00198365-03_UM_JTF-ML2_TX12_V1-V2_EN.pdf - 第40页
4 Setting up and commissioning 4.2 Retrofitting in the SIPLACE TX-Series 40 User Manual SIPLACE TX V1/V2 Series JEDEC Tray Feeder (JTF-ML2) 11/2019 Fig.59: Fitting the holder ► Fit the holder (2) , using the two screws…
4 Setting up and commissioning
4.2 Retrofitting in the SIPLACE TX-Series
User Manual SIPLACE TX V1/V2 Series JEDEC Tray Feeder (JTF-ML2) 11/2019 39
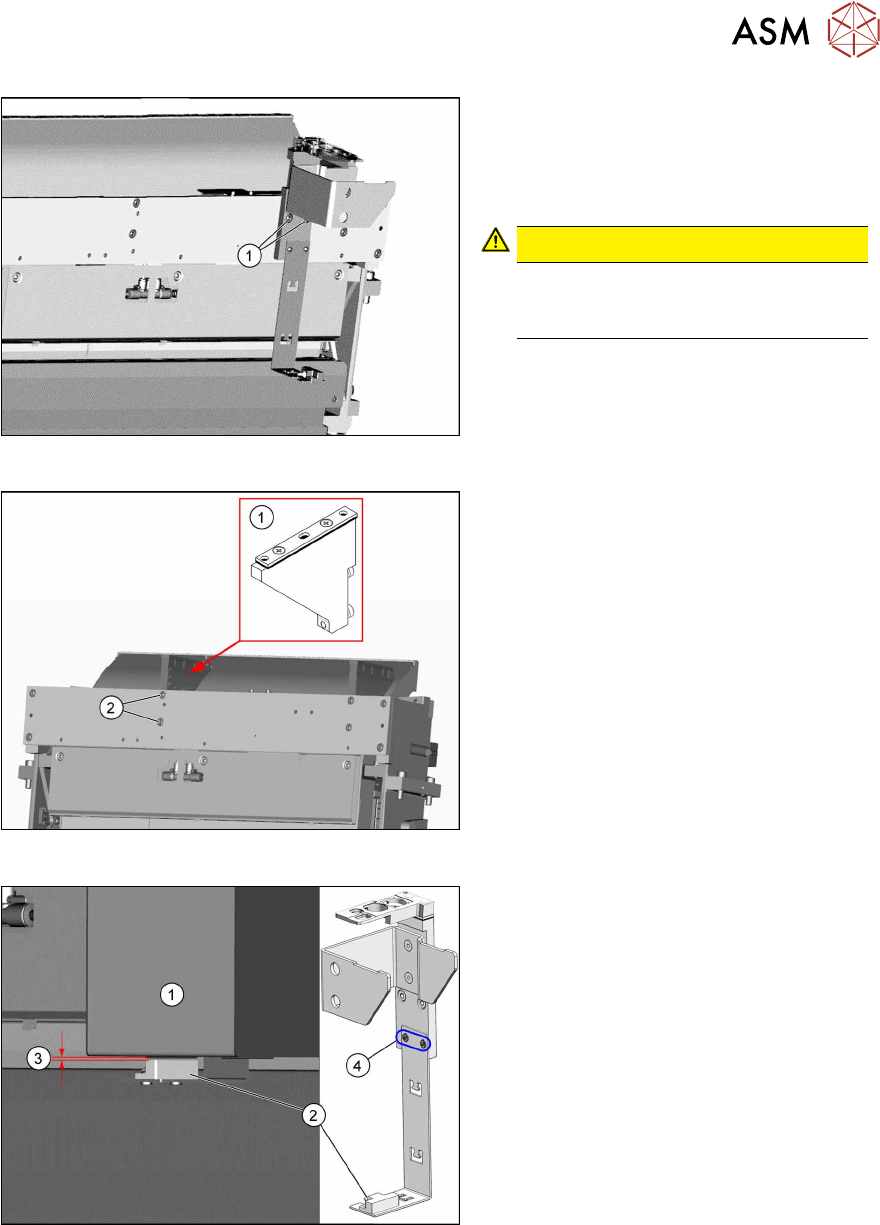
Fig.56: Fitting the reject bin holder
► Fit the reject bin holder with two fasten-
ing screws DIN7984-M6x12-A2-70
[03081847-xx](1) on the COT insert.
Push the sensor cable behind the cover
as far as possible.
CAUTION!
If too much cable length lies in front of
the cover, the reject bin may damage
the cable.
.
Fig.57: Fitting the NC holder
► Fit the right NC holder(1) with two
fastening screws DIN 7984-M6 x 12-
A2-70 [03081847-xx](2). The right NC
holder is replaced by the supplied ver-
sion without nozzle station.
Do not fit the NC and the nozzle station yet!
Fig.58: Setting the sensor
1. Reject box
2. Sensor
3. Distance 2.0+/-1.0mm
4. Fastening screws for setting the senor
height
► Insert the reject bin.
► Set the sensor to a distance of
2.0+/-1.0mm from the reject bin.
4 Setting up and commissioning
4.2 Retrofitting in the SIPLACE TX-Series
40 User Manual SIPLACE TX V1/V2 Series JEDEC Tray Feeder (JTF-ML2) 11/2019
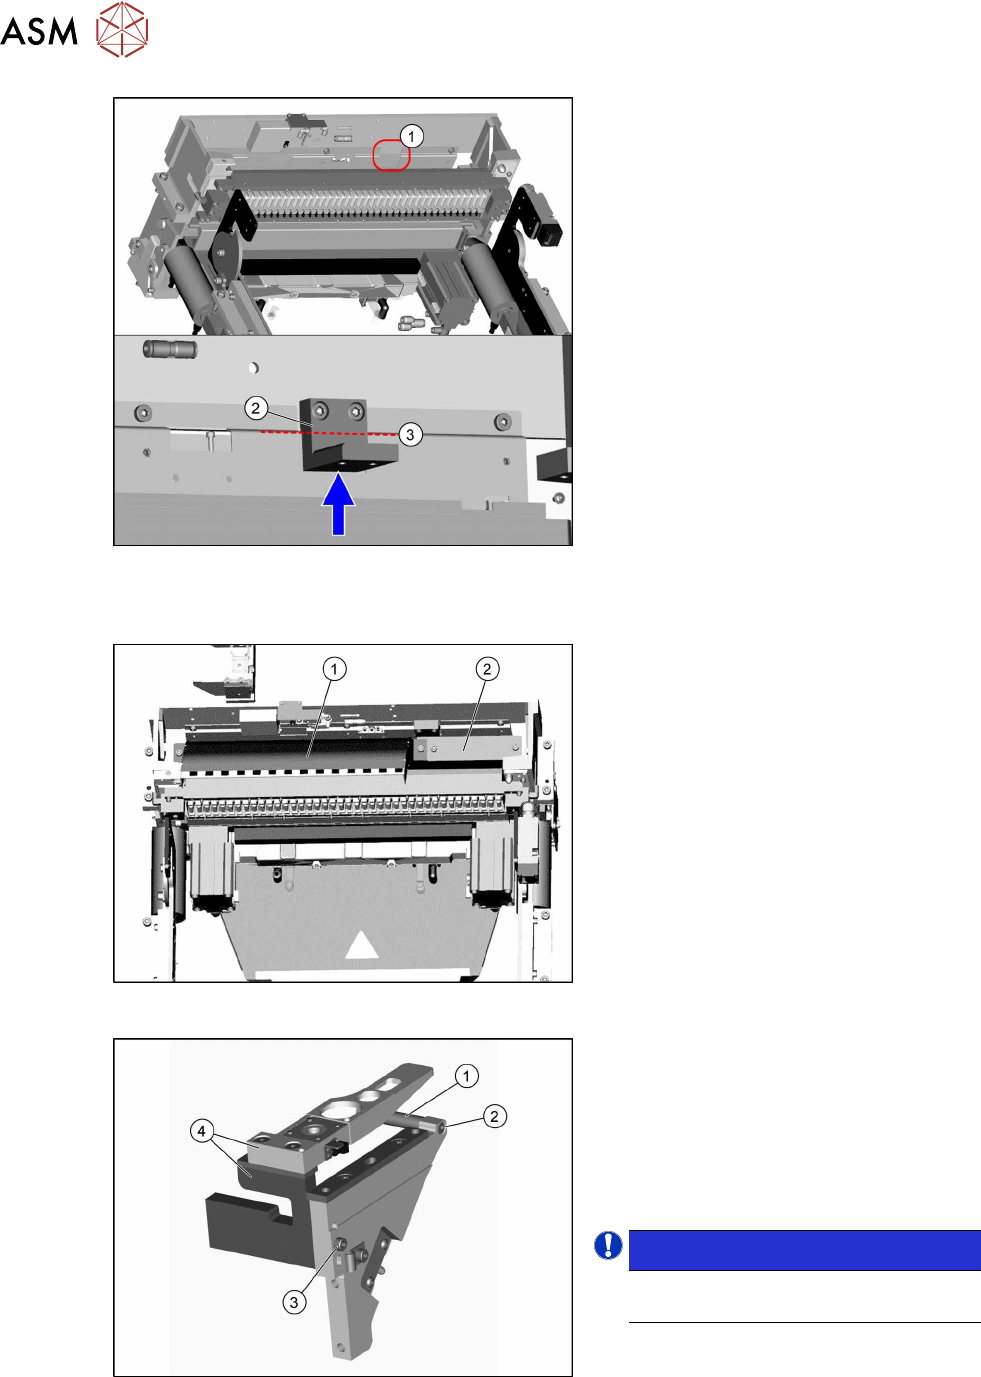
Fig.59: Fitting the holder
► Fit the holder(2), using the two screws
ISO4762-M6x14-A2-70 [03043125‑xx]
provided, to the traverse bar(1).
When tightening the screws, press the
holder upwards, against the edge(3).
Fitting the empty tape duct and removing the nozzle changer
Fig.60: Fitting the empty tape duct and cover
► Fit the short empty tape duct(1), using
two ISO4762-M6x14-A2-70
[03043125‑xx] screws.
► Fit the "hand guard tape cutter"(2)
[03130649‑xx] with two screws
ISO4762-M6x14-A2-70 [03043125‑xx].
Fig.61: Removing the NC holder
Perform the following steps on the dis-
mantled NC holder:
► Remove the screw(2) fastening the
support(1) and remove this.
► Remove the screw(3) fastening the
nozzle station and the reject bin
holder(4) and remove this.
NOTICE!
The previously used nozzle station is
no longer needed.
.
► Close open pneumatic connections if
necessary.
4 Setting up and commissioning
4.2 Retrofitting in the SIPLACE TX-Series
User Manual SIPLACE TX V1/V2 Series JEDEC Tray Feeder (JTF-ML2) 11/2019 41
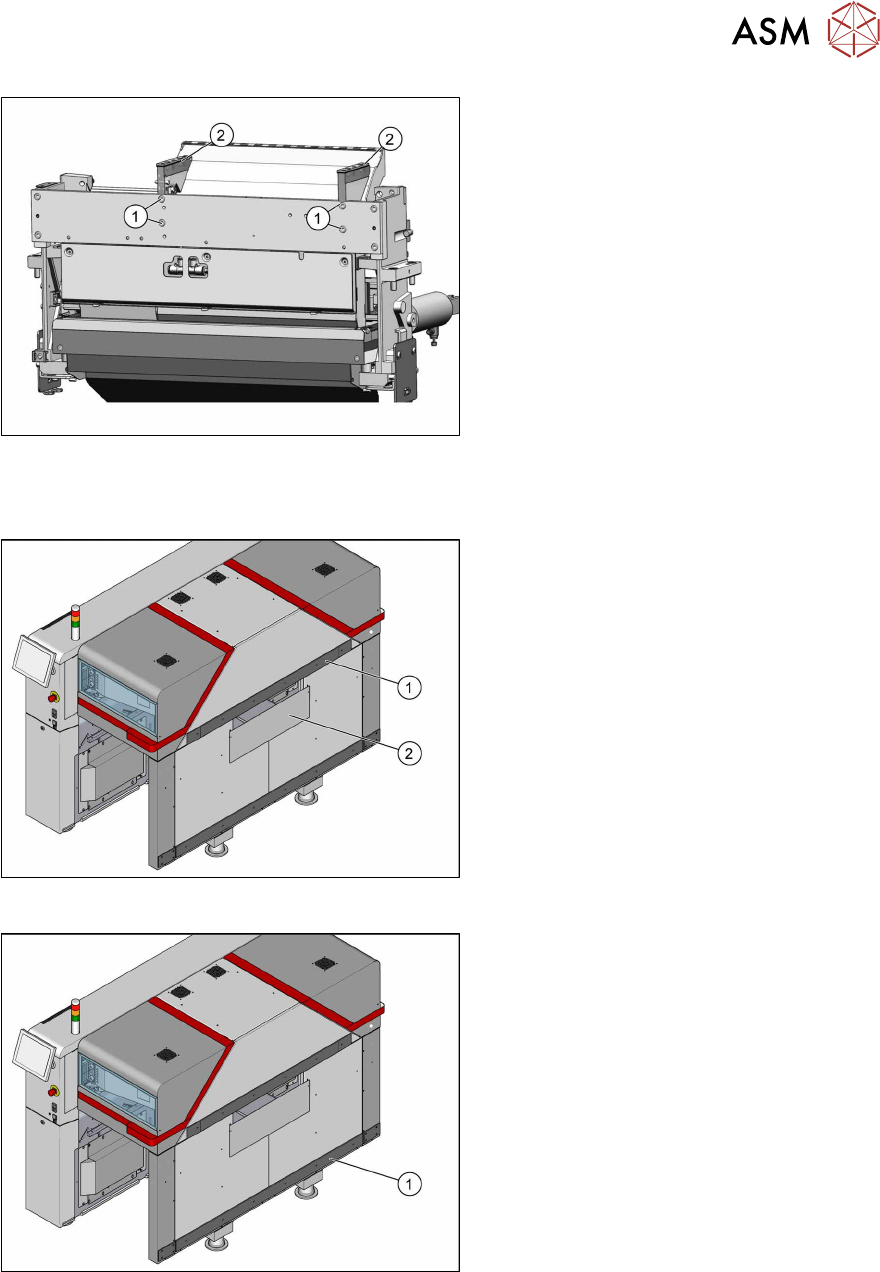
Fig.62: Fitting the NC holder
► Fit the two NC holders(2) , with two
screws in each case(1).
Do not fit the NC yet.
4.2.5.3 Converting the machine protection
Fig.63: Removing the hand guard
1. Top rail with top hand guard below it
2. Bottom hand guard
► For removal of the following parts, read
the relevant section in the Assembly In-
structions "Input and Output Conveyor
Extension SIPLACE
TX" [00198141‑xx].
Fig.64: Removing the bottom rail
► Remove the bottom rail(1).