1OM-1603-006_w.pdf - 第74页
1OM-1603 1-17 2. Name and Function of Each Section : Chap.1 1007-004 • When the machine is powered under low temperature, the brightness of the back light drops. It turns out to be normal in a few minutes and the deterio…
1OM-1603
1-16
2. Name and Function of Each Section : Chap.1
1012-005
2.3.4 Operation Section
The machine is equipped with the touch screens and operation panels for machine
operations on both front and rear sides.
The [PNL CHANGE] buttons on the operation panels can be used to select and
activate either the front or the rear operation panel.
Note
The keyboard and mouse are not attached, but they can be attached as options.
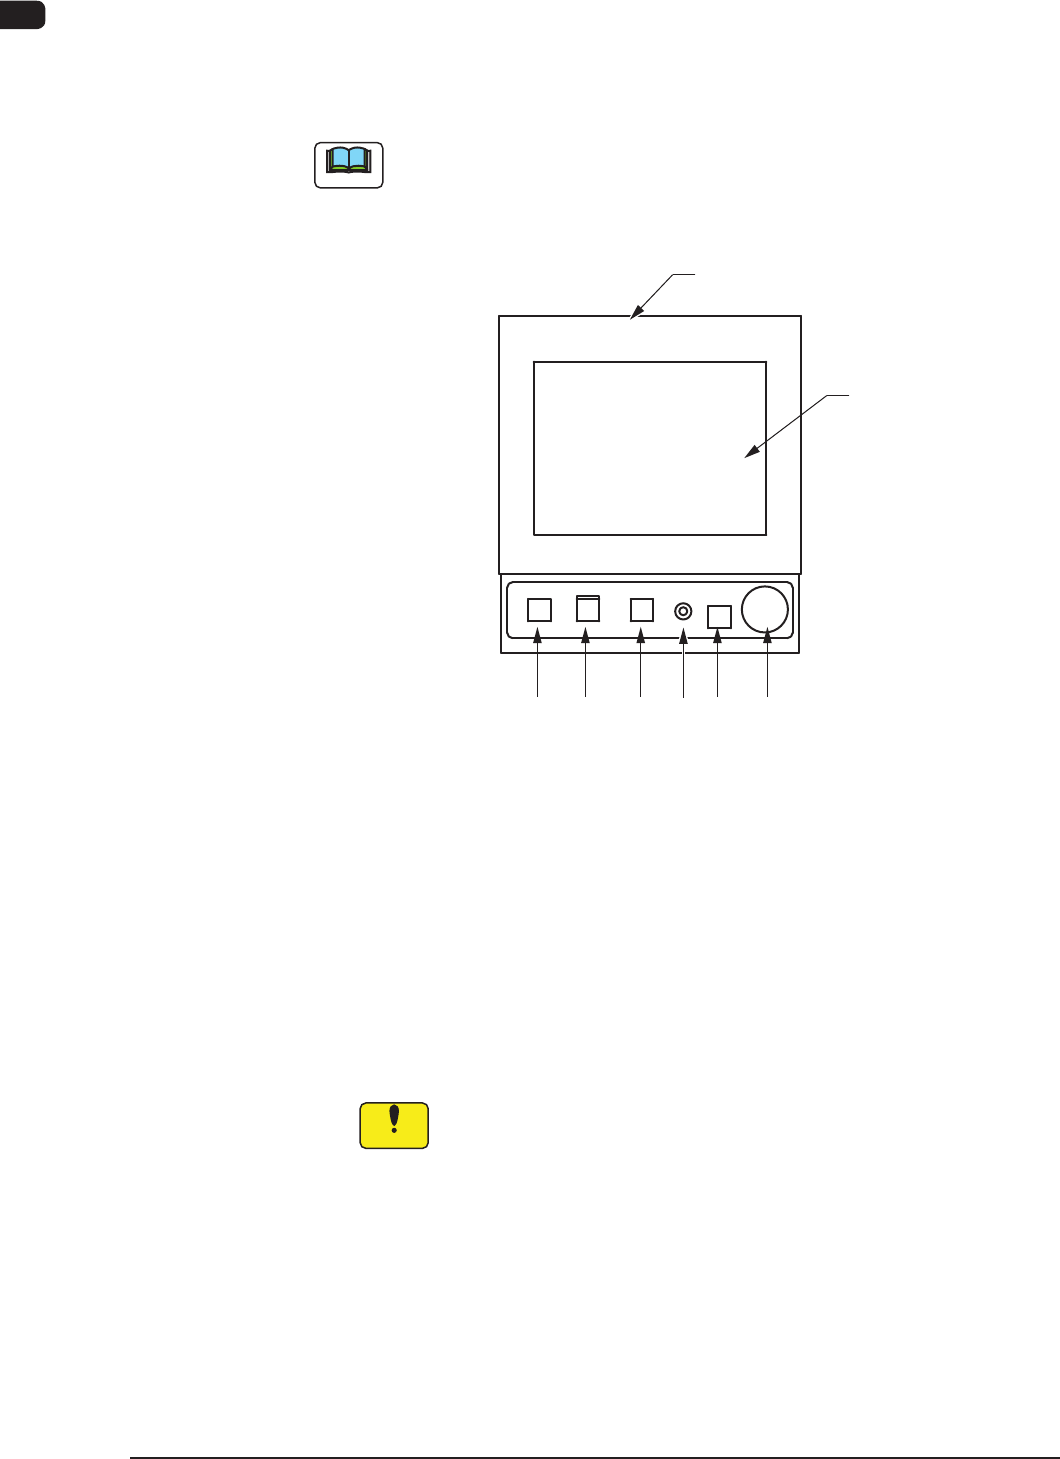
The following operation buttons and switch are arranged on the operation panel.
[2] [3] [4] [7]
[1]
Operation Panel
[5]
[6]
F1A13
[1] Touch Screens
The windows for operations are displayed on the front rear touch screens.
Various operations can be performed by nger-touching the buttons that
appear on the screen.
Notes on Handling Touch Screen
•
Since the touch screen uses the molecules in liquid crystals, handle it like
glass. Do not apply any strong pressure or shock to the surface.
Notice
Do not apply any strong pressure or shock to the touch screens.
Otherwise, they will be damaged.
Do not press the touch screens with a force of 0.79N (80 g) or
more.

1OM-1603
1-17
2. Name and Function of Each Section : Chap.1
1007-004
•
When the machine is powered under low temperature, the brightness of
the back light drops. It turns out to be normal in a few minutes and the
deterioration is not abnormal.
When the back light is turned on or off repeatedly at low temperature, the
life will be shortened.
•
Before cleaning the touch screen, be sure to turn off the [POWER ON]
button. Otherwise, the touch screen will react to your touch during cleaning,
resulting in data corruption.
If the surface of the touch screen gets dirty, wipe it softly with a soft cloth
soaked in ethanol to remove dirt and dust.
Notice
Never use an organic solvent such as acetone, thinner, benzine to
clean the touch screens.
If the surface is wiped with an organic solvent, it may melt or get
cloudy.
[2] [POWER ON] Button
Turning ON or OFF this button supplies or intercepts the power for
operations.
When the [POWER ON] button is pressed and the power for operations is
supplied, the LED of the [START] button ickers.
[3] [START] Button
When the [START] button is pressed while the lamp is ickering after the
machine is powered, the automatic operation starts and the LED of the button
turns green.
While the LED is ON, it indicates that the automatic operation is being
performed.
When the [STOP] button is pressed during the automatic operation, the
automatic operation stops temporarily and the lamp of the [START] button
extinguishes.
While each device is being zeroed, the LED is kept ON.
[4] [STOP] Button
When this button is pressed, the machine stops running temporarily.
When the machine is running automatically, it stops temporarily after all the
picked components are placed.
When the [STOP] button is pressed during the zeroing operation, the zeroing
operation of each device is interrupted.
1OM-1603
1-18
2. Name and Function of Each Section : Chap.1
1003-003
[5] [LOCK] Lamp
When this lamp is ON, it indicates that the operation panel is set in the
"LOCK" mode and the operation panel on this lamp side is available.
The other operation panel cannot be selected.
When the operation panel on the opposite side is used with this lamp "ON",
the lamp starts ickering.
To cancel the ickering, press the [PNL CHANGE] button and follow the
procedure to set the "LOCK" mode again.
CAUTION
Beforeperforminganywork,conrmthatthe"LOCK"
lamp on the operation panel is "ON" (green).
•
If the "LOCK" lamp is not turned on, the machine
can be operated at any time from the front and
rear sides, endangering the operators around
the machine.
•
Before performing any setup work with the
machine being powered up, turn on the [PNL
CHANGE] button and the "LOCK" lamp on the
front or the rear operation panel.