AP130_A_MANUAL.pdf - 第4页
Pull out the remaining solder fr om inside the feeder tube. Use a flat-nosed pliers if necessary . Note: Always use 0.8 - 1.0 mm diameter solder wire. Pull the trigger repeatedly until the solder wire appears at the tip. …
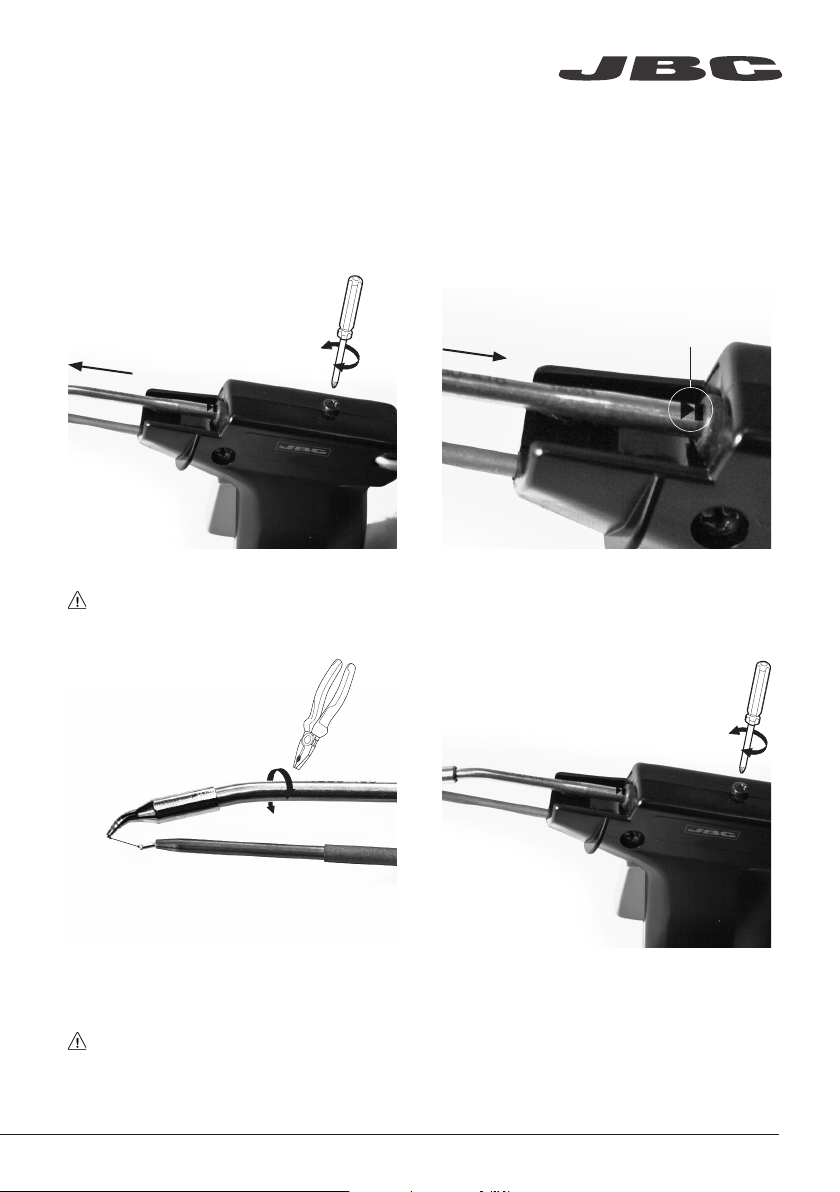
Align the tip of the cartridge with the feeder
tube. Use a PLR195 or a flat-nosed pliers for a
safe tip alignment.
Do not over-tighten the cartridge.
Changing cartridge
For a safe cartridge change, unplug the tool or turn the station off and wait until the tool temperature
drops to room temperature before following these guidelines:
Loosen the screw and remove the cartridge.
Use a flat pliers if still hot.
1. Removing
Alignment
Important: Tighten the screw again. This is
necessary for a proper connection.
2. Inserting
3. Aligning 4. Fixing
Mark
Important: Insert the cartridge as far as
the mark for a correct connection.
www.jbctools.com
3
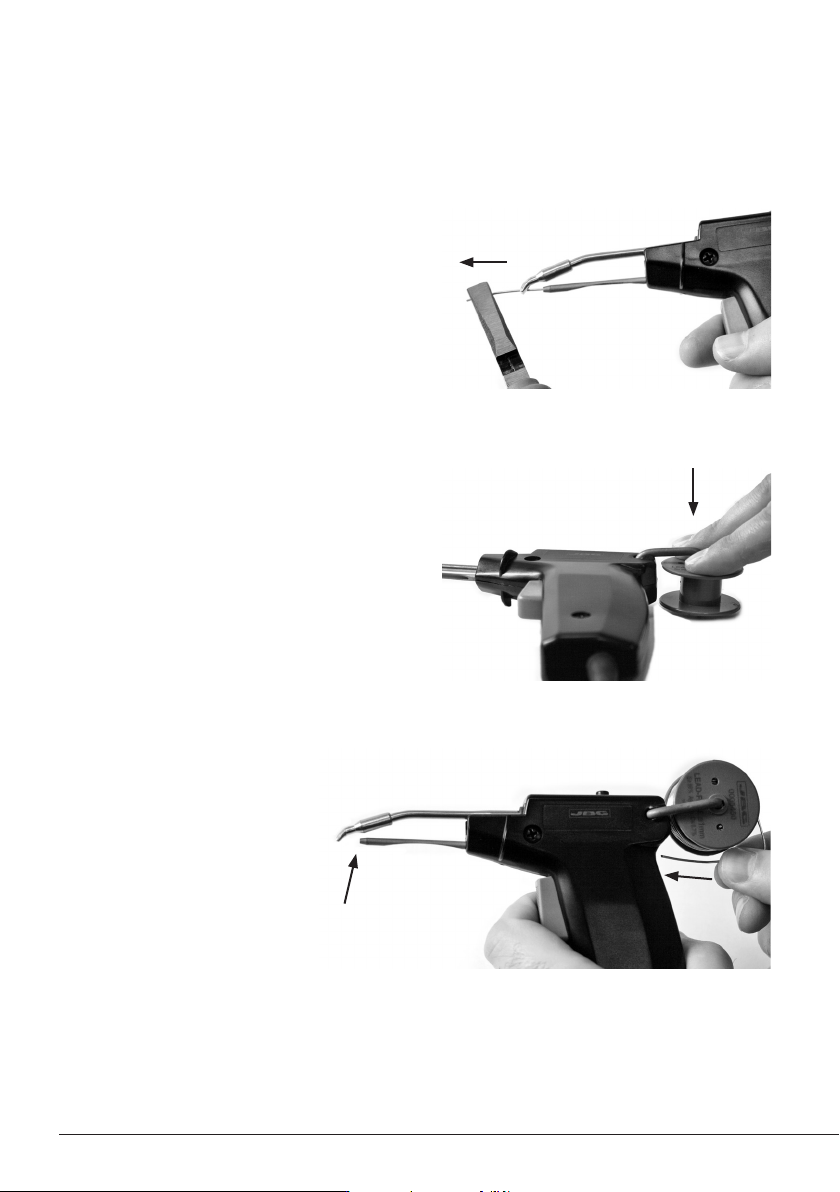
Pull out the remaining solder from inside the
feeder tube. Use a flat-nosed pliers if necessary.
Note: Always use 0.8 - 1.0 mm diameter solder wire.
Pull the trigger repeatedly until the
solder wire appears at the tip.
Replacing solder wire
2. Replace the solder reel
Push the empty reel to remove and fit the new one.
1. Remove the remaining solder wire
3. Insert the new solder wire
4
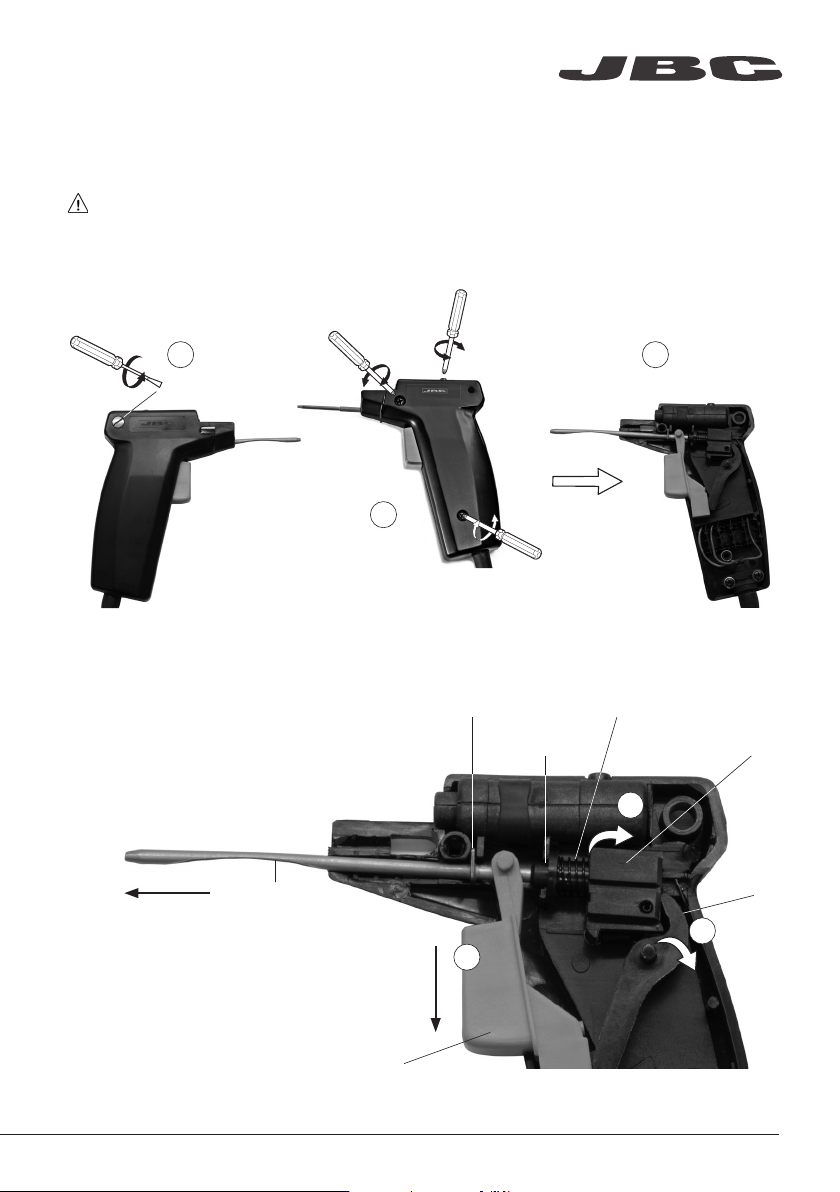
Changing the Feeder Tube
Feeder tube
Flange
Trigger
Socket
Spring
Skid
Lever
1. Take out the screw from behind (a) to remove the reel and the solder wire from the tube.
Next, remove the three other screws (b) and lift the cover off (c).
2. Remove the lever (a), then the skid with the
spring (b) and finally the trigger (c).
Take out the feeder tube and replace it with
the new one.
Repeat the process inversely.
Don’t forget to insert the trigger between the
flange and the socket of the feeder tube.
You must replace the feeder tube depending on the length of the cartridge you are going to use.
Remove the cartridge and make sure the tool is unplugged before start.
a
a
c
c
b
b
www.jbctools.com
5