Oxford ICP-CVD SOP.pdf - 第7页
Page 7 of 11 E) Run cleaning recipe 1) Load cleanin g recipe a) Click Main Menu , then Recipe s b) Click “ Load ”, and choose a ppropri ate cleaning reci pe: i) “Chamber Cle an @70C ” if you dep osited a t 70C ii) “Chamb…

Page 6 of 11
C) Load and run desired recipes
5)
Select and Run the desired recipe
a) Follow steps 3-6 from section C (conditioning run). Summarized:
i) From Recipes page, load the desired recipe
ii) Change the time of the “Dep” step, press OK
iii) Press Run
iv) Wait for plasma to ignite and stabilize; make sure plasma is stable before leaving tool
D) Vent loadlock, unload sample, load dummy wafer, pump loadlock
1)
Vent loadlock
a) Follow procedure from section B
2) Unload sample
a) If using hands, double-glove before retrieving your sample
3) Load dummy wafer
a) the clean wafer you used for your conditioning run, or a clean 4” Si wafer
4) Pump loadlock
a) Follow procedure from section B
Page 7 of 11
E) Run cleaning recipe
1)
Load cleaning recipe
a) Click Main Menu, then Recipes
b) Click “Load”, and choose appropriate cleaning recipe:
i) “Chamber Clean @70C” if you deposited at 70C
ii) “Chamber Clean @250C” if you operated at 250C
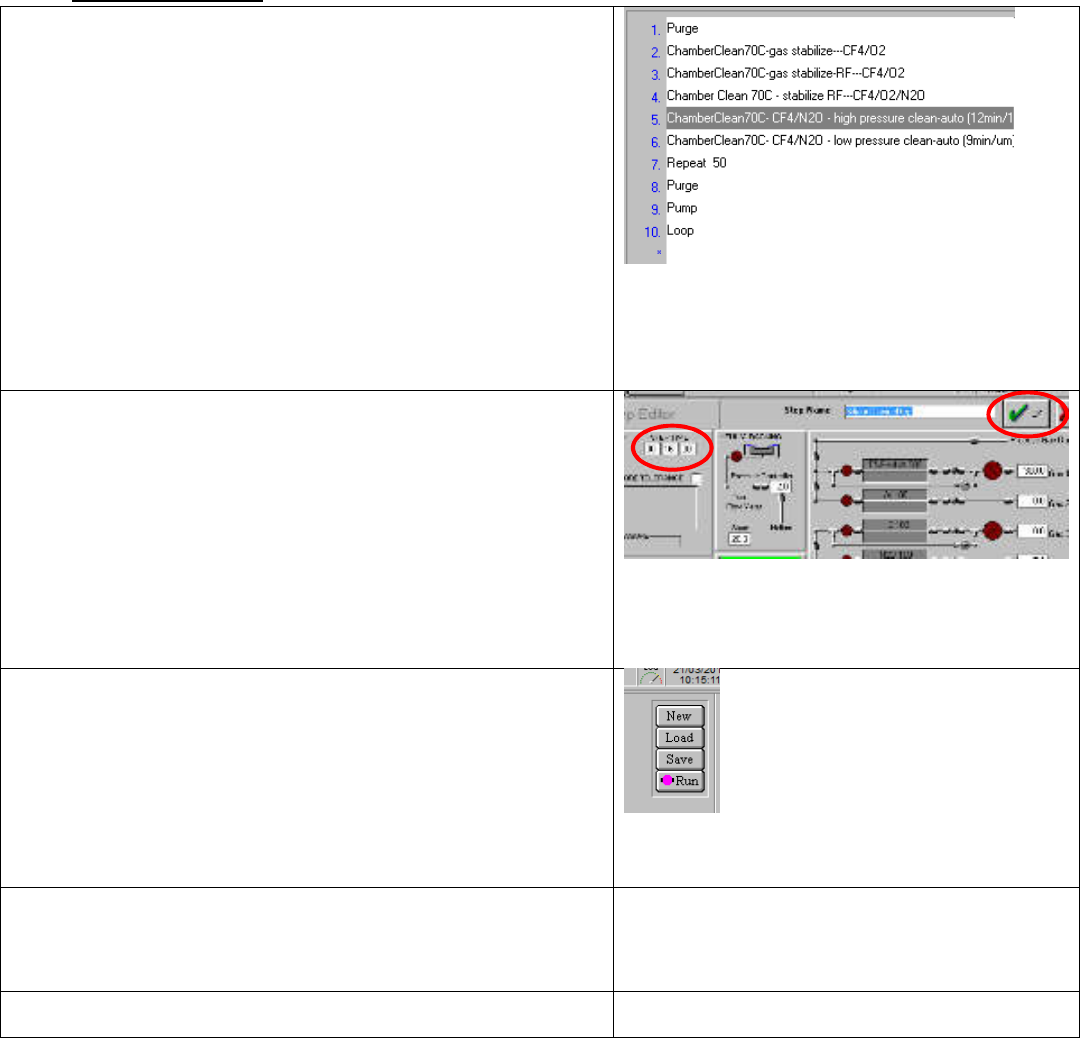
c) Notice the two important steps: ‘high pressure clean-
auto’ and ‘low pressure clean-auto’
i) To etch back 1um of deposited material:
ii) The “high pressure clean” step must run for 12
minutes, and
iii) The “low pressure clean” step must run for 9 minutes
Figure 29. Cleaning recipe steps. The "High Pressure clean"
and "Low pressure clean" are the two steps to modify
2)
Modify cleaning times
a) These cleaning steps have defaults of 12, and 9 minutes,
respectively. Scale these times up/down, to etch back the
amount of material you deposited, round up to nearest
minute.
i) If you deposited 2um total during your runs, set the
high pressure step for 24 minutes (12min/um * 2um)
and the low-pressure for 18 minutes (9min/um *
2um).
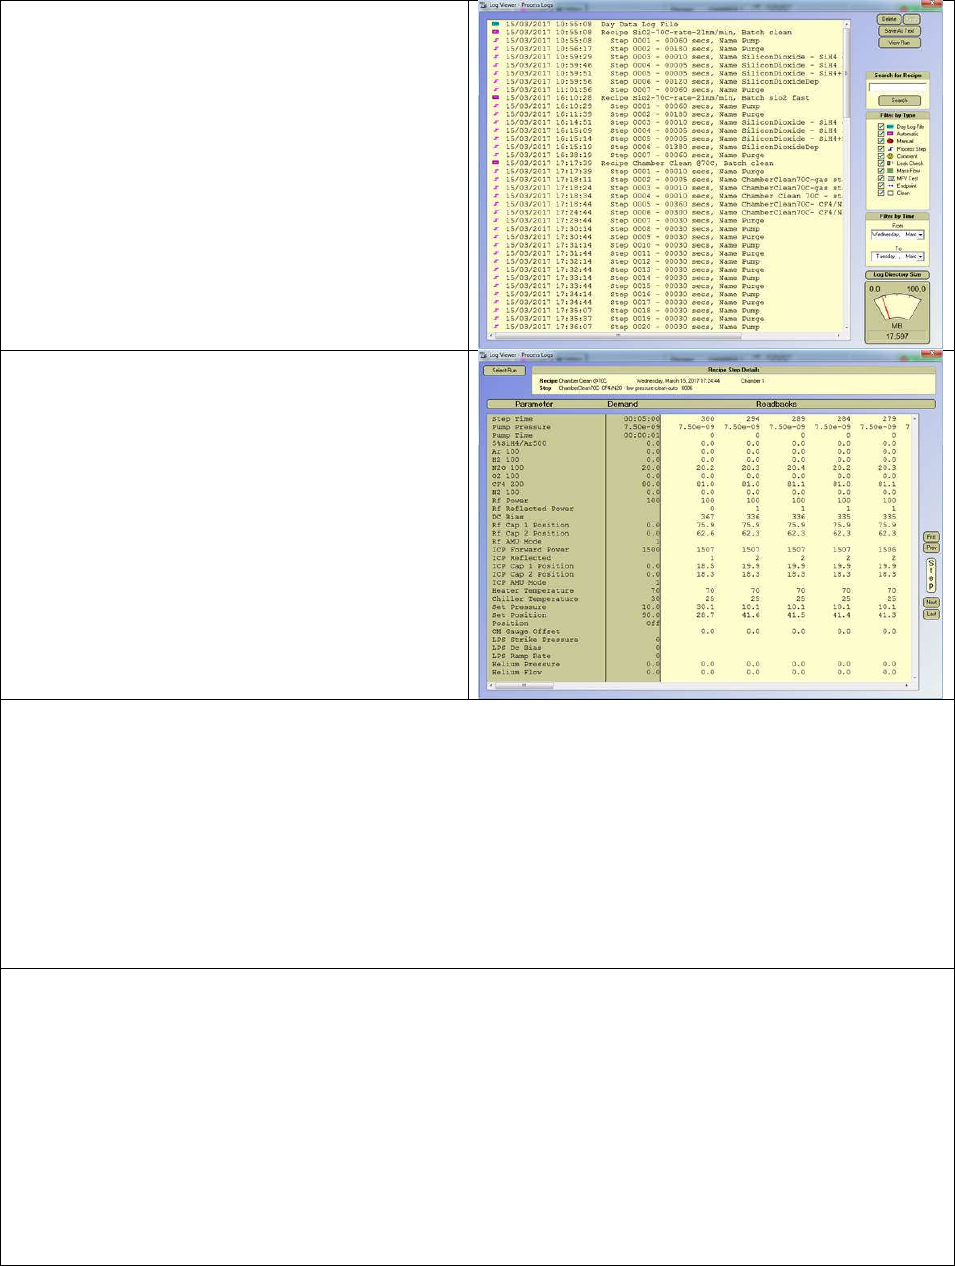
Figure 30. Edit Step screen. Revise times as necessary, then
press OK
3)
Run the recipe
a) Press the “Run” button
Figure 31. Recipe Load button on the recipes
page
4)
Wait for the plasma to ignite and stabilize
a) This should happen after about 1 minute; make sure
plasma is stable before leaving the tool
5)
Sign out of the tool in Mendix
Page 8 of 11
Appendix A: Navigating the Logbook
2)
Once inside the Log view, you can see 1) The
processes, and 2) the individual steps of each
process. This makes it hard to navigate, if
you’re looking for a specific process
3) First, uncheck the “Process Step” box under
“Filter by Type”.
4) Next, select your desired date range (2-3
weeks is usually enough to find the recipe of
interest)
5) Scroll down to see more recent entries
6) Left-Click on the process of interest, then
left-click “View Run” (top-right corner)
7)
Now you’re viewing all of the sensor readings
taken during the particular step of the
process.
8) Time is displayed as a countdown, in seconds.
Scroll right to see further into each process
step
9) You can move forward/backwards by step,
clicking the “Prev” and “next” buttons (right
side of screen), and see the current step
name under “Recipe Step Details” (top of
screen)
10)
Usually you’d only use the logbook if you come back to the tool and find that your process has
stopped suddenly.
11) You can use the logbook to see how long your process was running before it got stopped, and
thereby estimate the amount of material deposited.
12) To do this, view your “Dep” step in detail, and scroll to the right until “ICP Forward Power” drops to
0. This is where you will have stopped depositing.
i) Note: When processes are disrupted, the tool will try to reignite the plasma. This usually
fails.
Look for the point where “ICP Reflected” rises significantly; this is usually about 20 seconds before the
process terminates.
13)
Process Checks:
ii) It is good practice to check the DC bias of the last time your process was used, along with
the capacitor positions (you may have to dig back a few weeks to find your process being
run)
14) Cleaning checks:
iii) It is good practice to check if the cleaning recipe used by the last user is sufficient for the
primary recipe run
iv) For either oxide or nitride deposition, the plasma steps of the cleaning recipe, run at the
deposition temperature, should be the following
(1) High-pressure step: 12min/um
Low-pressure step: 9min/um