EUKYX-199-2100_G5S2_Instruction_Vol2_E.pdf - 第67页
EUKYX 1-17 199-2100 4. "OPERA TION" Window 4. " OPERA TION " Windo w The constrai nt s base d on the design ati on of an y of the vari ous operatio n mode s in the a utoma tic operation an d operation…
EUKYX
1-16199-2100
3.1 Cmp.Rem.List
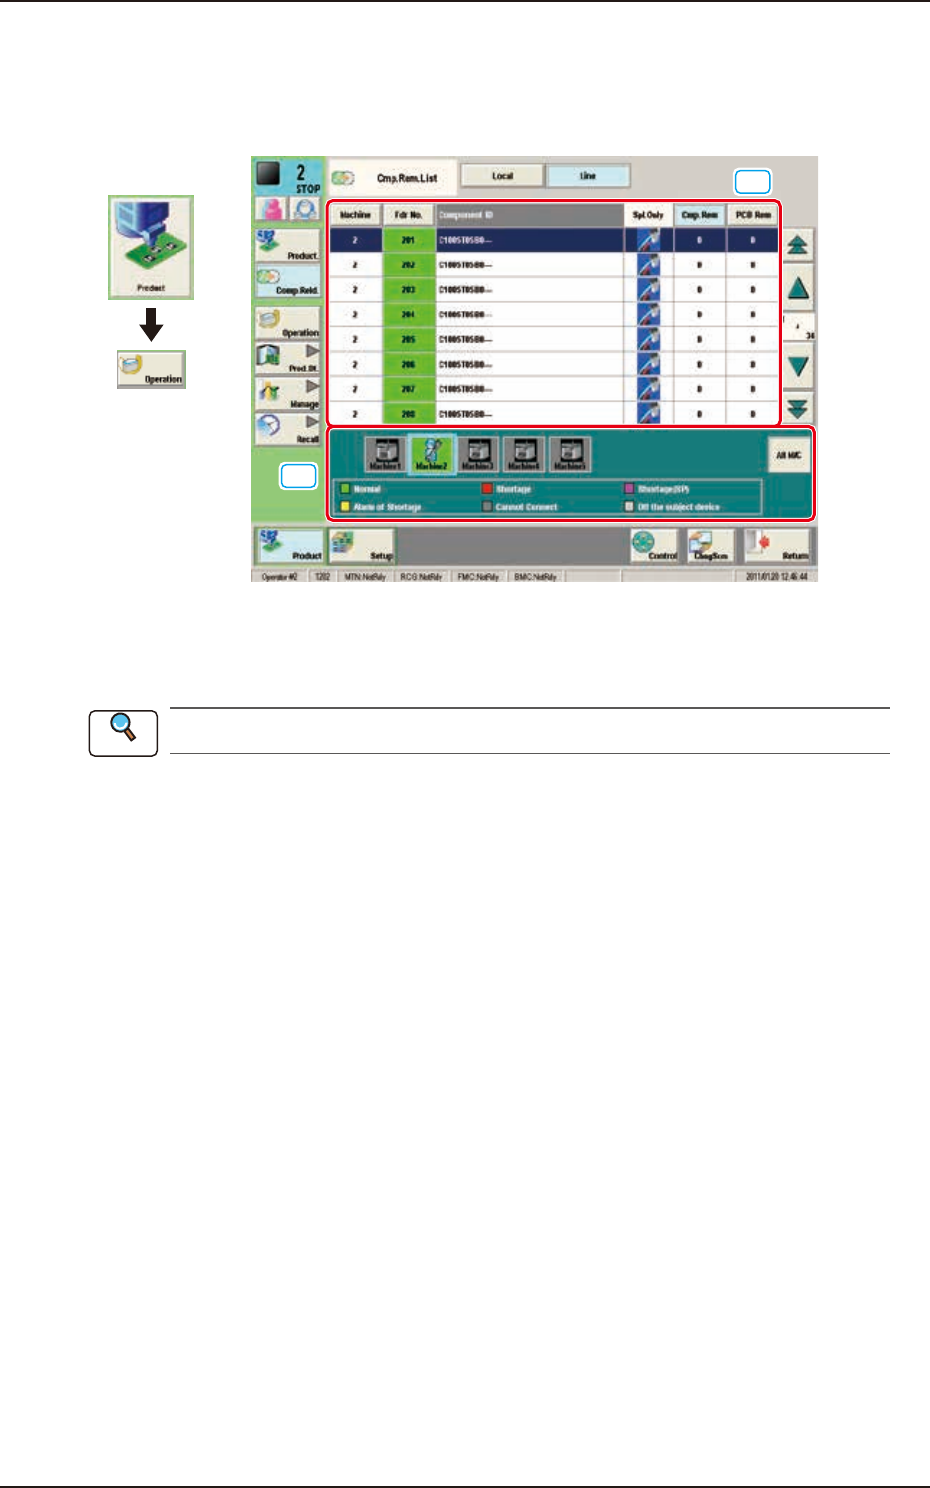
3.1 Cmp.Rem.List
The list of the remaining components in the production line, can be checked in this window. When
the [Line] button is pressed in the "Comp Reload" window, the following window appears.
[1]
[2]
Graphic
Development
F2A14
[1] Feeder List
The feeder status in the selected machine is displayed in this area.
Refer to “3. “Comp.Reload” Window” in Chapter 1 for the feeder list details.
[2] Machine List
The list and status of the machines set in the line configuration are displayed in colors.
When the machine in which the feeder is to be checked, is selected, the feeder list of the selected
machine is displayed in the feeder list area.
Reference
EUKYX
1-17199-2100
4. "OPERATION" Window
4. "OPERATION" Window
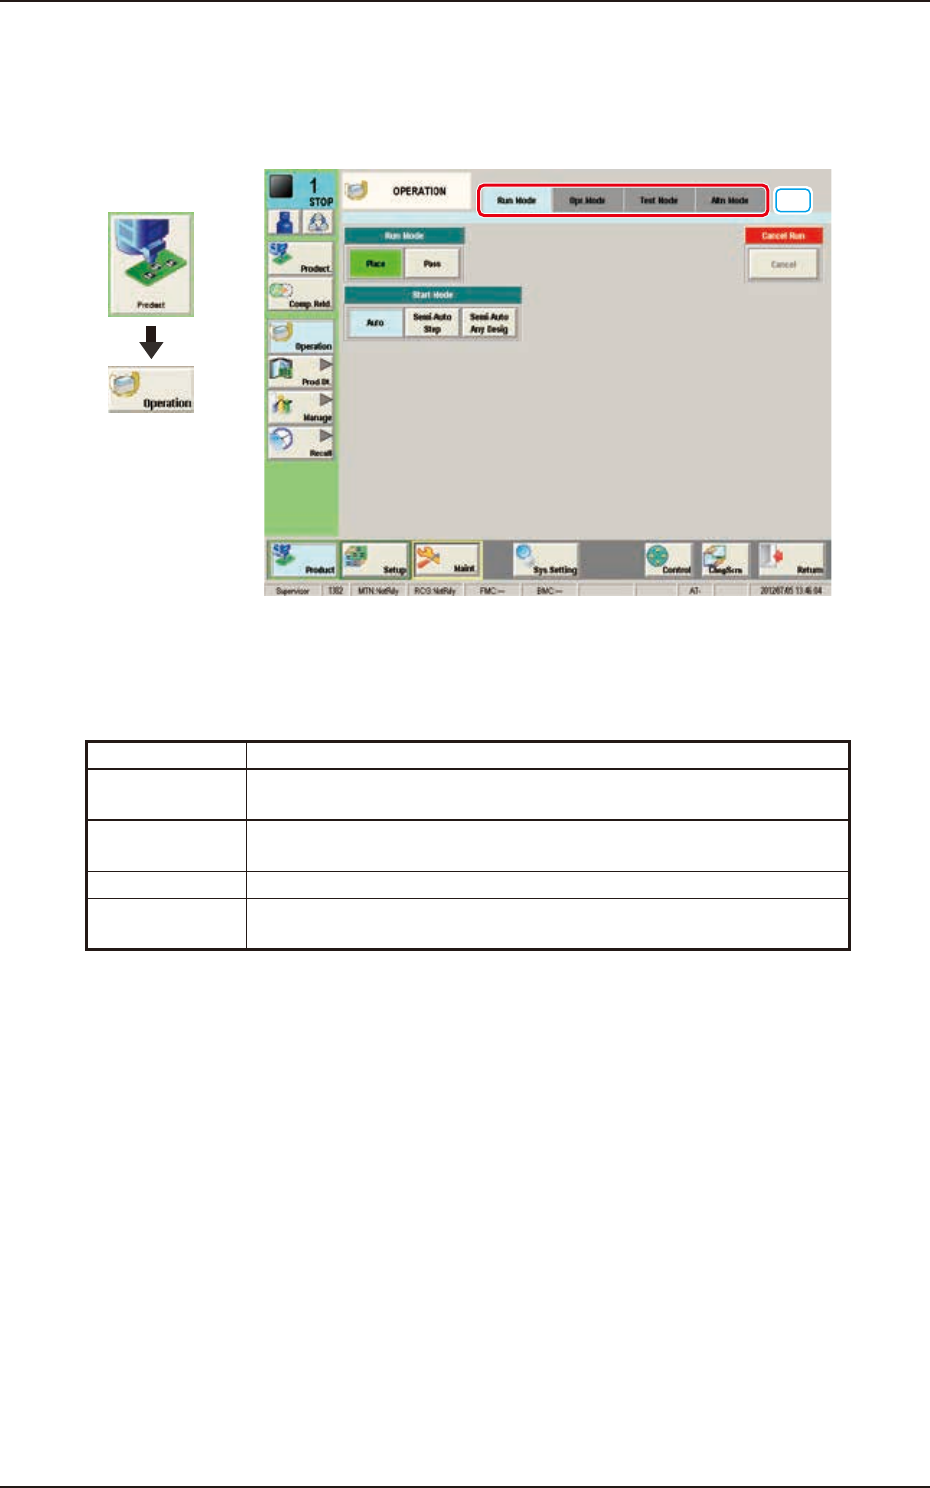
The constraints based on the designation of any of the various operation modes in the automatic
operation and operation method in the test operation, are set in this window.
[1]
Graphic
Development
F2A15
[1] Tabs and Tab Sheets
The "OPERATION" window is provided with the following four tabs. When each tab is pressed, the
corresponding tab sheet appears inside the window.
Tabs Description
Run Mode The corresponding tab sheet enables the operator to change the
operation mode or stop the production.
Opr. Mode The corresponding window enables the operator to select an operation
mode such as Over Tact-Time Reduction.
Test Mode The corresponding window enables the operator to set test modes.
Altn Mode The corresponding tab sheet enables the operator to set the "Feeder
Alternate"function.
EUKYX
1-18199-2100
4.1 "Run Mode" Tab Sheet
4.1 "Run Mode" Tab Sheet
[3]
[1]
[2]
Graphic
Development
F2A16
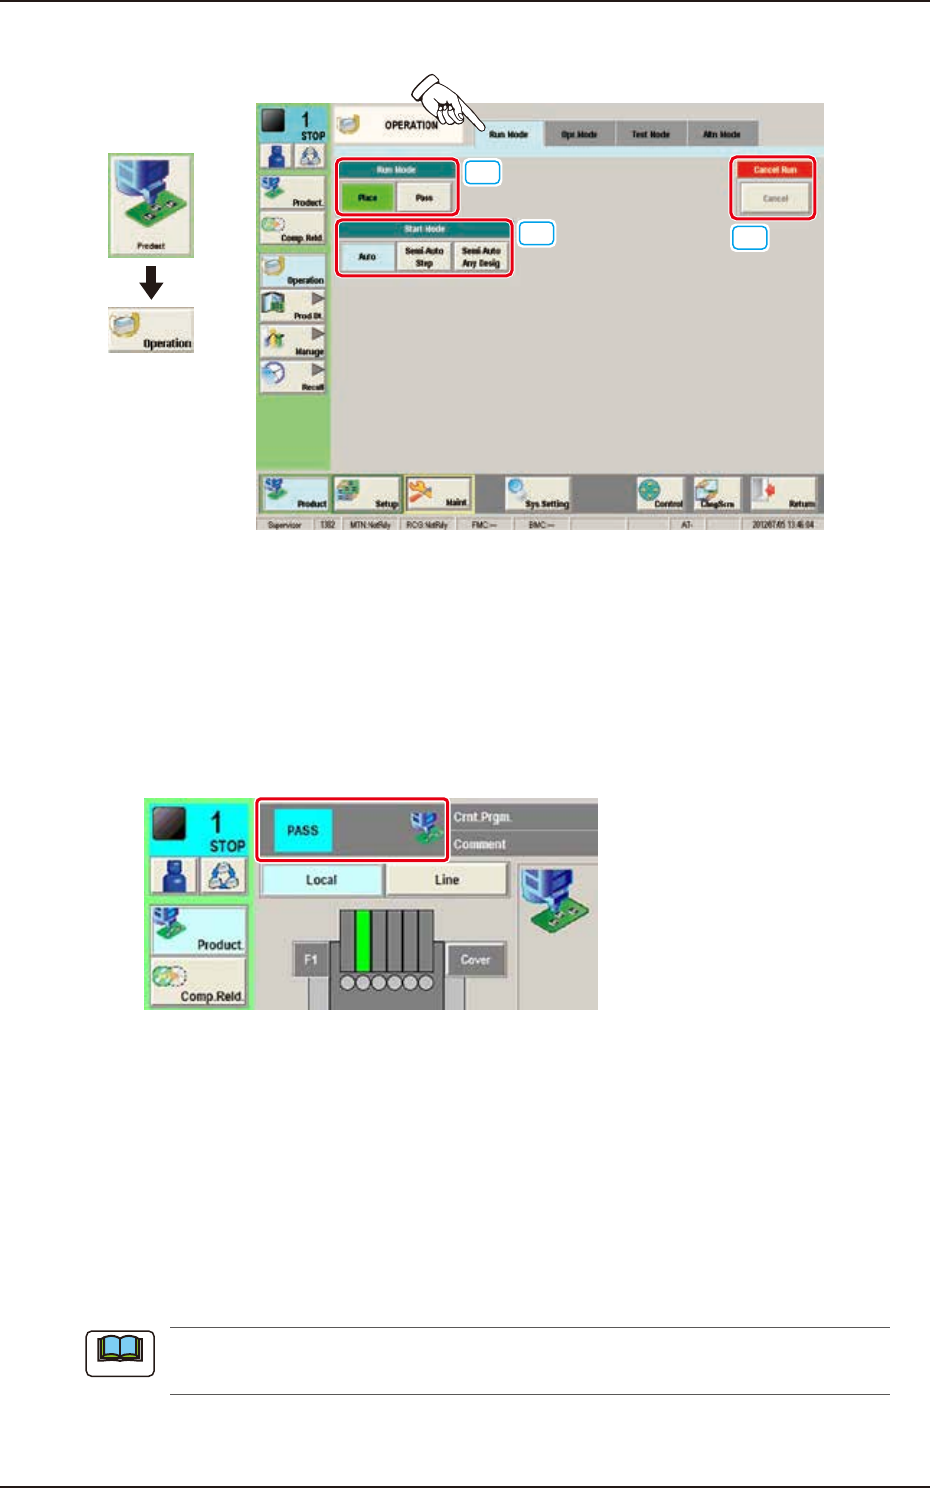
[1] "Run Mode" Selection Buttons
Press either one of the following buttons to select the desired run mode.
[Place] Button : Select this button to set the machine in the "PLACE (Automatic
Operation)" mode.
[Pass] Button : Select this button to set the machine in the "PASS" mode.
In the case that the pass operation has been setup, "PASS" is displayed in the "Status
Indicator" on the upper area of the "Product" window.
Status Indicator
F2A17
[2] “Start Mode” Selection Buttons
Using the following buttons, the start mode is setup.
[Auto] Button : Select this button to start up the machine automatically.
[Semi-Auto Step] Button : When this button is pressed, the designated step operation (one
component/point) is performed.
[Semi-Auto Any Desig] Button : When this button is pressed, the designated step operation
(Designating two or more steps is available) is performed.
[3] Cancel Run
When the [Cancel] button is pressed, the “Pause” condition is cancelled and the machine is turned
to the “STOP” mode.
When the machine is set to the “PAUSE” mode by pressing the [STOP] button on the operation
panel during the automatic operation, etc., the [Cancel] button becomes available.
Note