00197465-01_SM_CP20-A-M_EN.pdf - 第47页
3 Service Work Conveyor 3.13 Replacing the clamping pl ate at the DPdrive [030 05144-xx] Service Manual SIPLACE C&P20, C&P20A, C&P20M 47 3.13 3 . 1 3 R e p la c in g t h e c la m p in g p la t e a t t h e D P…
3 Service Work Conveyor
3.12 Replacing the Z Drive [03058631-xx]
46 Service Manual SIPLACE C&P20, C&P20A, C&P20M
► Follow the removal instructions in reverse order for further installation.
► Start the station software and perform zero point correction by means of a reference run (SW60x) or
via the manual operations for the head (SW70x).
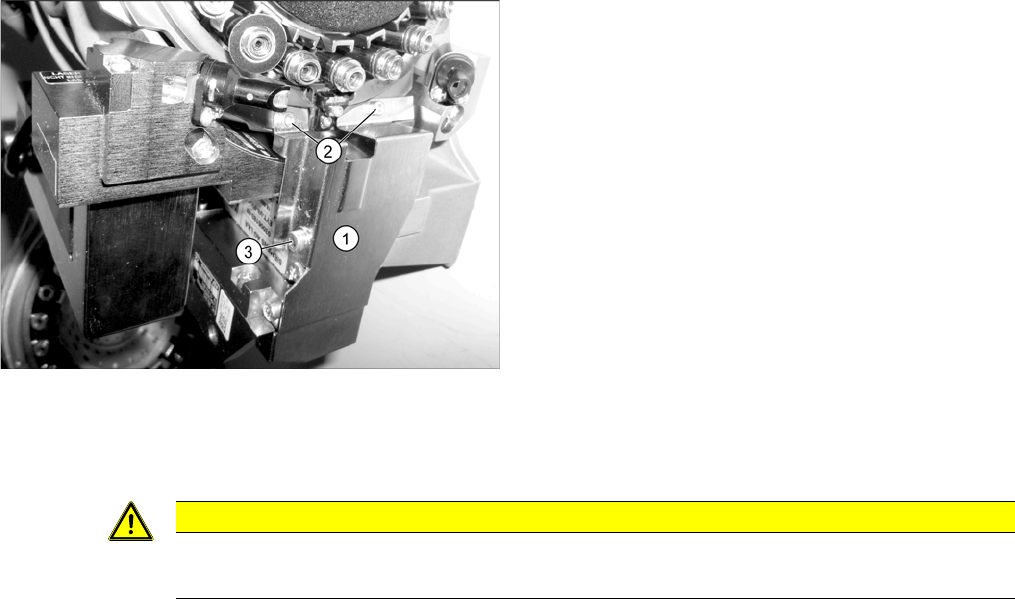
► Fit the cover plate (1). Screw in and tighten the
screws at (2) until hand-tight and then tighten the
screw at (3) with a torque of 130 Ncm.
CAUTION
Reference run reports error
► If the reference run fails, you will need to check the settings for the jaws on the Z drive.
3 Service Work Conveyor
3.13 Replacing the clamping plate at the DPdrive [03005144-xx]
Service Manual SIPLACE C&P20, C&P20A, C&P20M 47
3.13
3.13 Replacing the clamping plate at the DPdrive [03005144-xx]
Replacing the clamping plate at the DPdrive [03005144-xx]
Parts, equipment and tools
▪ Clamping plate [03005144-xx]
▪ Tools for removing the head, if needed (see also the service manual for your machine)
Overview
Preparation
► Remove the head from the machine. For removal and installation details of the placement head, read
the service manual for your machine.
Removal
► Loosen the fastening screw of the clamping plate.
Installation
► Follow the removal instructions in reverse order for installation.
1. Clamping plate
3 Service Work Conveyor
3.13 Replacing the clamping plate at the DPdrive [03005144-xx]
48 Service Manual SIPLACE C&P20, C&P20A, C&P20M