00197465-01_SM_CP20-A-M_EN.pdf - 第64页
5 Settings 5.6 Transferring the head sp ecific data 5.6.1 Transmitting the H ead-Specific Data (from SW601) 64 Service Manual SIPLACE C&P20, C&P20A, C&P20M (C&P20 shown as example) ► and enable the settin…
5 Settings
5.6.1 Transmitting the Head-Specific Data (from SW601) 5.6 Transferring the head specific data
Service Manual SIPLACE C&P20, C&P20A, C&P20M 63
5.6
5.6 Transferring the head specific data
Transferring the head specific data
► From software version 601 read the section "5.6.1 Transmitting the Head-Specific Data (from
SW601)" [ ➙ 63].
► From software version 701 read the section "5.6.2 Transferring the Head-Specific Data (from
SW701)" [ ➙ 65].
5.6.1
5.6.1 Transmitting the Head-Specific Data (from SW601)
Transmitting the Head-Specific Data (from SW601)
CAUTION
Observe the direction of transfer!
After replacing the assembly, you need to send the valid machine data at the station to the new
assembly.
As the buttons required are very near to each other, take care that you do not accidentally press
the wrong one on the touch screen!
► Make sure you press the correct arrow button. To be on the safe side, select the button with
the mouse.
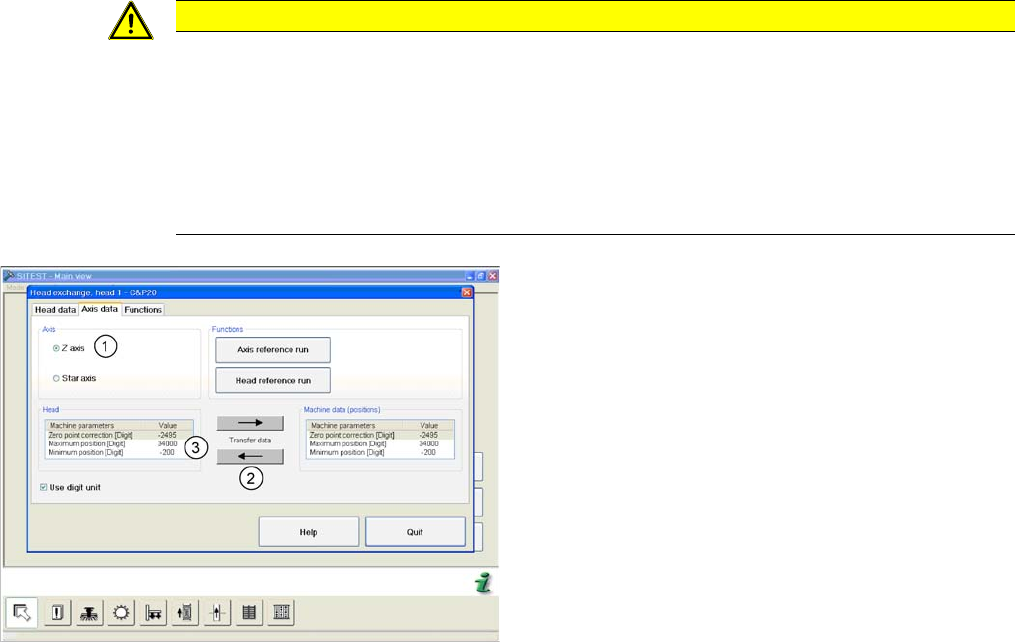
(C&P20 shown as example)
► Start SITEST and select the menu Settings: Head
Exchange: Head for the relevant head.
► Select the Axis data tab
► and enable the setting Z Axis (1).
► Transfer the machine data with the button (2) , from
the list on the right to that on the left (3).
5 Settings
5.6 Transferring the head specific data 5.6.1 Transmitting the Head-Specific Data (from SW601)
64 Service Manual SIPLACE C&P20, C&P20A, C&P20M
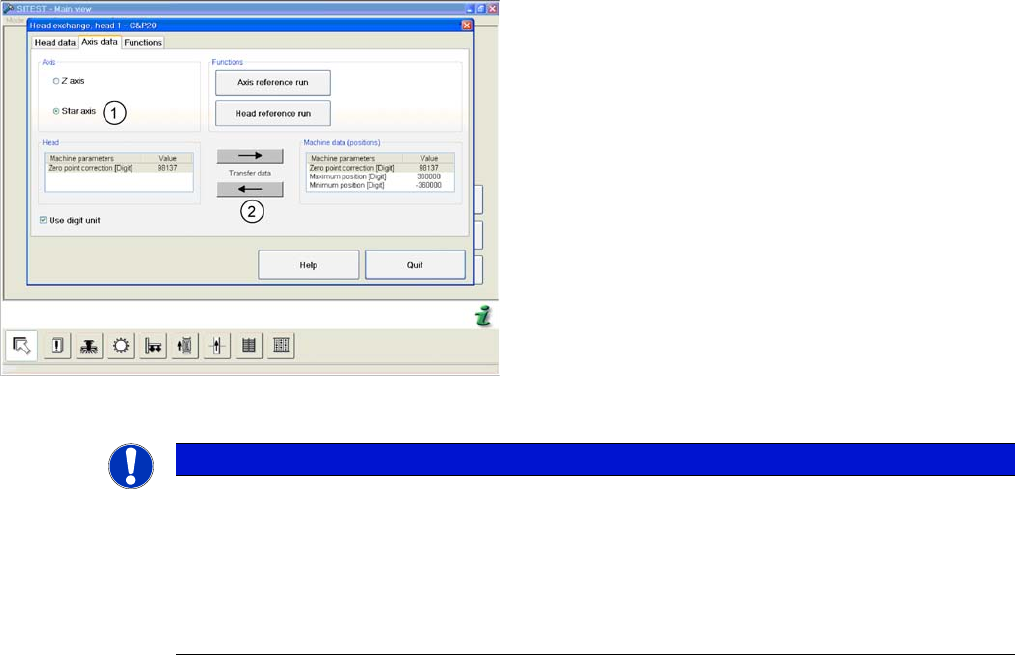
(C&P20 shown as example)
► and enable the setting Star axis (1).
► Transfer the machine data with the button (2), from
the list on the right to that on the left.
► Select Close.
NOTICE
If you have accidentally transferred the data in the wrong direction, proceed as follows:
► Calculate the zero point correction value for the head (you may need to use the label at
-
tached to the head) and enter this in SITEST.
Make sure that you use the unit "digit" for entering the data.
► Check the minimum and maximum positions and enter the values from the above screen
-
shots for the C&P20.
5 Settings
5.6.2 Transferring the Head-Specific Data (from SW701) 5.6 Transferring the head specific data
Service Manual SIPLACE C&P20, C&P20A, C&P20M 65
5.6.2
5.6.2 Transferring the Head-Specific Data (from SW701)
Transferring the Head-Specific Data (from SW701)
After changing the head hardware, the new head data
need to be imported from the head EPROM in the soft
-
ware.
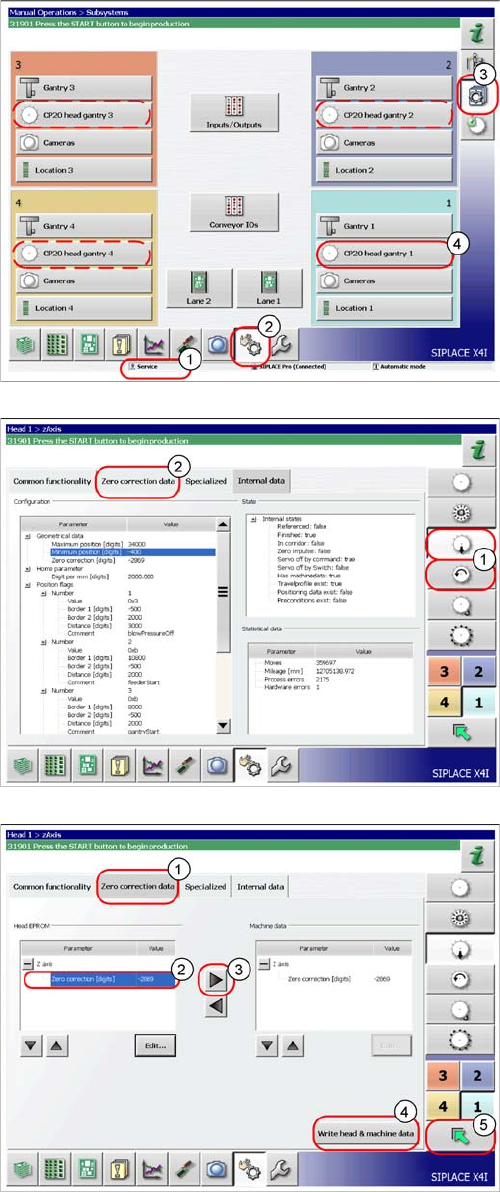
► Switch the machine on.
► Select the user level Service (customer) (1).
► Switch over to the menu Check sensors and
functions (2).
► Click on the button Check sensors and functions of
specific components (3).
► Click on the button CP20 head, gantry x for the gantry
concerned (4).
► Select the Z axis/star axis (1).
► Select Zero correction data (2).
This is where the axis data (Z and star axes) can be writ
-
ten from the head EPROM to the machine data. You can
also write the Z and star axis data from the machine data
to the head EPROM.
► In the Zero correction data (1) select the line Zero
point correction (2).
► ;Move the value out of the head EPROM and into the
machine data (3).
► Select Write head & machine data (4).
► The arrow button (5) takes you back one menu level.