00194591_02.pdf - 第34页
3 Instal lation Installation Manual SIPLACE Setup Center RF 2.1 3.3 Installation of SIPLACE Setup Center and Possible Setup Types Edition 09/2005 EN 34 Step 3a → In case no database with the name SiplaceSetup Center and …
Installation Manual SIPLACE Setup Center RF 2.1 3 Installation
Edition 09/2005 EN 3.3 Installation of SIPLACE Setup Center and Possible Setup Types
33
Step 3
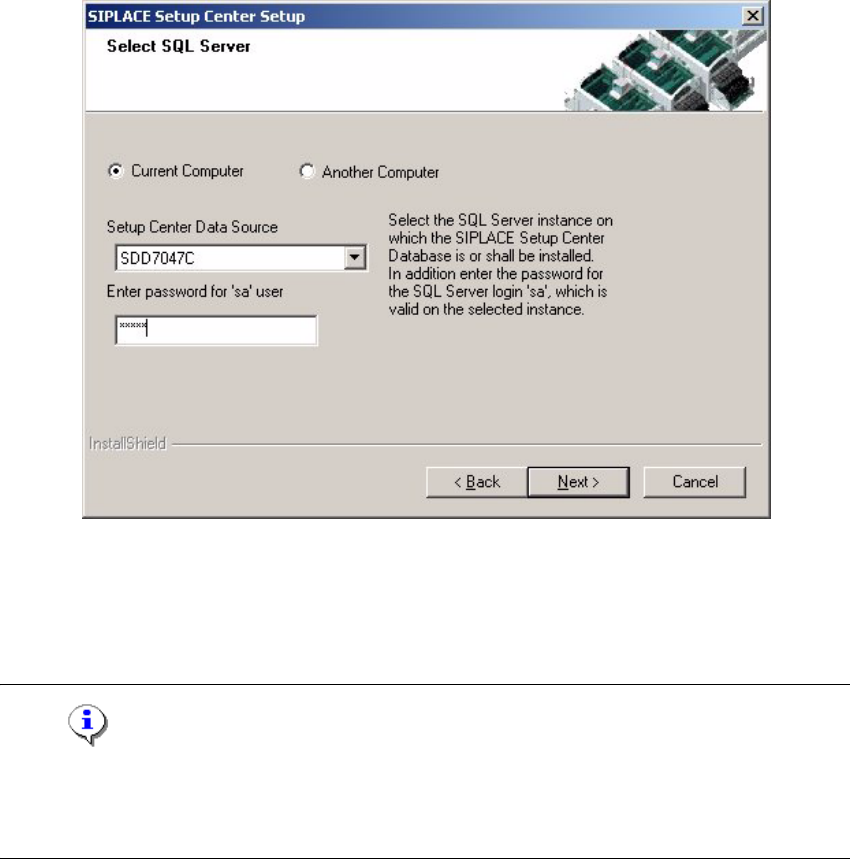
→ In the Select SQL-Server dialog box you enter the information required to be connected with
the SQL Server and database.
3
Fig. 3.3 - 22 "Select SQL Server" dialog box
→ Enter the Password for the SQL Server user ’sa’, i.e. the SQL server system administrator.
→ Selecting the radio button Another Computer will search computers with a database in the
network and will list them in the drop down box Setup Center Data Source.
Note
This password is empty if MSDE has been freshly installed. In this case, erase the displayed de-
fault password. Subsequently, a window will open, prompting you to change this password. You
may accept the Siemens Service default password or choose one of your own 3
→ Choose your SQL Server Instance from the pull-down menu.
→ Click Next.
3
3 Installation Installation Manual SIPLACE Setup Center RF 2.1
3.3 Installation of SIPLACE Setup Center and Possible Setup Types Edition 09/2005 EN
34
Step 3a
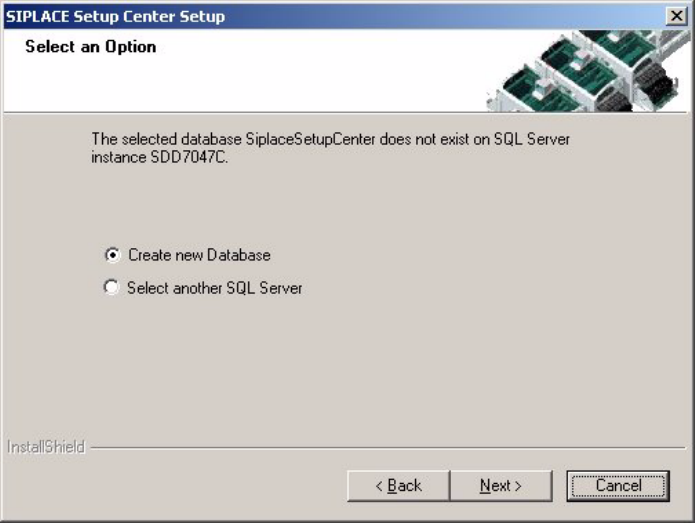
→ In case no database with the name SiplaceSetupCenter and the correct version exists, the
following dialog will appear:
3
Fig. 3.3 - 23 "Select an Option" dialog box
→ If you choose Select another SQL Server instance you will be returned to the previous dialog.
→ Click Next to create a new database.
3
Installation Manual SIPLACE Setup Center RF 2.1 3 Installation
Edition 09/2005 EN 3.3 Installation of SIPLACE Setup Center and Possible Setup Types
35
Step 4
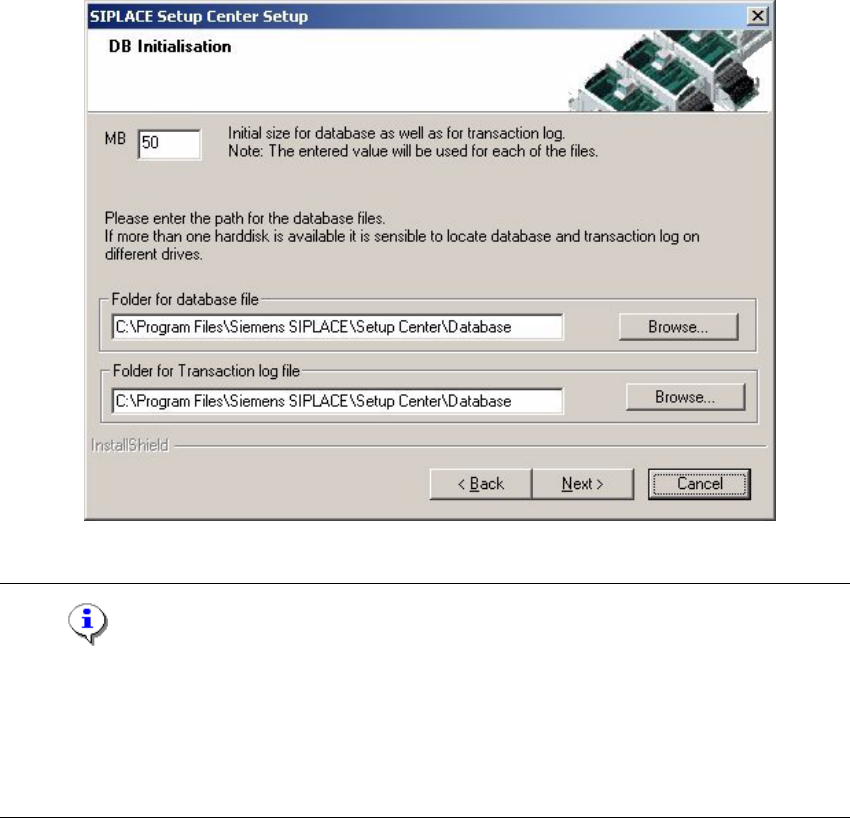
→ In the DB Initialization dialog box you enter the information required to be connected with the
SQL Server and database.
→ The figure you enter in the MB text box defines the size of the SIPLACE Setup Center data-
base files (default: 50) which are to be created during the installation.
→ Confirm the default value or enter the size you want in the MB text box.
3
Fig. 3.3 - 24 "DB Initialization" dialog box
Note
The specified size is only an initial value. The database will grow automatically as required.
However, only the database administrator is capable of freeing up unused disk space.
In the "database files" edit field, enter the directory in which the SIPLACESetupCenter.mdf file is
to be created. In the transaction log files edit field, enter the name of the directory in which the
SIPLACESetupCenter.mlf database file is to be created. 3