N7201A617E00_0317.pdf - 第256页
NPM-W 2 EJM7DE-MB-07M-0 0 7-1 -9 Checking the nozzle arrangement Cleaning the no zzle holder 5 (Light weight 16-/12-/8-nozzle head(option)) Maintenance 7-1 23 ● Only if production data has been loa ded, carry out operati…
NPM-W2 EJM7DE-MB-07M-00
7-1-8
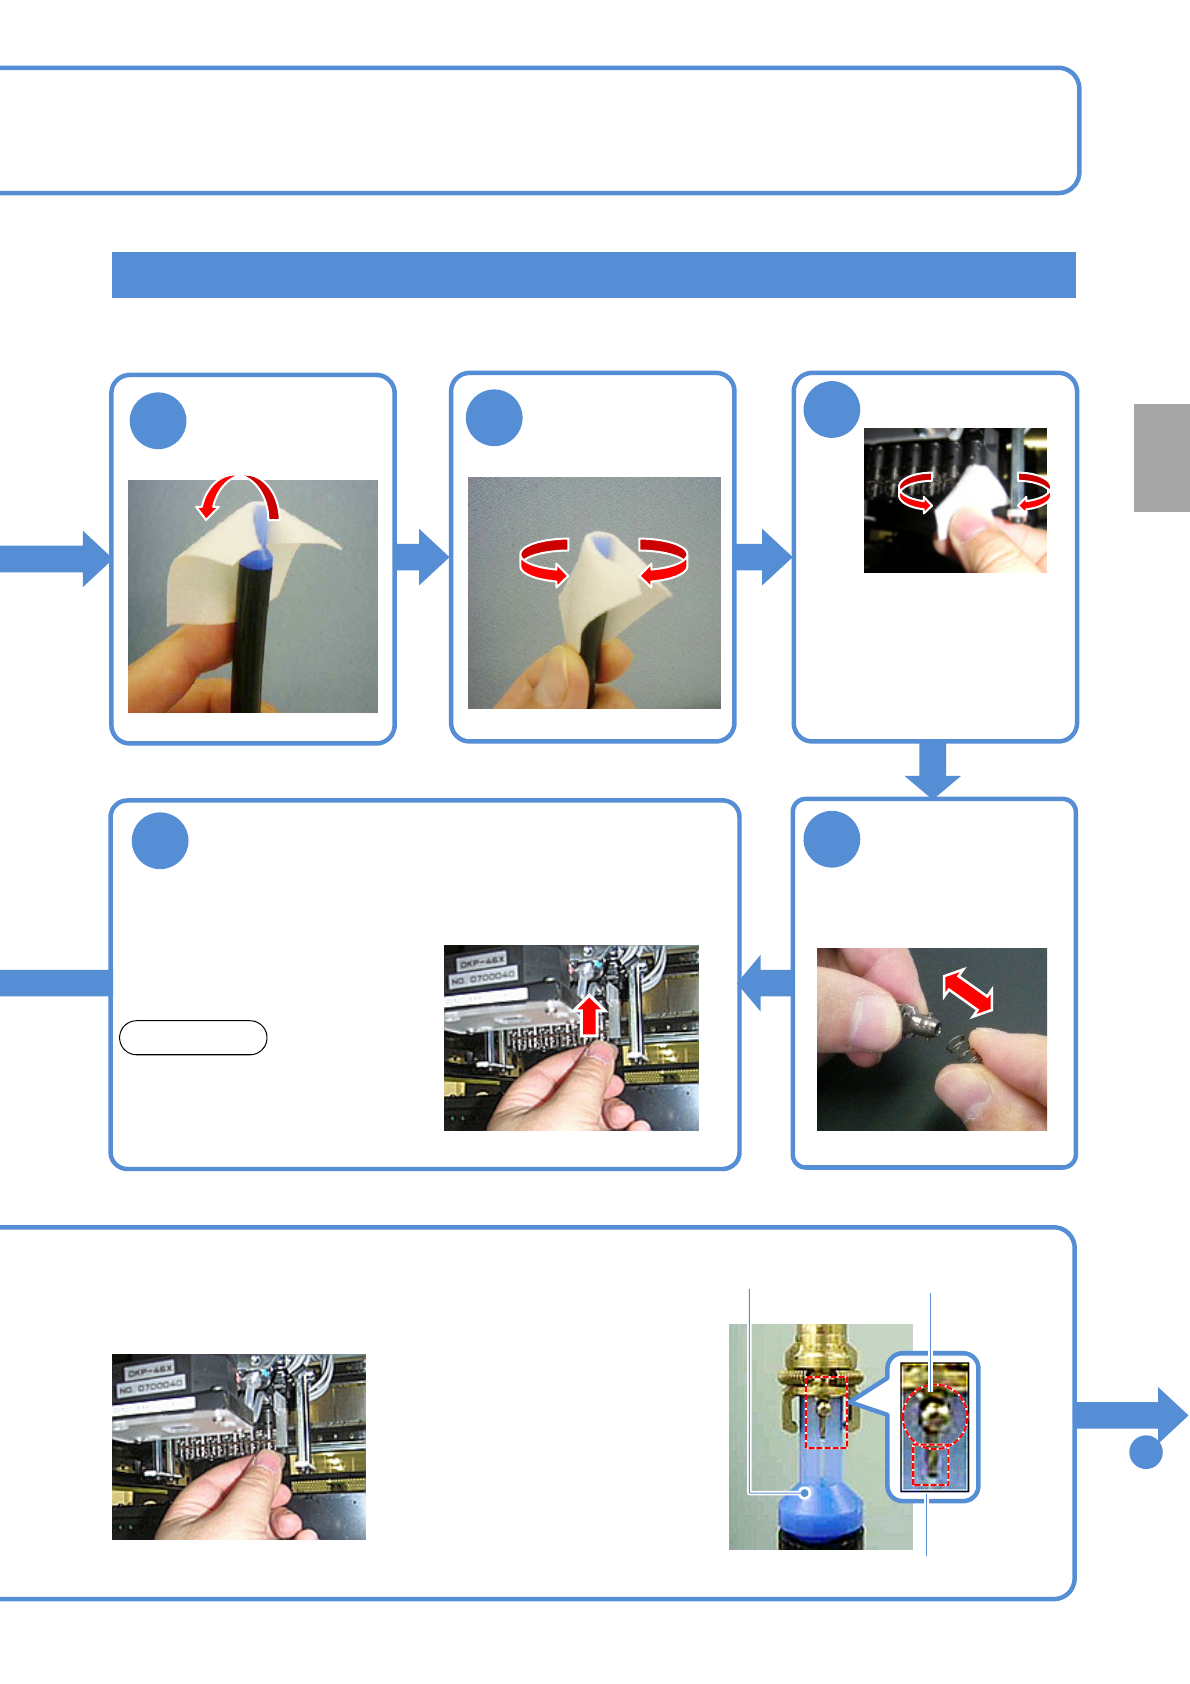
Attaching the nozzle holder
13
Turn down the
end of the
cleaning paper
●Use the nozzle holder shaft
cleaning tool (option).
●Align the groove on the 12-
nozzle cleaning side with the
positioning pin of the nozzle
holder.
●Turn it clockwise as viewed from
below while pushing up the
cleaning tool.
■Without the nozzle
attached
12
15
Remove the
spring
●Push the nozzle holder up with
a finger and make sure that it
does not get stuck, and remove
the finger and make sure it
lowers by its own weight.
16
Attach the nozzle holder
NOTICE
●If the holder gets stuck or does
not lower (→P.7-1
-11 to 12)
Positioning pin
Cleaning tool
To
21
14
Clean the shaft
●Insert the cleaning tool into
the shaft, and turn it in the
direction of nozzle rotation
two to three times.
●Replace the paper when it
becomes dirty.
Every
1000
hours
PeriodicPeriodicPeriodic
inspection
Groove
NPM-W2 EJM7DE-MB-07M-00
7-1-9
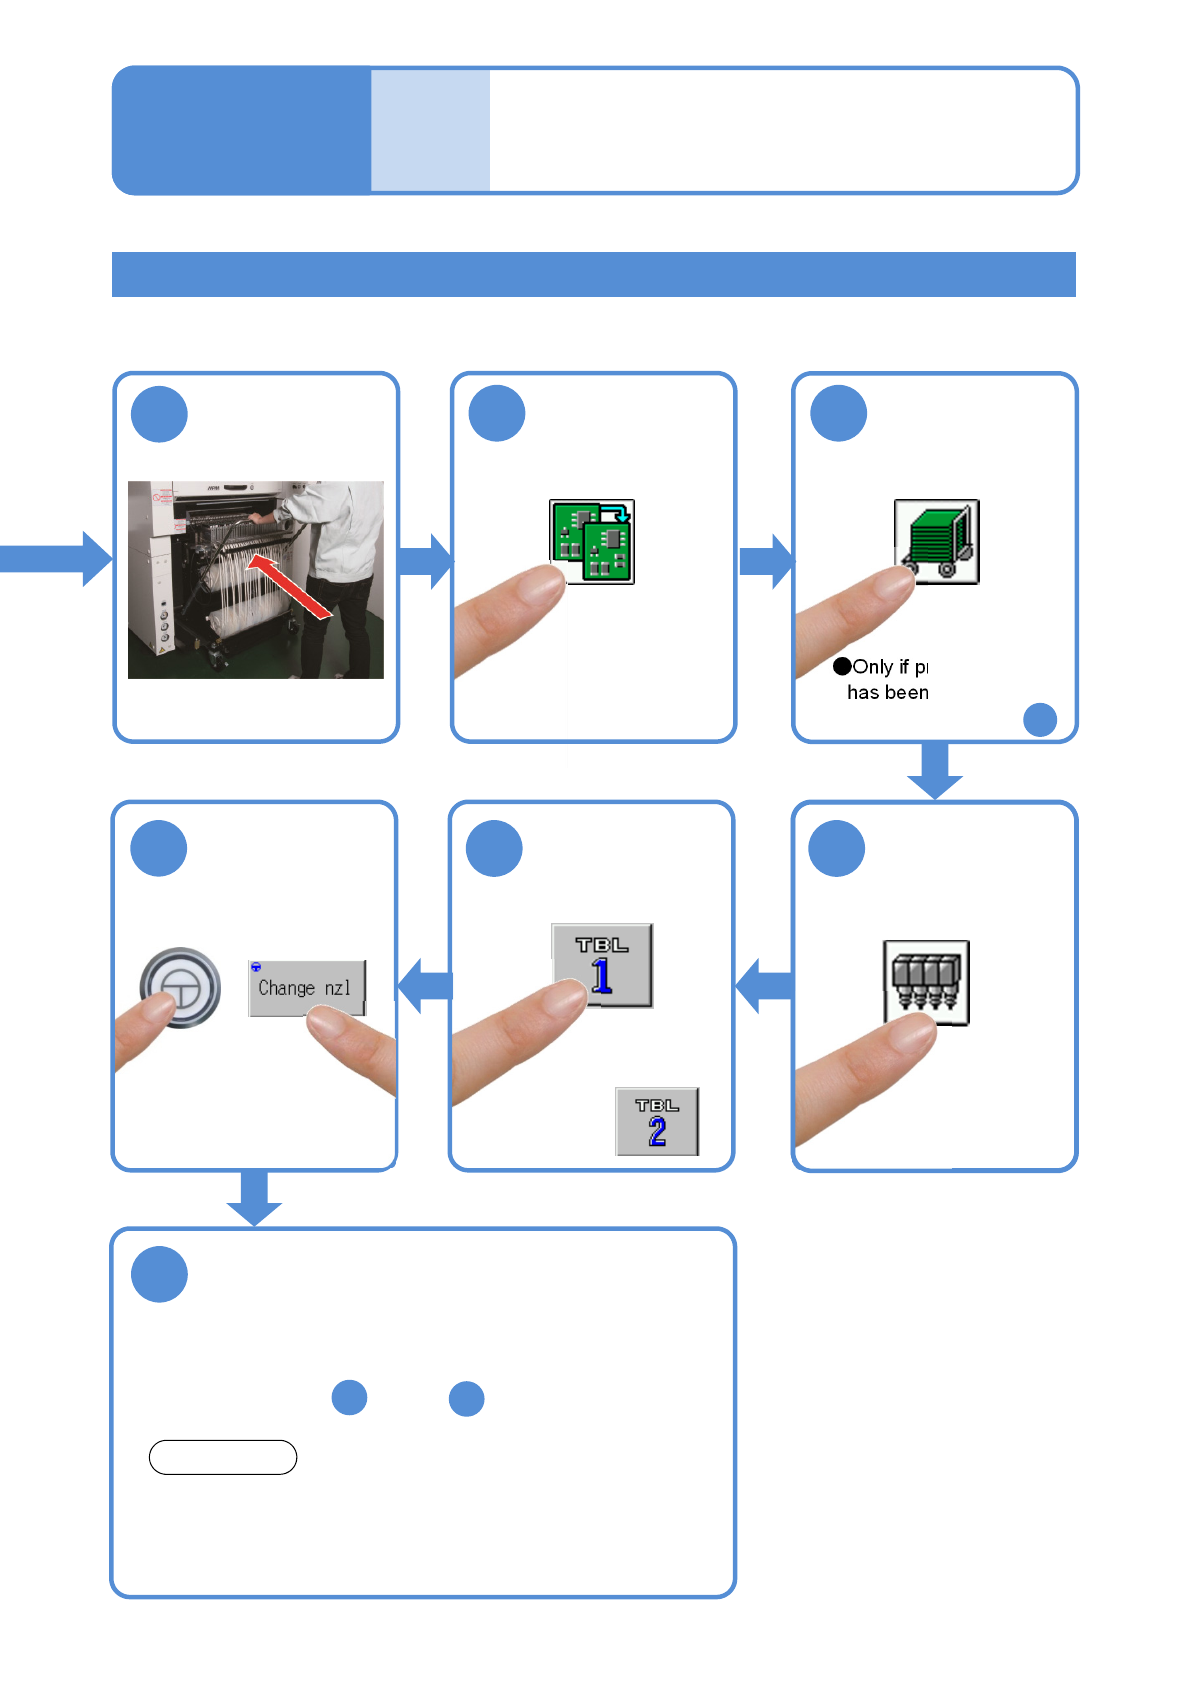
Checking the nozzle arrangement
Cleaning the nozzle holder 5
(Light weight 16-/12-/8-nozzle head(option))
Maintenance
7-1
23
●Only if production data
has been loaded, carry
out operations after
24
22
25
26
27
Check the nozzle arrangement
* The dimensions of nozzle bases are measured in this
operation. Nozzles that have the same dimensions but
differ in nozzle type are not identified. So visually check for
the nozzle type when attaching nozzles.
●Check the screen for the nozzle arrangement of each
nozzle position.
●If the wrong nozzle is set, replace it with the correct one
after the step , and do .
24
21
2
NOTICE
●For the rear,
Attach the
feeder cart
(→P.3-2)
21

NPM-W2 EJM7DE-MB-07M-00
7-1-10
Every
1000
hours
PeriodicPeriodicPeriodic
inspection