06_SM481_Service_Manual Flow Manual.pdf - 第10页
Advance d High Speed Flex i ble Mounter 6-6 7. Set the sen s or and stopper posi t ions i n the Conveyo r C onfig ur ation dialog bo x of the Syste m Setup m enu. T e ach the position s of the Sensor X and Sto pp er X. F…
Advanced High Speed Flexible Mounter
6-4
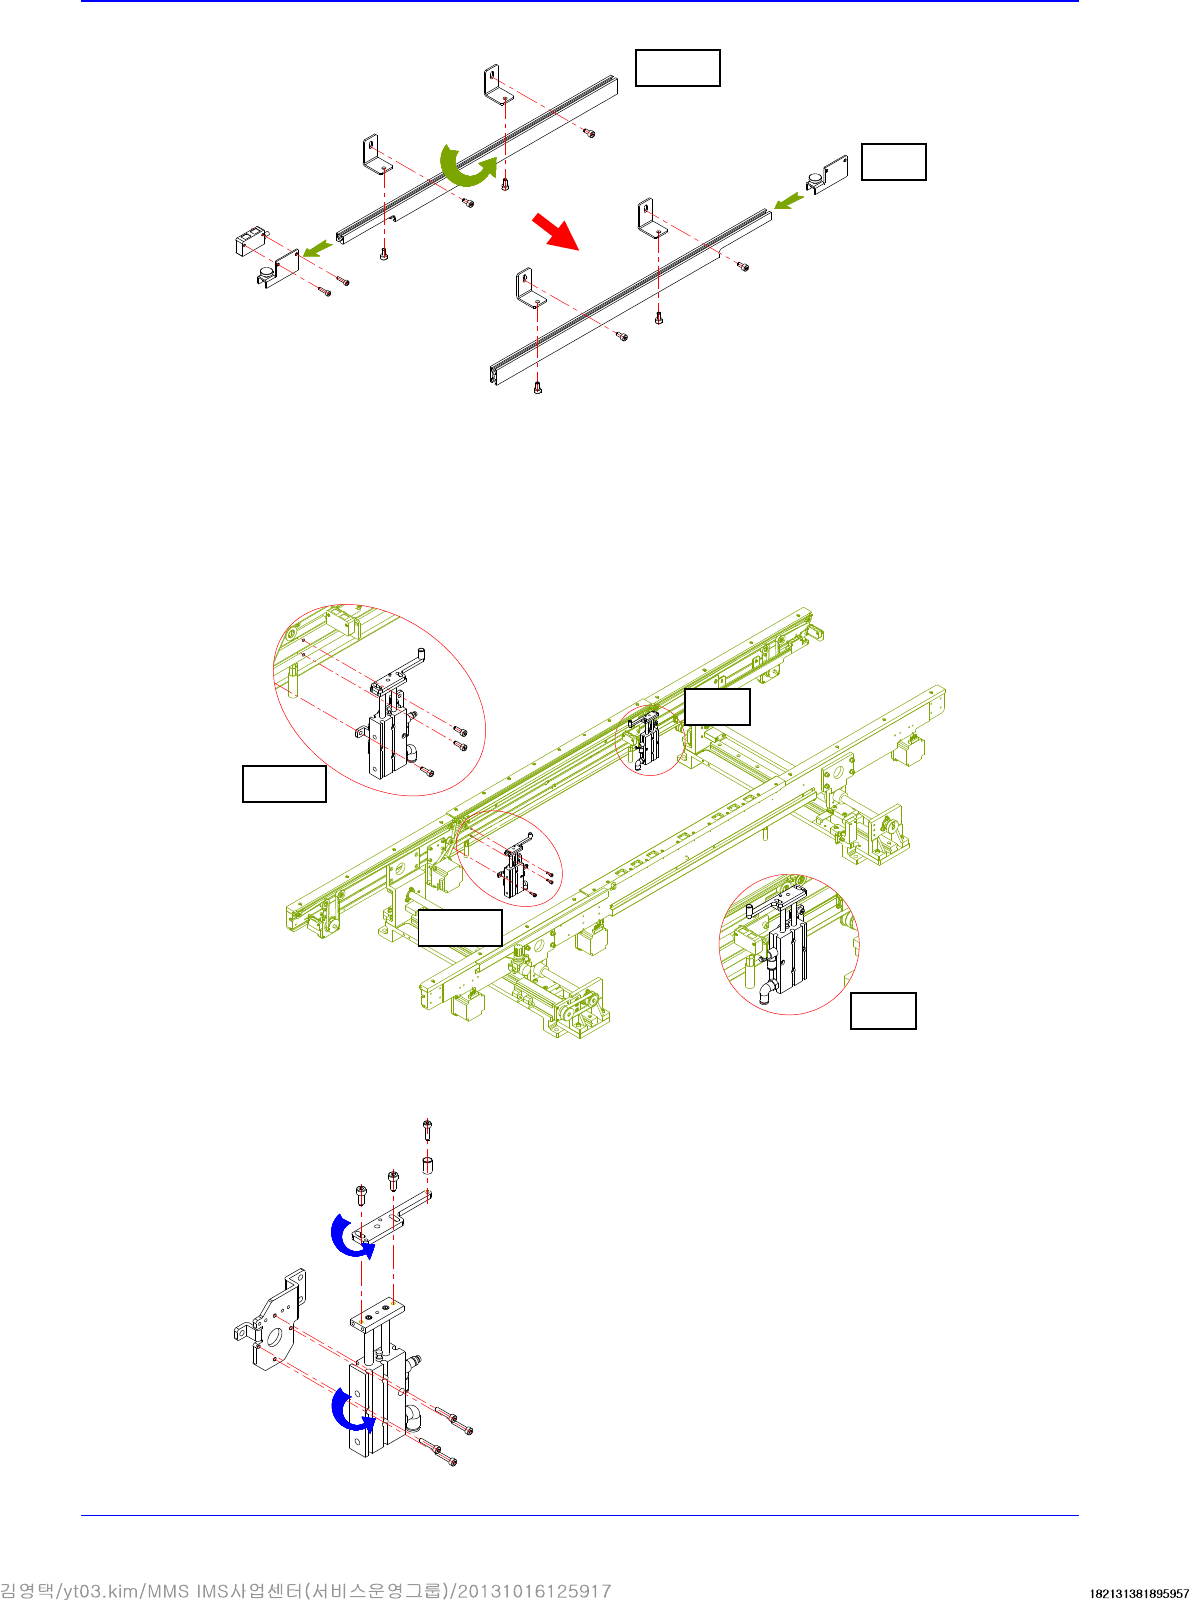
③ Assemble the Wait sensor and Placement sensor by changing their position.
④ Assemble the Entry sensor and Exit sensor by changing their position.
⑤ Unscrew the fixing bolts securing the placement stopper and remove it.
⑥ Remove the stopper cylinder and cylinder bracket. Then assemble them by rotating them
by 180°.
Before
After
Before
After
Before
After
PCB Flow
6-5
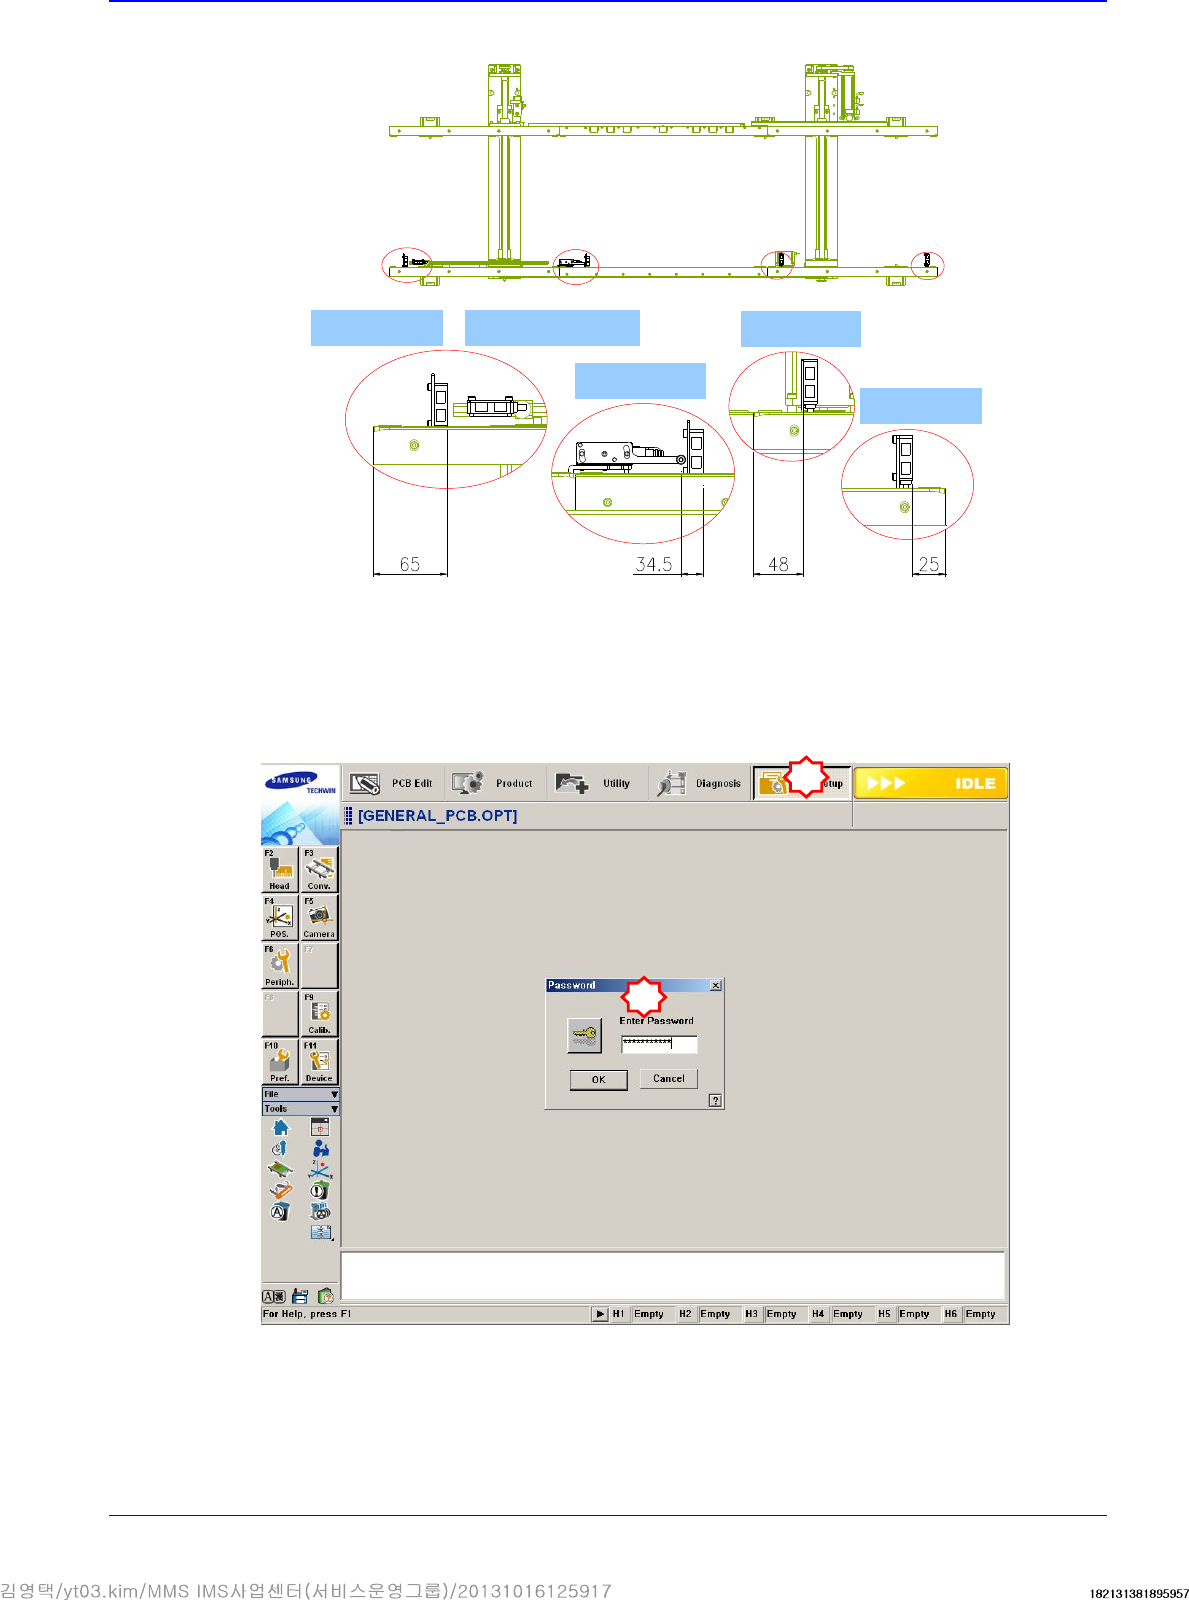
5. After moving them all, check whether they are as follows:
6. Select the secondary Option menu from the System Setup Factory menu and select the PCB
flow to be changed from the ‘Factory Setting Option’ dialog box.
In order to access the Factor menu, a separate password must be input in the System Setup
Menu.
Quick load sensor
Wait sensor
Place sensor
Entry sensor
Outpu sensor
1
2

Advanced High Speed Flexible Mounter
6-6
7. Set the sensor and stopper positions in the Conveyor Configuration dialog box of the System
Setup menu.
Teach the positions of the Sensor X and Stopper X. For more details, refer to “Board Position
Calibration".
8. Execute the ‘Conveyor Utilities’ dialog box. Feed the PCB and check if the board detection
sensor in each station and the stopper operates properly.
3
1
2
4
5