XPM2-Site_Preparation.pdf - 第19页
Site Preparation & Installation Section: 2 Page: 19 Revision Date: April 2005 OVEN RECEIPT & HANDLING Receiving Inspection A complete inspection of the oven should be con ducted and any discrepancies noted. Shipp…
Site Preparation & Installation Section: 2 Page: 18 Revision Date: April 2005
Compressed Air Supply
Pressure [Basic] regulated to 10-30 PSI (0.7-2.1 Bar)
Pressure [N
2
/Air Switching option] regulated to 50-70 PSI (3.5-4.8 Bar)
Volume 100 - 200 CFH, (2.8-5.6 M
3
/hr )
Fitting size 3/8" National Pipe Thread (NPT)
Supply pipe size 1/2"
The oven is equipped with a pressure regulator and gauge for control of the compressed air supply.
External Coolant Supply
For N2 ovens not equipped with Polar Cooling or Controlled Cooling options, must have a facility coolant
supply to the oven.
Temperature
20° C +/- 5° C
Flow rate 1.0 - 2.0 gpm (3.8-7.6 liter/min) minimum flow sensor trips at 0.5 gpm
Pressure (minimum)
sensor trips at 50 psig
2 Cooling zones 20 PSI (1.4 Bar)
3 Cooling zones 30 PSI (2.1 Bar)
4 Cooling zones 40 PSI (2.8 Bar)
Fitting size / type 3/8 FPT (Supply must be 3/8 MPT)
Coolant medium Supercool (Inhibited Propylene Glycol and distilled water mixture)
Alternative Coolant medium Pure distilled water
Note: flushing frequency increases 2-6X that of Supercool.
Caution: De-ionized water is NOT to be used (attacks brass and copper)
PH Neutral
Particulate Filtered to at least 100microns
Site Preparation & Installation Section: 2 Page: 19 Revision Date: April 2005
OVEN RECEIPT & HANDLING
Receiving Inspection
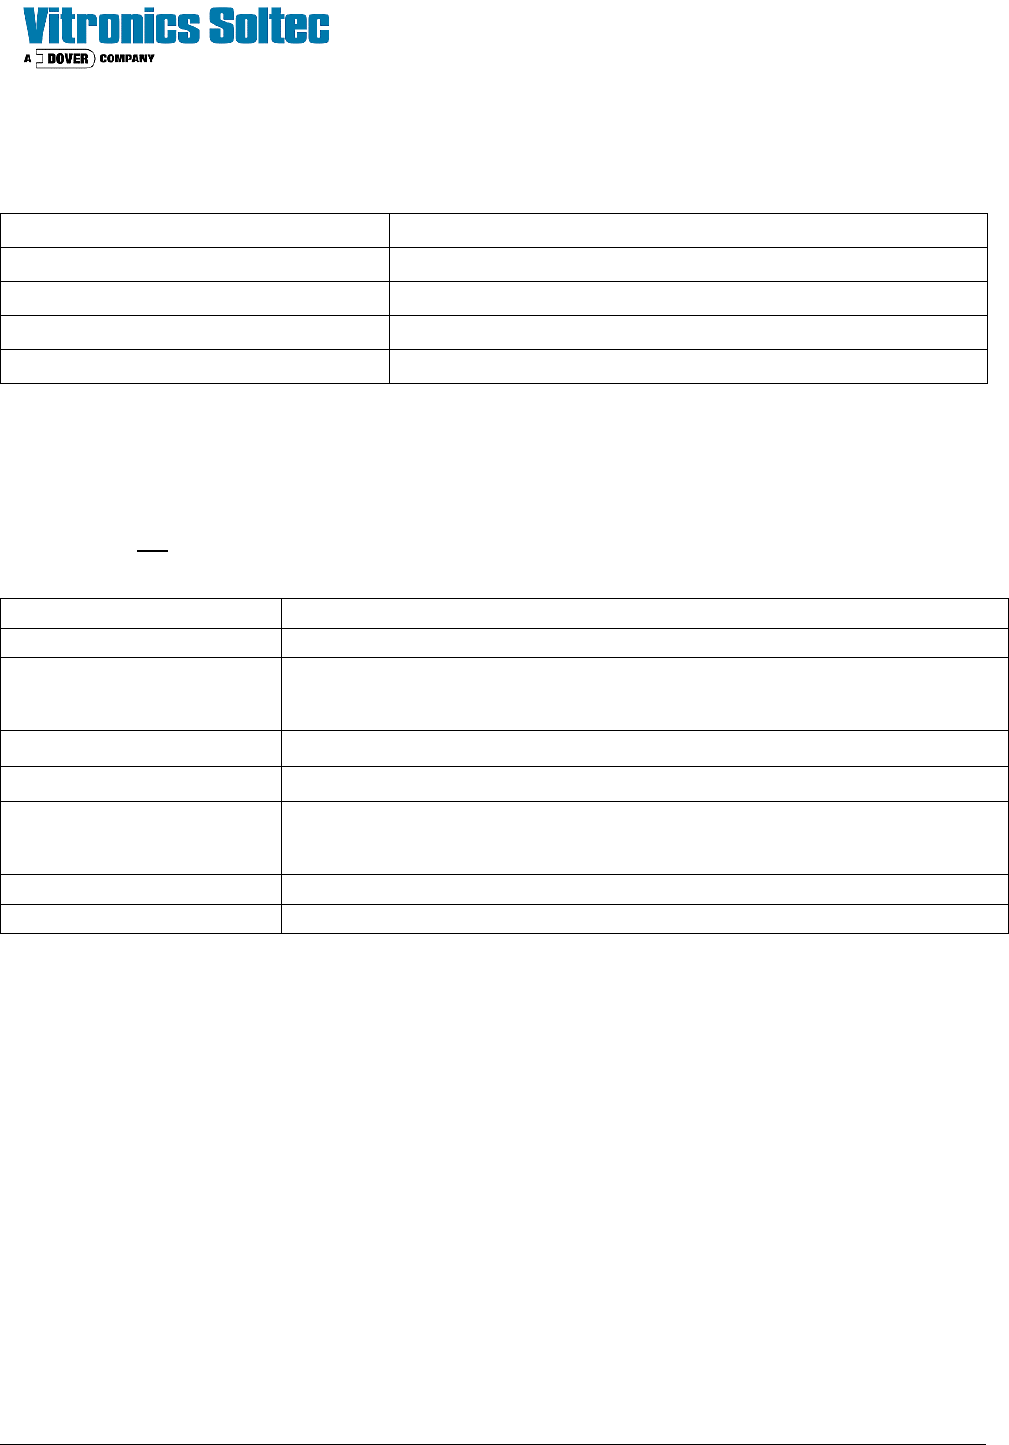
A complete inspection of the oven should be conducted and any discrepancies noted. Shipping indicators,
(see examples below), are mounted to the inside of the oven before shipping from the factory. These
indicators should be checked and the “as received” condition recorded as part of the receiving inspection
process. If the oven shipping crate/packaging shows any signs of damage or rough handling, a notice should
be filed with the shipper at the time of receipt.
Tip Indicator Example Shock Indicator Example
Site Preparation & Installation Section: 2 Page: 20 Revision Date: April 2005
Unpacking the Oven
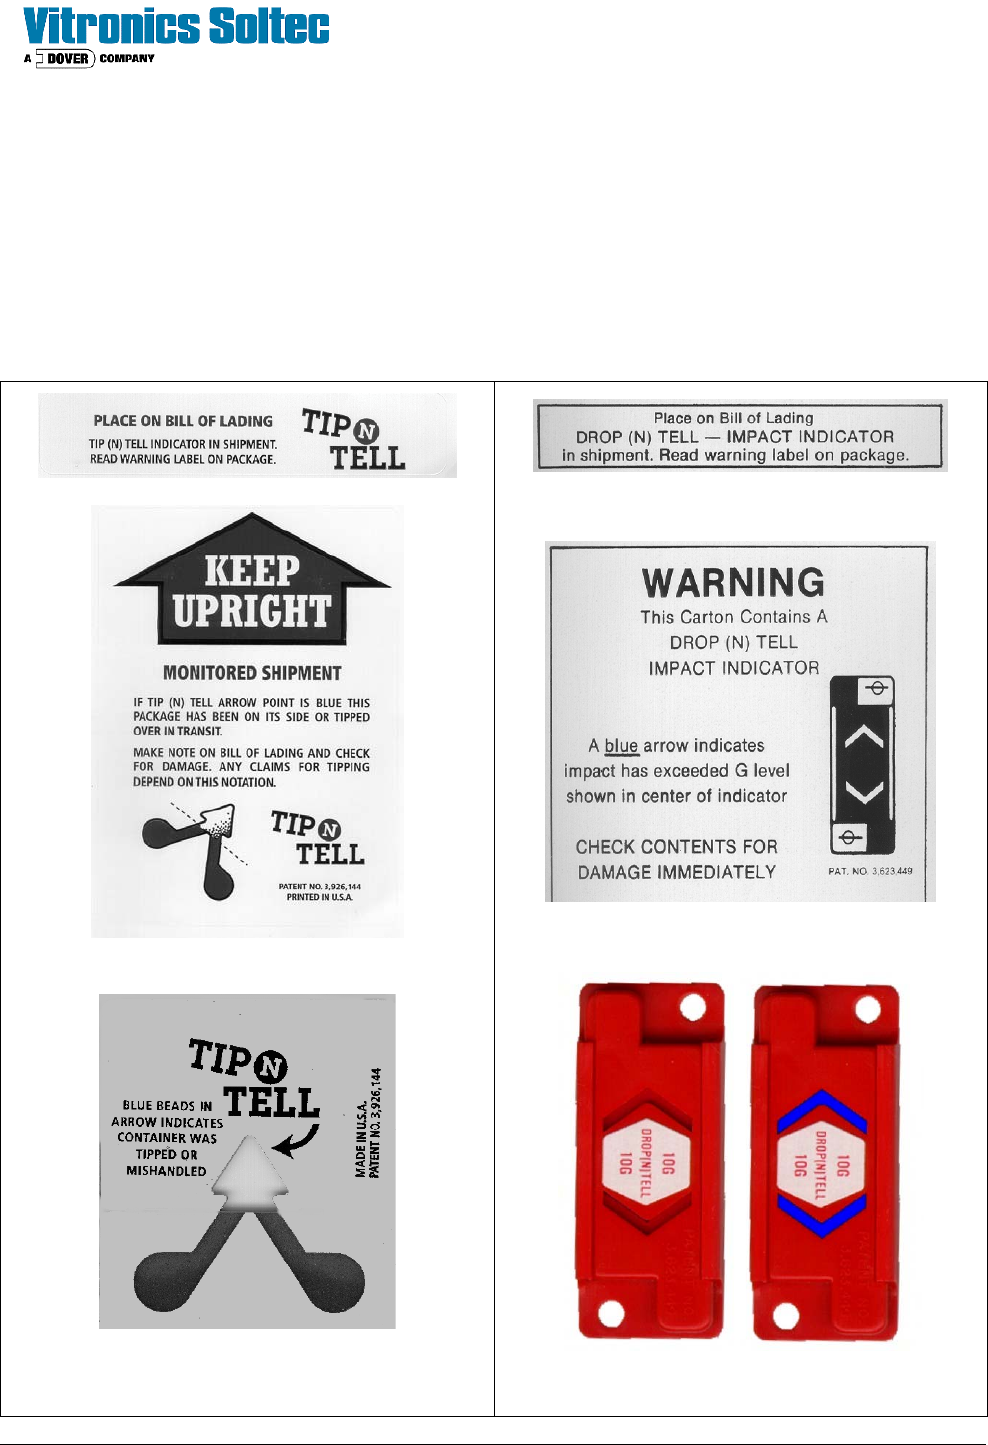
The XPM2 is a piece of large industrial equipment. Only qualified fork lift operators or
riggers should unpack, move, and position the oven. Keep fingers, hands and feet
clear at all times while lifting and positioning the oven.
CAUTION: Failure to follow the sequence described may result in injury or damage to the oven.
Ovens are shipped secured to a wooden
pallet (skid) and plastic wrapped. Where
required the oven may be crated and foil
bagged. If crated, remove the top section of
the crate first, the shorter end panels next
and the longer side sections last. Cut open
and remove the barrier bag and plastic
wrapping material. Remove the auxiliary
equipment boxes from the skid - be sure to
save the original packing material and boxes
in the event a return shipment may be
necessary for any reason.
Unbolt and remove the shipping brackets (as
shown), located at the each end the skid/
oven before lifting the oven
Once the shipping brackets are unbolted and
removed from the oven and the area is
cleared of shipping material the oven may be
lifted with a fork truck and placed on movable
wheeled dollies capable of supporting the
oven's weight.
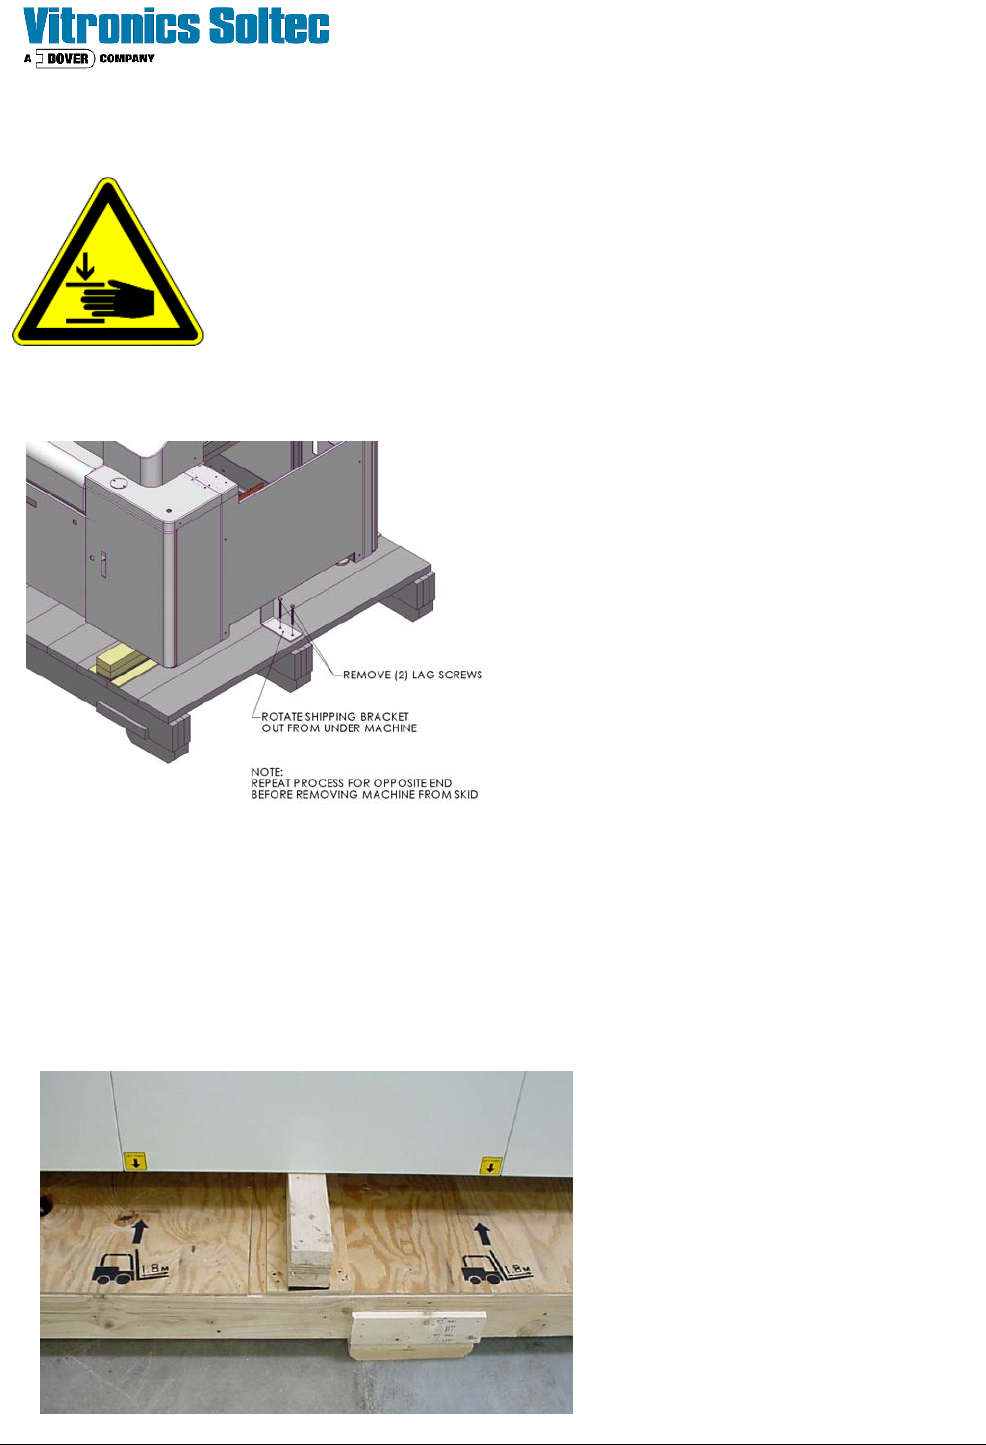
• Make sure the lifting forks are at least 6 feet (1.8 cm) long and enter from the rear of the oven only.
• Forks should be positioned to lift from the measured center of the oven.
Raise the oven high enough to allow the
skid to be removed from under the oven.
Make sure the oven is balanced properly
on the dollies before removing the fork
truck. On 7 and 10 zones oven s use two
dollies, one under each end. On 13 and
16 zone ovens use three dollies, one
under each end and one under a middle
crossmember to evenly support the oven
weight.