Cleaning SIPLACE Vision camera systems.pdf - 第8页
ASMP T GmbH & Co KG Rupert - Mayer - St raße 48 81379 Munich, Germany Subject to c hange without notice TI2024 - 03E09.doc 09.04.2025 Page 8 - 18 ENABLING THE DIGIT AL WORLD The cam era lens is located below the s ec…
ASMPT GmbH & Co KG
Rupert-Mayer-Straße 48
81379 Munich, Germany
Subject to change without notice
TI2024-03E09.doc
09.04.2025
Page 7 - 18
ENABLING THE DIGITAL WORLD
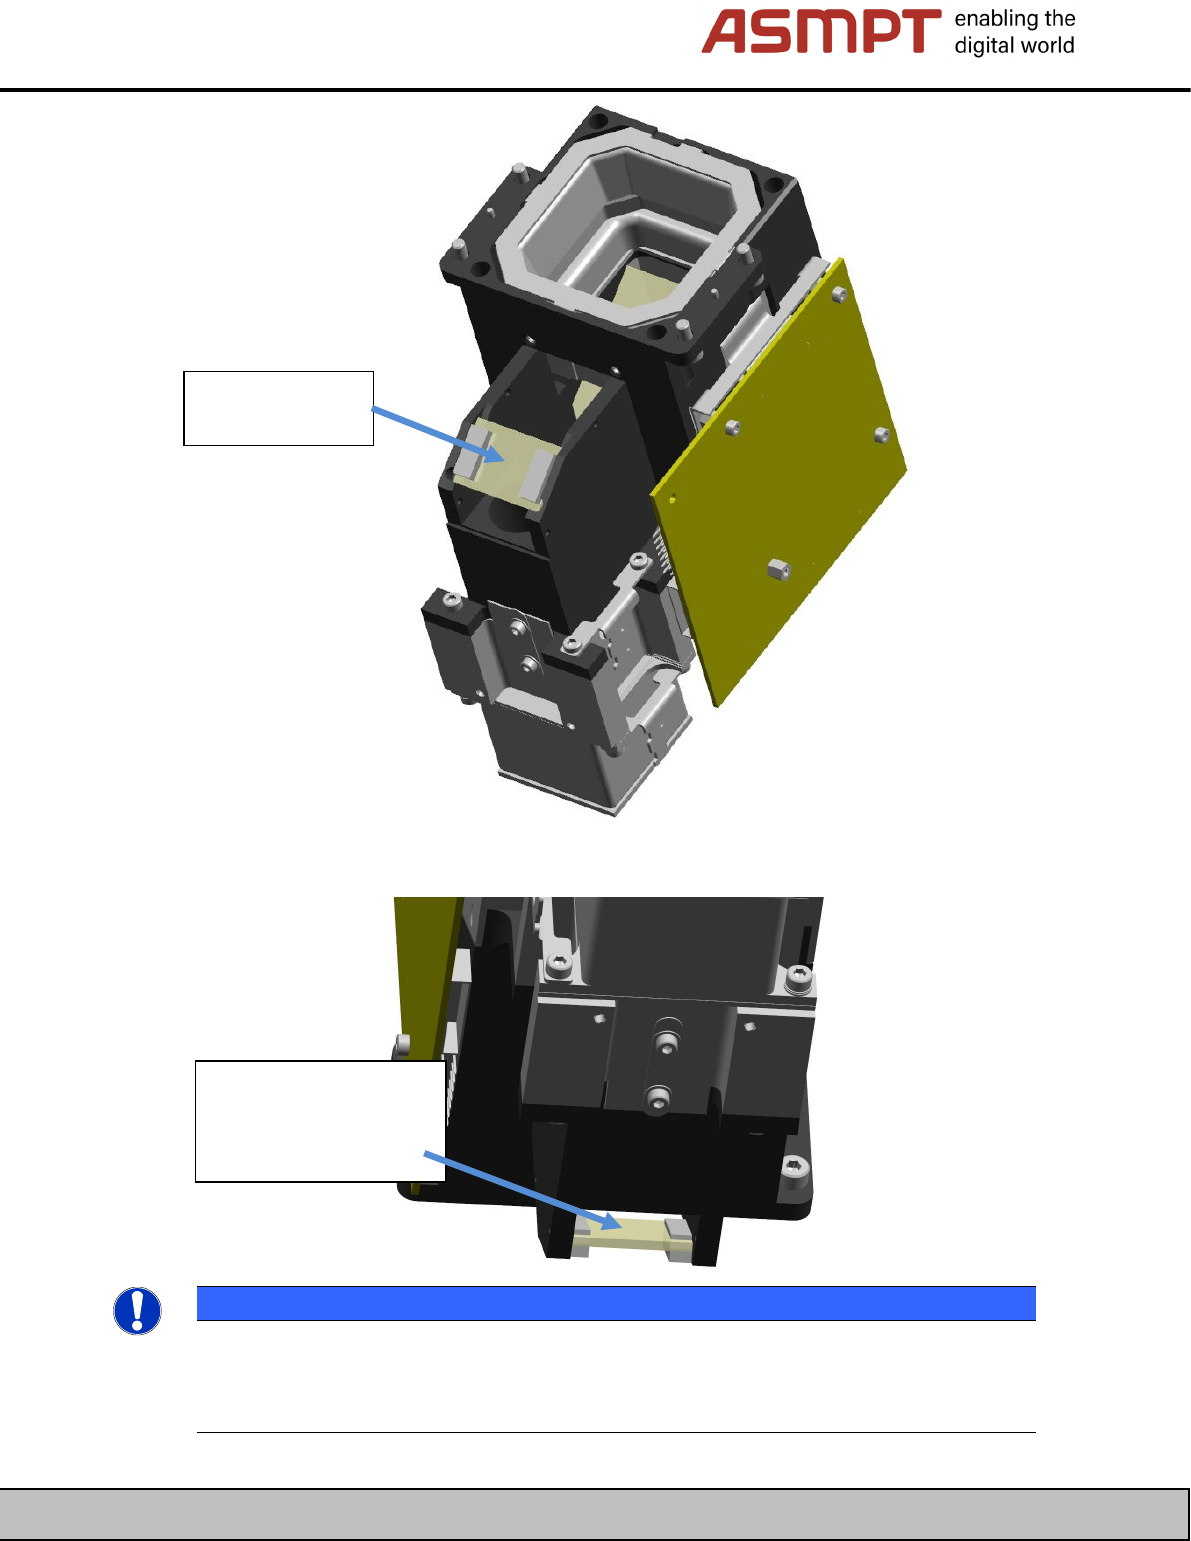
To clean the small deflection mirror on the inside, turn the camera so that it is standing on the
illumination unit.
NOTE
Second deflection mirror
The mirror is glued to the side walls.
Make sure that you do not apply excessive pressure when cleaning the mirrors.
Clean the inner side of
the second deflection
mirror from this side.
Second deflection
mirror
ASMPT GmbH & Co KG
Rupert-Mayer-Straße 48
81379 Munich, Germany
Subject to change without notice
TI2024-03E09.doc
09.04.2025
Page 8 - 18
ENABLING THE DIGITAL WORLD
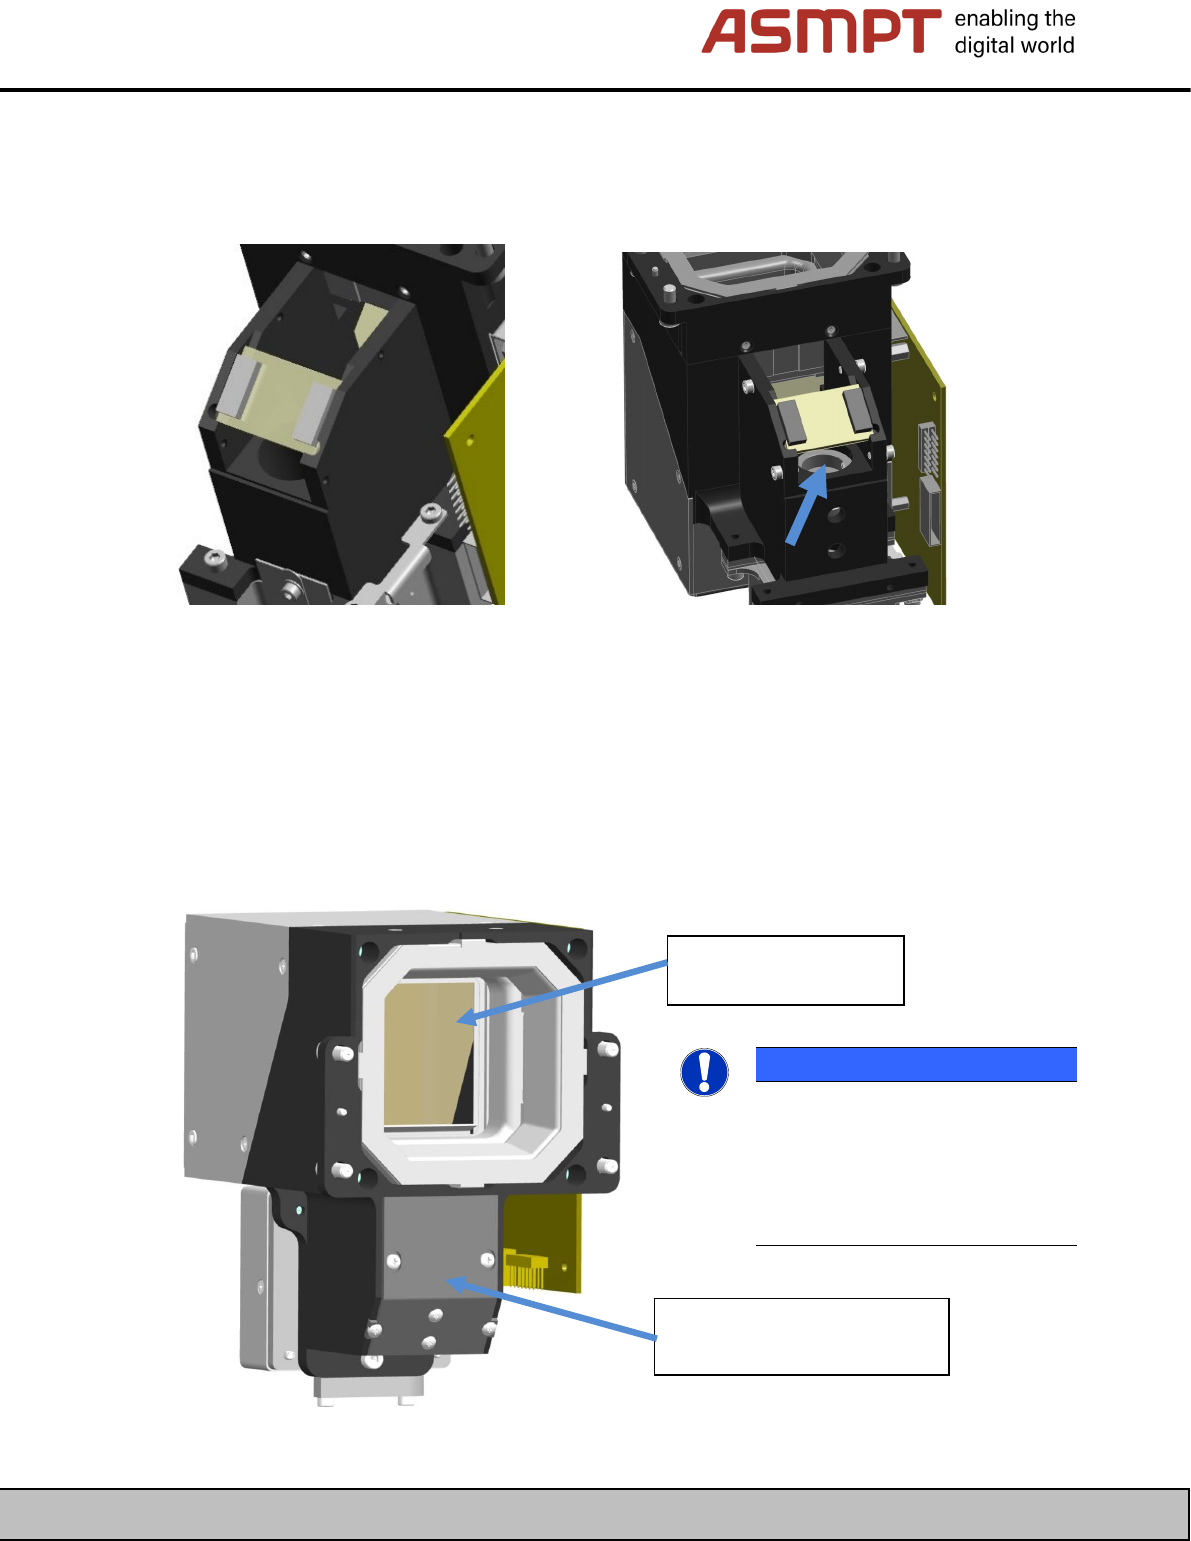
The camera lens is located below the second deflection mirror (see arrow).
Because access to the lens is restricted, it is recommended that you do not clean the lens on the
cameras SST30/SST29/SST28!
On the SST38, the lens is visible, and you can clean it with the tools listed above.
SST30/SST29/SST28, lens cannot be accessed SST38, lens can be accessed.
4.4 Cleaning the SST45G camera (CPP head)
It is not possible to remove the illumination unit on the SST45 cameras.
The aperture (view window) is, however, large enough to allow the mirror to be accessed with the
cleaning tools.
NOTE
2nd deflection mirror
The second deflection mirror can
unfortunately not be accessed on
this camera and can therefore not
be cleaned
Clean the surface of
the mirror.
The second deflection mirror
is located below this cover

ASMPT GmbH & Co KG
Rupert-Mayer-Straße 48
81379 Munich, Germany
Subject to change without notice
TI2024-03E09.doc
09.04.2025
Page 9 - 18
ENABLING THE DIGITAL WORLD
4.5 Cleaning the stationary cameras SST33 / SST36 / SST25 / SST33G (03105198-xx) / SST25G
All three stationary camera types have the same construction.
All the cleaning steps therefore apply to all three types.
Pull off the illumination unit in an
upward direction.
Remove the bottom cover.
The bottom of the cover is inserted in the base
plate and the top is clipped in place at the sides
with two lugs on sprung pins.
The top of
the splitting
mirror is now
free.