00198108-01_JC_PM_WF3_TX_EN.pdf - 第46页
13 WF 3 TX-Series Maintenance Maintain the tape cutter 15 min 4 / 4 C A U T I O N ! R e f e r t o s a f e t y i n s t r u c t i o n s i n u s e r m a n u a l b e f o r e c o m m e n c i n g M a i n t e n a n c e Machin…
13 WF 3 TX-Series Maintenance Maintain the tape cutter 15 min 3 / 4
CAUTION! Refer to safety instructions in user manual before commencing Maintenance
Machine Status OFF Conveyor Empty
NOTICE! ESD guidelines are to be followed Tool:
T31, T34, T54
Wear Part: Consumables:
C26, C27, C28
www.asm-smt.com
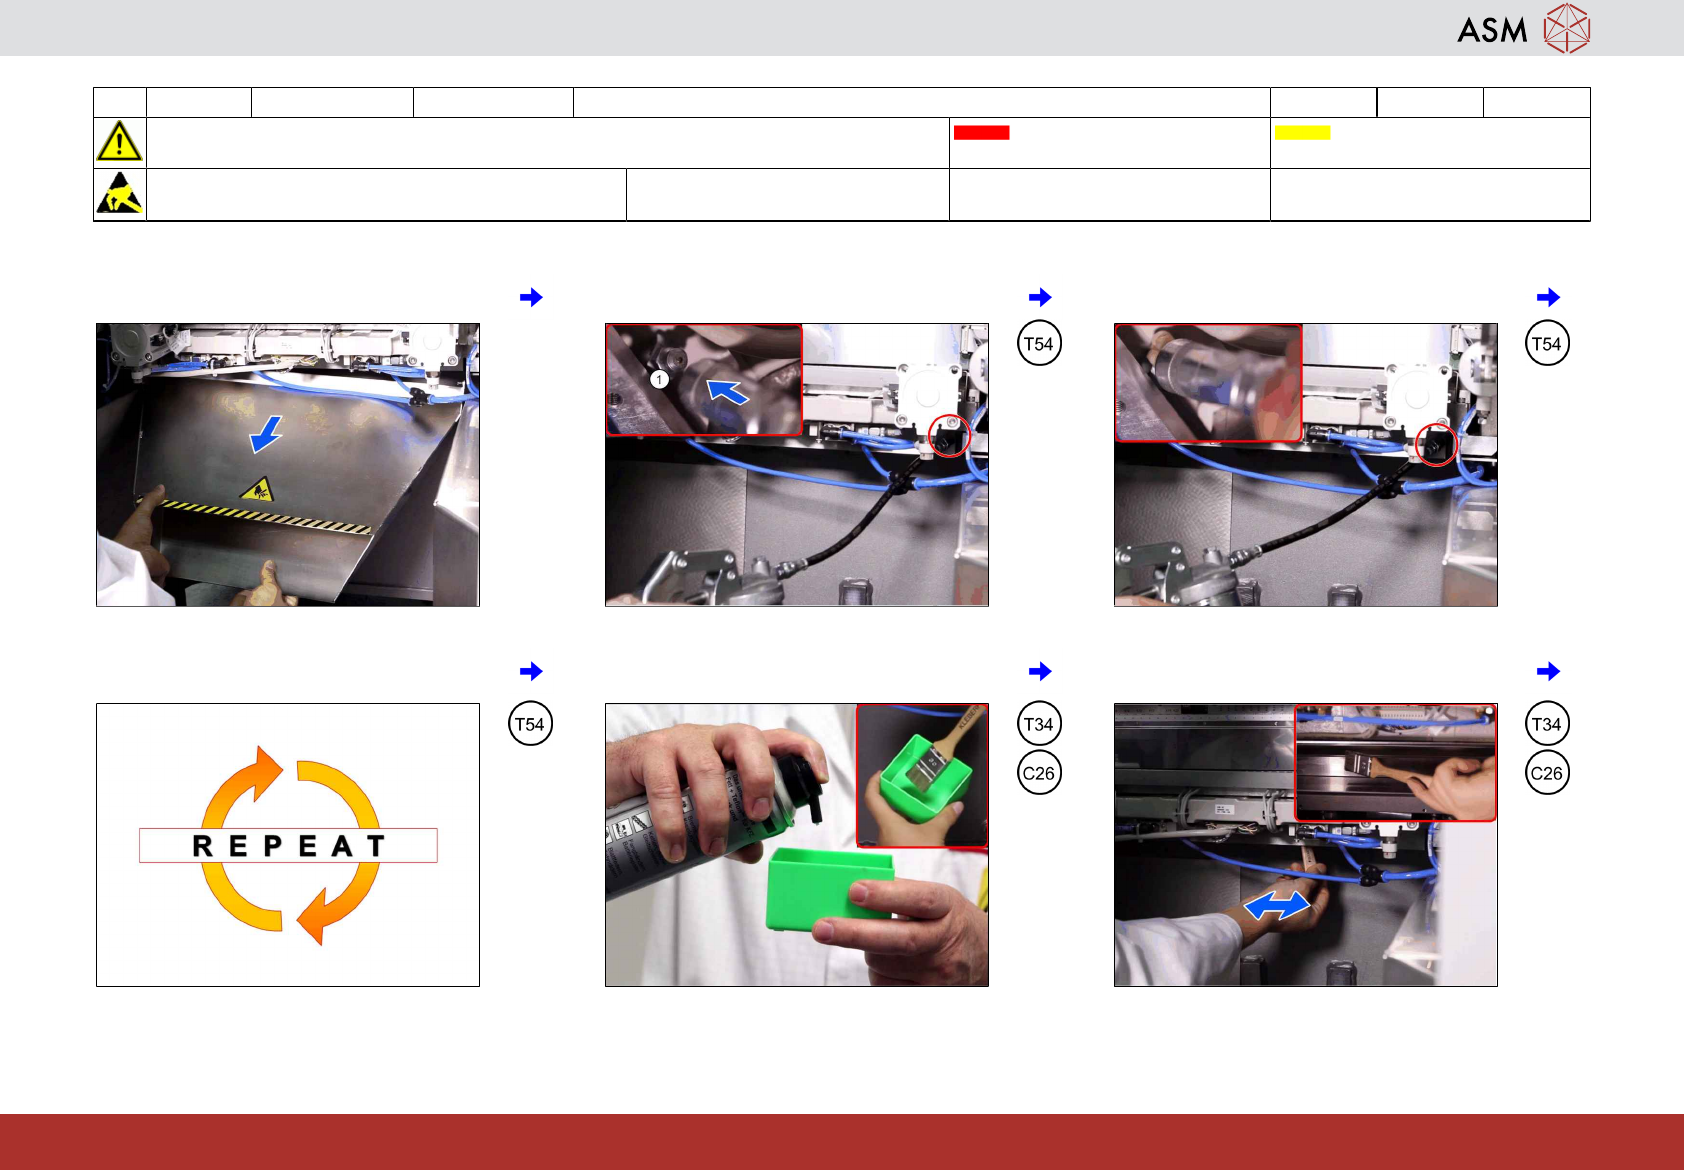
13 Remove the waste slide. 14 Positioning grease gun to nipple (1). 15 Press the trigger till grease comes out.
16 Repeat steps 12 to 13 at the other side of
the cutter.
17 Put grease on a brush. 18 Distribute the grease to the fixing blade
over the whole length.
13 WF 3 TX-Series Maintenance Maintain the tape cutter 15 min 4 / 4
CAUTION! Refer to safety instructions in user manual before commencing Maintenance
Machine Status OFF Conveyor Empty
NOTICE! ESD guidelines are to be followed Tool:
T31, T34, T54
Wear Part: Consumables:
C26, C27, C28
www.asm-smt.com
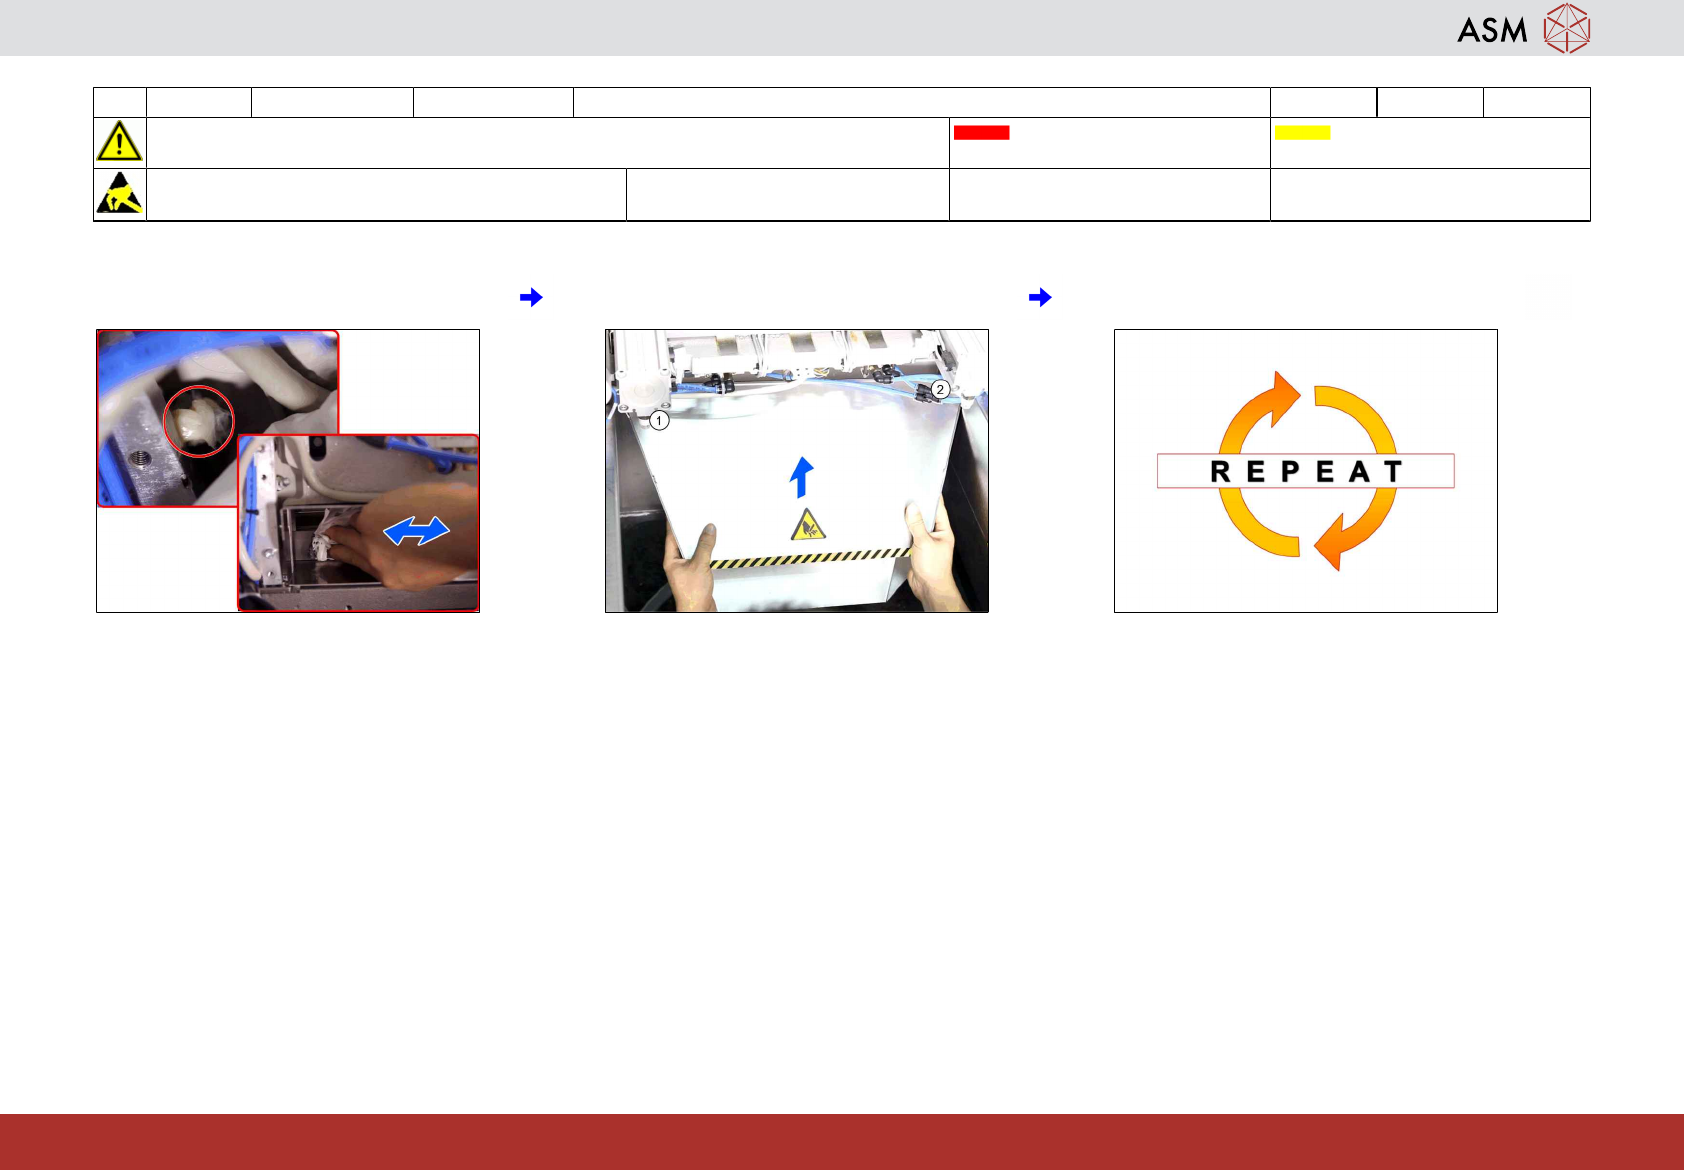
19 Remove excess grease from both sides of
the cutter.
20 Return the waste slide and fasten screws
on both sides (1 and 2).
21 Repeat for other tape cutter.
14 WF 3 TX-Series Maintenance Check/ replace the vacuum pump filter disk 4 min 1 / 2
CAUTION! Refer to safety instructions in user manual before commencing Maintenance
Machine Status OFF Conveyor Empty
NOTICE! ESD guidelines are to be followed Tool:
T31, T86
Wear Part: Consumables:
C19
www.asm-smt.com
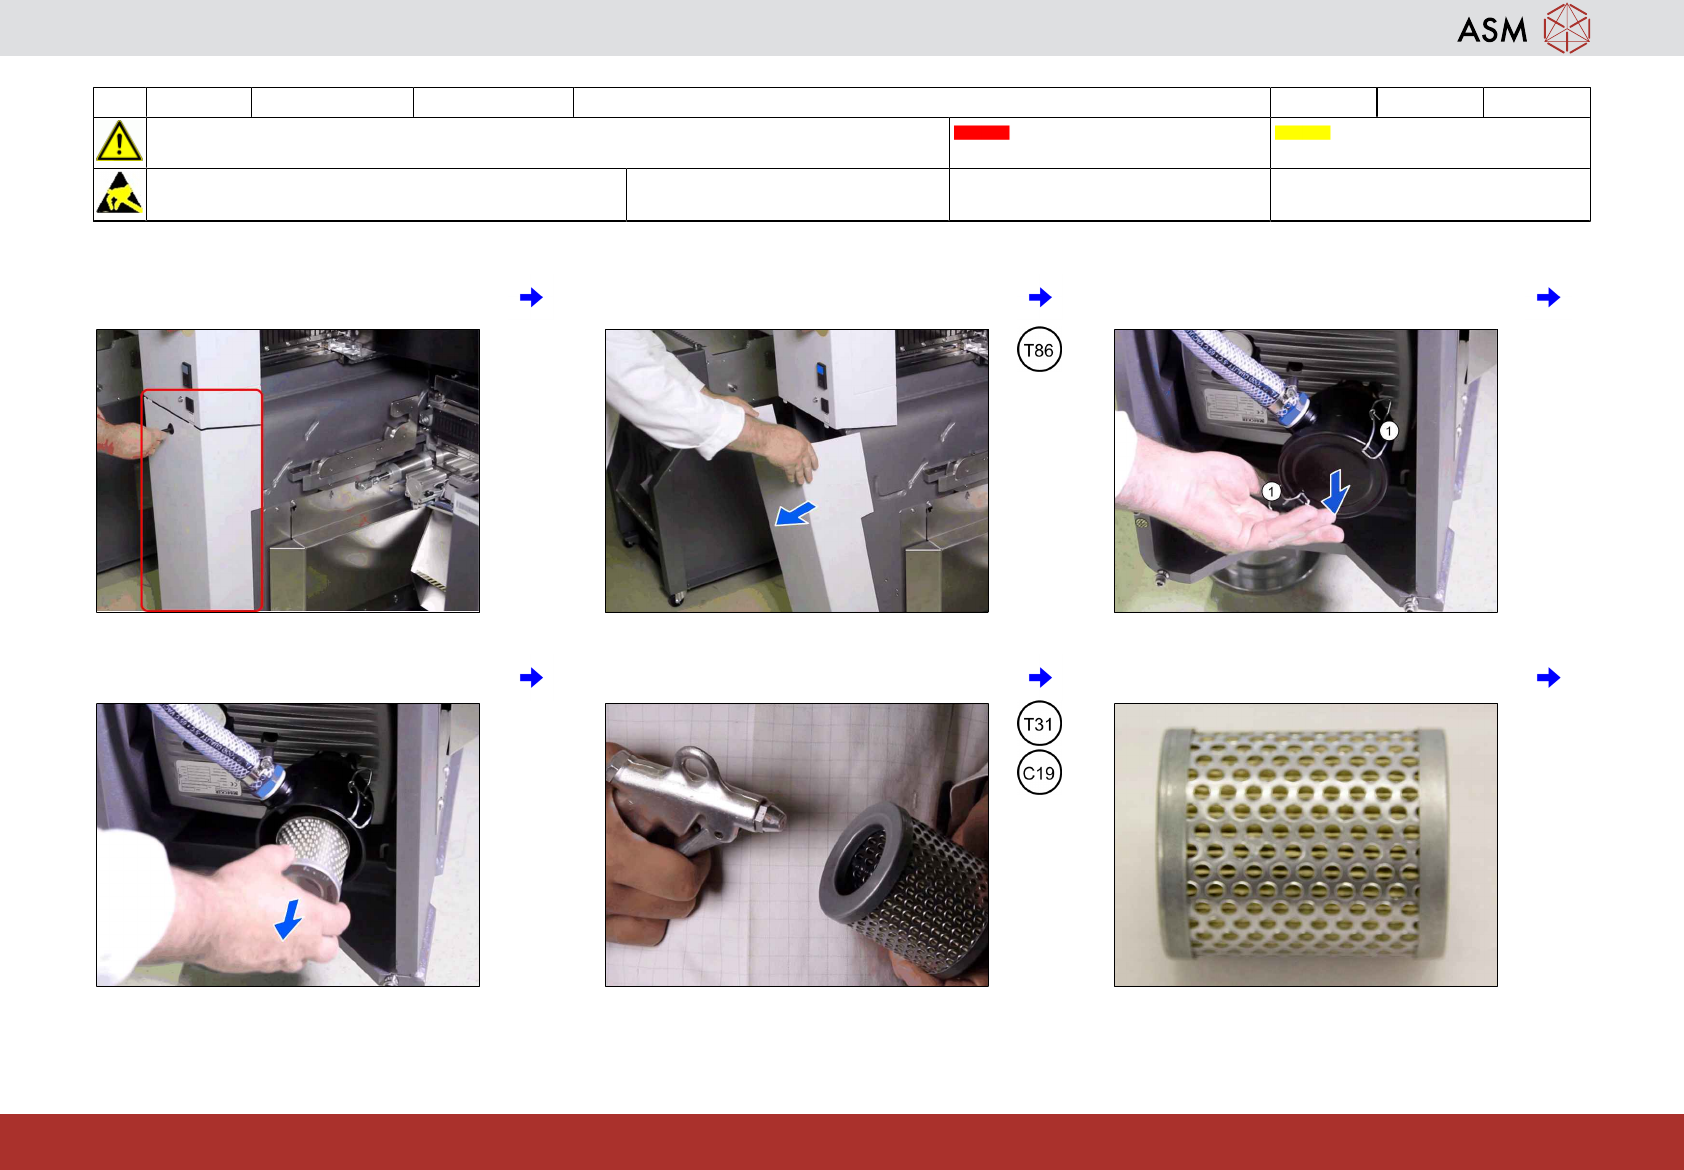
1 Pump location. 2 Open panel. 3 Open the edgewise retaining clamp (1)
and remove cap.
4 Remove the vacuum filter. 5 Clean the vacuum filter. 6 If OK go to step 8.