00196658-01 - IM SIPLACE Pro 7.1_en.pdf - 第28页
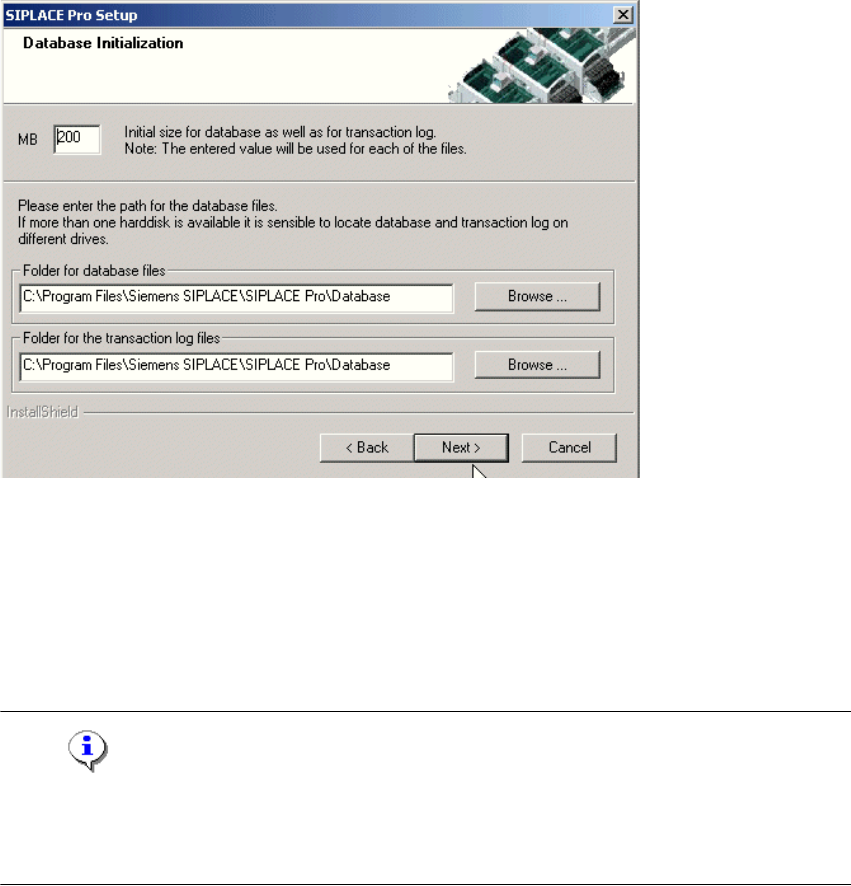
Installation Manual 4 Installation of SIPLACE Pro and possible Setup Types SIPLACE Pro 7.1 Edition 11/2009 US 26 4 Fig. 4 - 13 "Database initialization" dialog box The figure you enter in the MB text box define…
4 Installation of SIPLACE Pro and possible Setup Types Installation Manual
Edition 11/2009 US SIPLACE Pro 7.1
25
After a fresh MSDE or SQL Server 2005 Express installation, the password is the Siemens Ser-
vice default password. 4
Æ Choose your SQL Server Instance from the drop-down menu.
Æ Click Next
Step 5
4
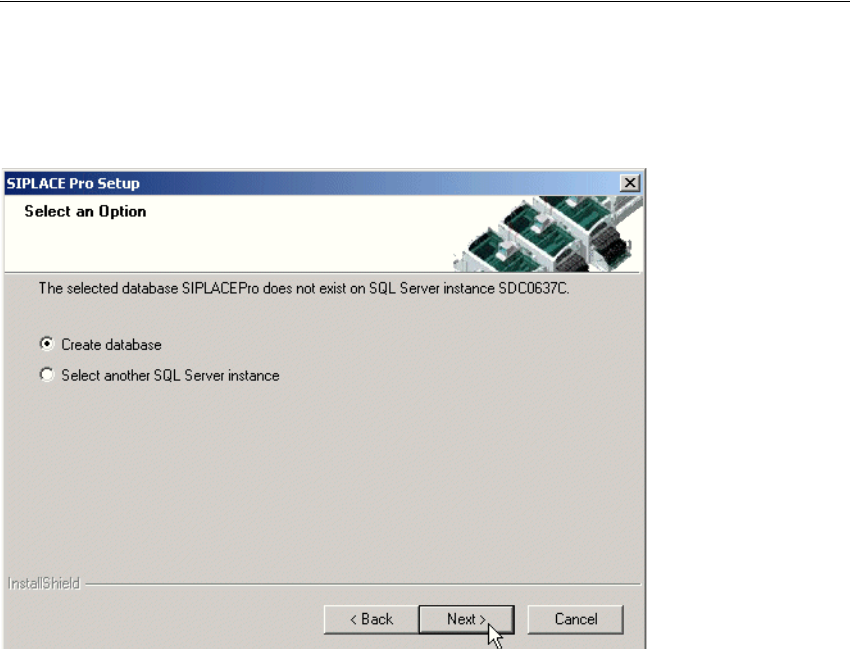
Fig. 4 - 12 "Create database" dialog box - in case no database exists
Æ If you choose Select another SQL Server instance you will be returned to the previous
dialog.
Æ Click Next to create a new database
4
Installation Manual 4 Installation of SIPLACE Pro and possible Setup Types
SIPLACE Pro 7.1 Edition 11/2009 US
26
4
Fig. 4 - 13 "Database initialization" dialog box
The figure you enter in the MB text box defines the size of the SIPLACE Pro database files
(SIPLACE Pro Data.mdf and SIPLACE Pro Log.ldf) which are to be created during the
installation. 4
Æ Confirm the default value or
Æ enter the size you want in the MB text box.
Note
The specified size is only an initial value. The database will grow automatically as required.
However, only intervention by the database administrator is capable of freeing up unused disk
space. 4
Æ In the "database files" field, enter the directory in which the SIPLACE Pro Data.mdf file is to
be created.
Æ In the transaction log files field, enter the name of the directory in which the
SIPLACE Pro Log.ldf database file is to be created.
Æ Click Next.
4 Installation of SIPLACE Pro and possible Setup Types Installation Manual
Edition 11/2009 US SIPLACE Pro 7.1
27
Note
You can specify a different folder for each of the database files. Indeed, having the files on different
hard disks can improve disk access performance. 4
Step 6
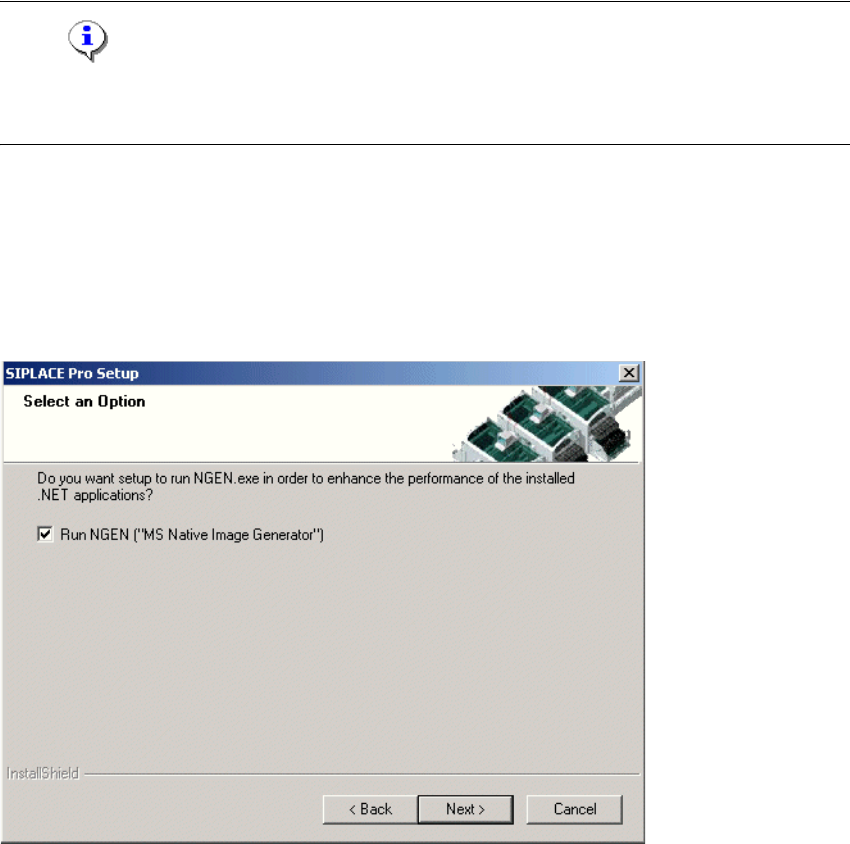
In the "Select an Option" dialog box the Native Image Generator (NGEN) may be configured. By
default this option is activated. In case the Native Image Generator is activated, this tool performs
some time-consuming optimization steps during installation. This results later on in much higher
performance each time SIPLACE Pro applications (Desk, LC GUI, LC Server) are started 4
4
Fig. 4 - 14 Native Image Generator setup
Æ Click Next to start the setup.
Step 7
The "Start Copying Files" dialog box gives you a last chance to check the information you have
entered during the previous steps. 4