manual-biron-100-precision-soldering-tool-jbc-0033098_ID-243824_EN.pdf - 第3页
ø 1 ø 1,5 ø 3,5 3 40 mm 50 mm 60 mm 80 mm 100 mm 130 mm 130 mm par a manuales - c olor g r is 200 mm 300 mm B·I RO N 1 0 0 TOOL Precision Handle Power Socket USB Connec tor USB Cable * Bluetooth Connection PDS Portable D…
2
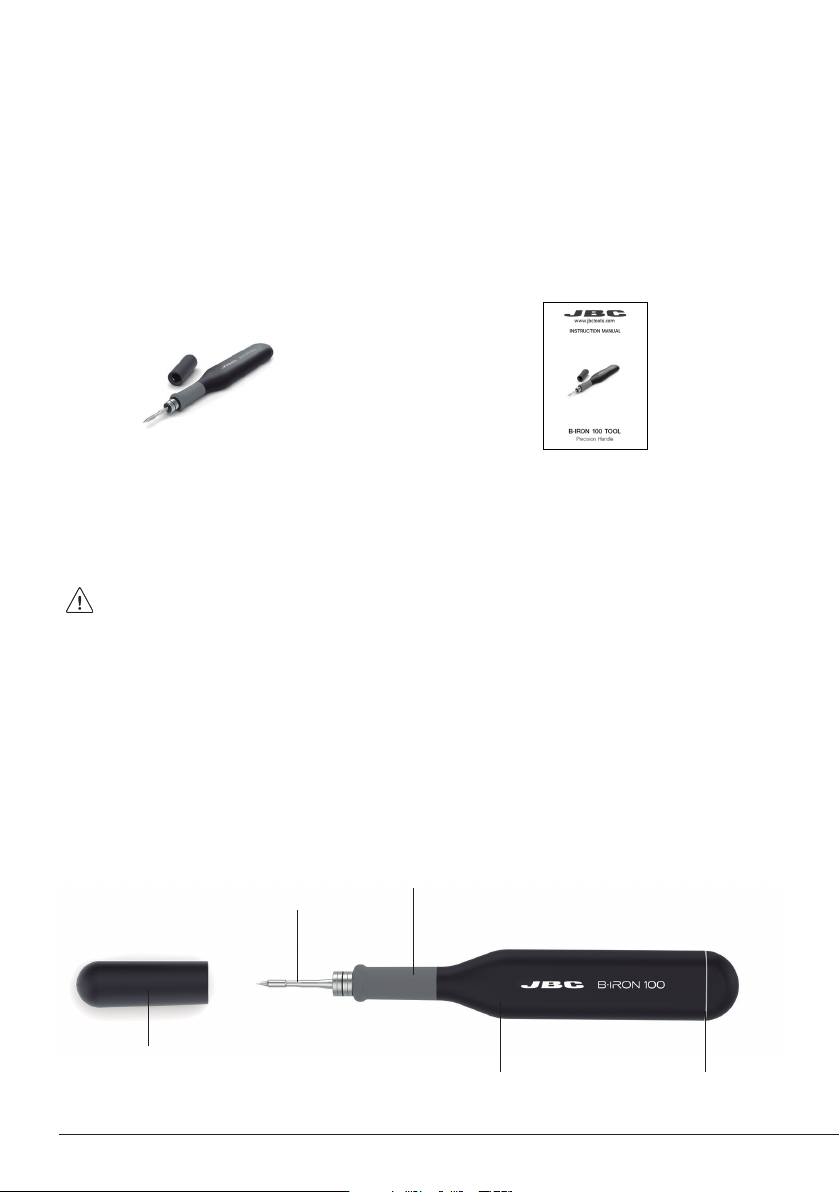
Packing List
The following items are included:
Features
B·IRON 100 TOOL
Precision Handle ...................................... 1 unit
Includes Ref. 0031596 Safety Cap for B·IRON handles.
Cartridge not included, sold separately.
This manual corresponds to the following reference:
B100-A
Manual ............................................................ 1 unit
Ref. 0033098
Safety Cap
Ref. 0031596
C210*
Cartridge Range
Status LightbandHandle
Please read this manual and its safety guidelines thoroughly before using the product.
* Not included, sold separately.
B0001*
Grips
B·IRON 100 TOOL performs up to 100 SMD soldering joints per charge and is the ideal tool for
applicationes in laboratories or performing individual soldering jobs.
Its technical performance has enabled a comfortable and lightweight design.
Note: To charge the tool a B·IRON station is needed.
ø 1
ø 1,5
ø 3,5
3
40 mm
50 mm
60 mm
80 mm
100 mm
130 mm
130 mm
para manuales - color gris
200 mm
300 mm
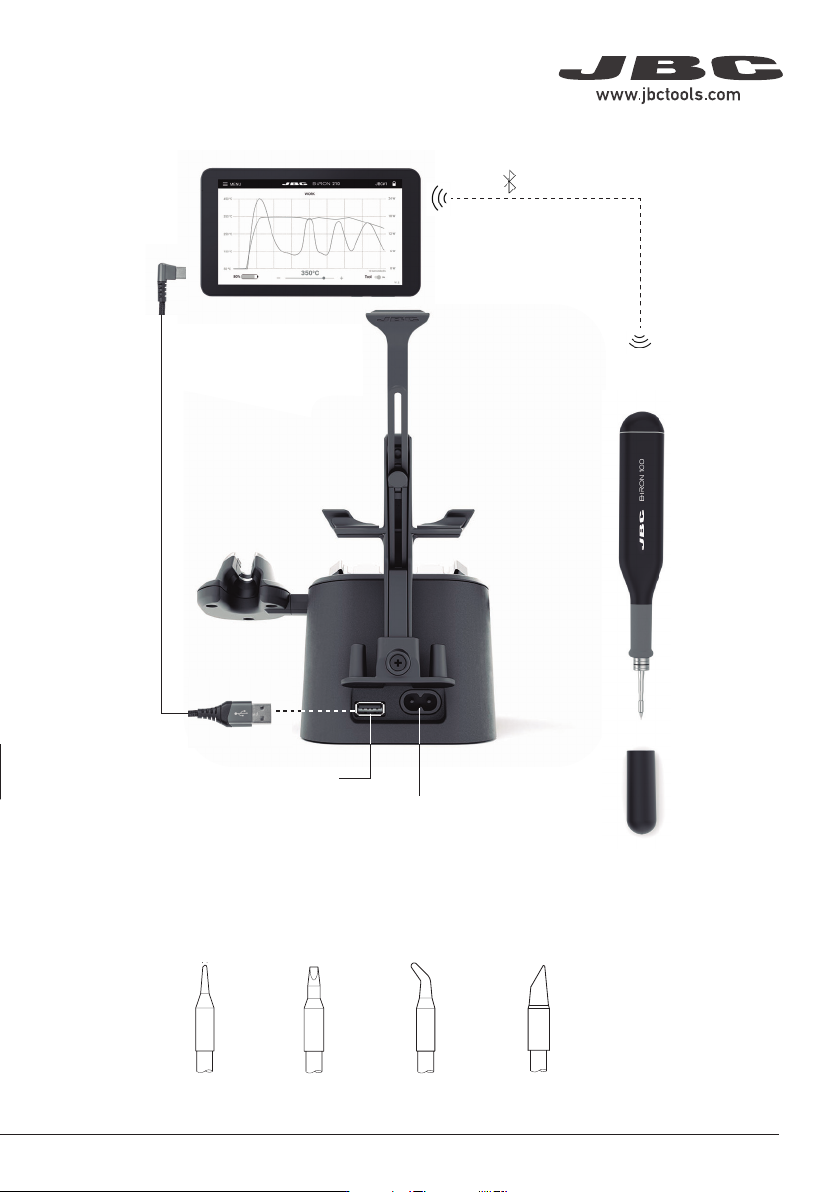
B·IRON 100 TOOL
Precision Handle
Power Socket
USB Connector
USB Cable *
Bluetooth
Connection
PDS
Portable Display 7”
for B·IRON *
Connection with B·IRON Station
* Not included, sold separately.
B·IRON 100 TOOL works with C210 Cartridges. Find the model that best suits your soldering needs
on www.jbctools.com
Conical Chisel Conical
Bent
Bevel
Compatible Cartridges*
3
1
4
2
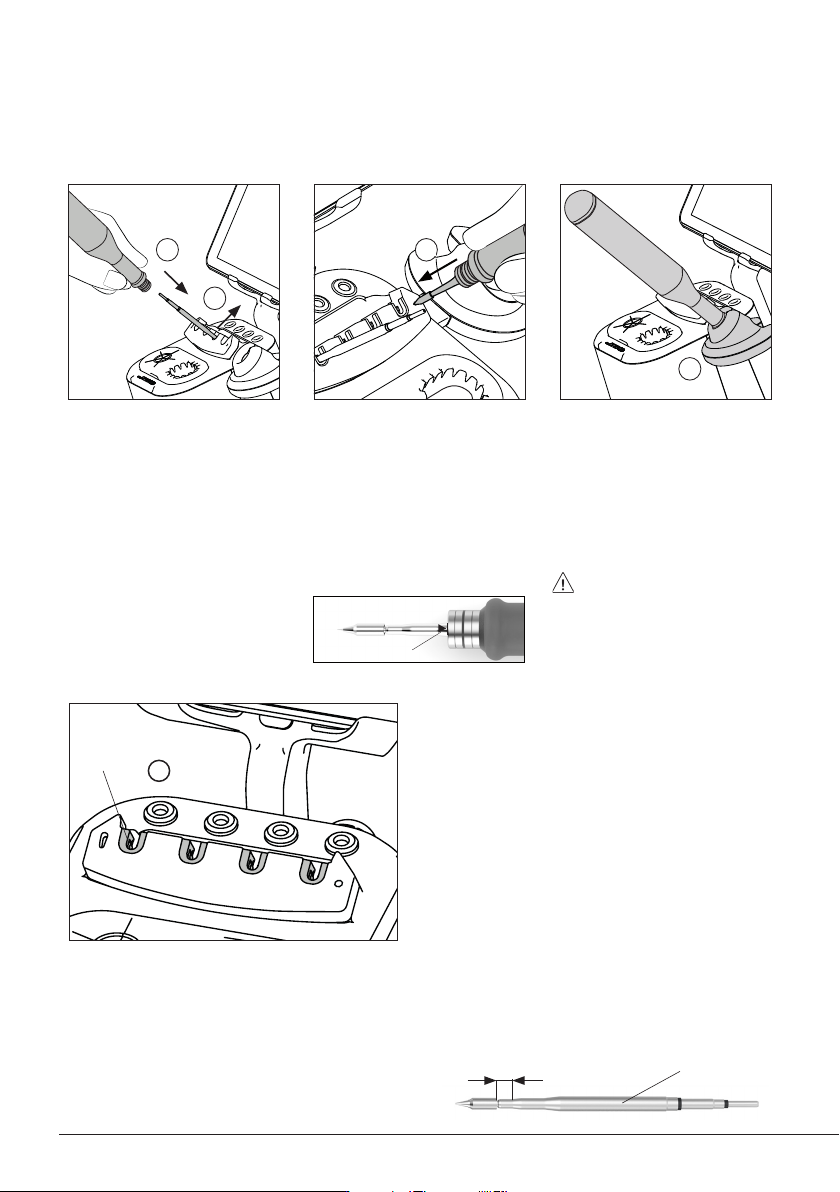
6. Cartridge Insertion and Charging
Place the tool over a cartridge
and press the tool down to insert
the cartridge (1). To release the
tool with the cartridge from the
extractor, lift the tool upward (2).
Make sure that the cartridge is
appropriately inserted* into the
tool by gently pressing the tip
against the holes on the sides
of the cartridge exchanger (3).
*Important: Cartridges must
be inserted up to the mark for
a proper connection.
Place the tool on the tool charger
(4) to charge it. A beep will sound
to confi rm that the tool is properly
placed and charging.
The sound can be turned up,
down or off using the buttons on
the display.
Note: Charge the tool
completely before using it for
the first time. It will take aprox.:
-30min for B·IRON 100 TOOL
-60min for B·IRON 500 TOOL
-30min for B·NANO TOOL
-40 min for B·TWEEZERS TOOL
For more information on how to change cartridges and the use of the cartridge exchanger, see section
“Cartridge Exchanger and Cartridge Holder”.
Inserting Fixing Charging
Mark
1
2
5
Retention
Clamps
Cartridge Exchanger
Cartridges are held in place inside the cartridge
exchanger thanks to the retention clamps (5),
with the advantage that the cartridges do not
fall into the exchanger and the cartridge tips are
therefore protected.
The cartridge exchanger of B·IRON stations
works with C210 and C115 cartridges.
Cartridge Retention
The cartridge exchanger saves time and allows to change cartridges safely without switching the
tool off.
Place the cartridge over one of the slots of the
cartridge exchanger and press down (1) until
you hear a click. Then pull the handle out (2)
to remove the cartridge.
1. Removing Cartridges
Cartridge
Exchanger
C115
Cartridge
Place the handle over a cartridge and press the
handle down to insert the cartridge.
2. Inserting Cartridges
C115 Cartridge Retention Area
The holding area of C115 cartridges is delimited
by the two rings at the cartridge shaft (x).
C210 Cartridge Retention Area
The holding area of C210 cartridges goes from
the collar of the tip until the cartridge begins
to widen (x).
C210
Cartridge
x
x
1
2
5
Retention
Clamps
Cartridge Exchanger
Cartridges are held in place inside the cartridge
exchanger thanks to the retention clamps (5),
with the advantage that the cartridges do not
fall into the exchanger and the cartridge tips are
therefore protected.
The cartridge exchanger of B·IRON stations
works with C210 and C115 cartridges.
Cartridge Retention
The cartridge exchanger saves time and allows to change cartridges safely without switching the
tool off.
Place the cartridge over one of the slots of the
cartridge exchanger and press down (1) until
you hear a click. Then pull the handle out (2)
to remove the cartridge.
1. Removing Cartridges
Cartridge
Exchanger
C115
Cartridge
Place the handle over a cartridge and press the
handle down to insert the cartridge.
2. Inserting Cartridges
C115 Cartridge Retention Area
The holding area of C115 cartridges is delimited
by the two rings at the cartridge shaft (x).
C210 Cartridge Retention Area
The holding area of C210 cartridges goes from
the collar of the tip until the cartridge begins
to widen (x).
C210
Cartridge
x
x
4
Cartridge Insertion and Charging