00196478-08_MM_SX12DX12_en.pdf - 第69页
Major Maintenance 5.6.3 Performing Maintenance Ta sks Maintenance Tasks for the Con veyor Maintenance Manual SIPLACE SX1/SX2/DX1/DX2 69 SXDX12 V1 Cle aning and Pres erving the Gu ide Shafts Cleaning and Preserving the Gu…
Major Maintenance
Maintenance Tasks for the Conveyor 5.6.3 Performing Maintenance Tasks
68 Maintenance Manual SIPLACE SX1/SX2/DX1/DX2
Cleaning and Preserving the Linear Guides
SXDX12 V1 Cleaning and Preserving the Linear Guides
Cleaning and Preserving the Ball Screws
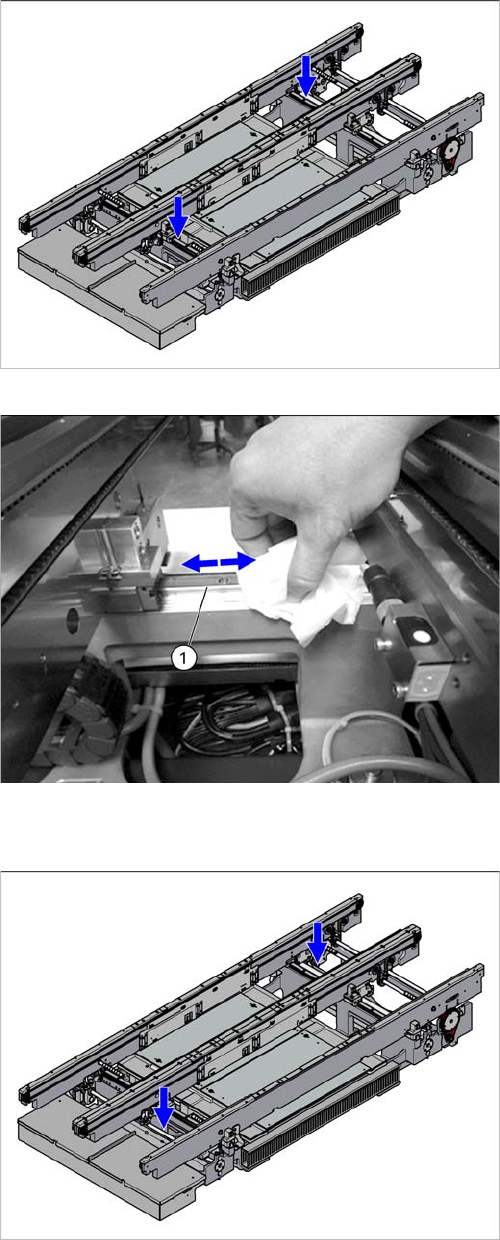
Overview of the linear guides in the conveyor
► Clean the linear guide rails for the conveyor sides (1)
and the width adjustment with a SIPLACE cleaning
tissue.
► Repeat the procedure for all linear guide rails in the
conveyor.
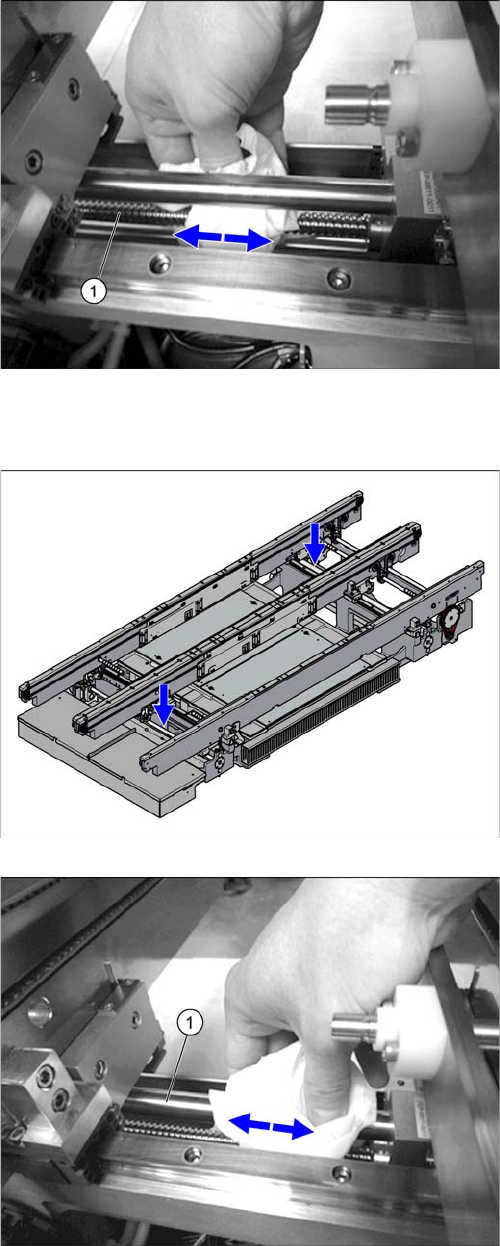
Overview of the ball screws in the conveyor
Major Maintenance
5.6.3 Performing Maintenance Tasks Maintenance Tasks for the Conveyor
Maintenance Manual SIPLACE SX1/SX2/DX1/DX2 69
SXDX12 V1 Cleaning and Preserving the Guide Shafts
Cleaning and Preserving the Guide Shafts
► Clean and preserve the recirculating ball screw (1) by
running a SIPLACE cleaning tissue along the thread
of the screw.
► Repeat this procedure for all ball screws in the con-
veyor.
Overview of the guide shafts in the conveyor
► Clean and preserve the guide shafts (1) on the width
adjustment with a SIPLACE cleaning tissue.
► Repeat the procedure for all guide shafts in the con-
veyor.
Major Maintenance
Maintenance Tasks for the Conveyor 5.6.3 Performing Maintenance Tasks
70 Maintenance Manual SIPLACE SX1/SX2/DX1/DX2
Cleaning the Clamping Surfaces on the Basic Carrier (Dual Conveyor Only)
SXDX12 V1 Cleaning the Clamping Surfaces on the Basic Carrier (Dual Conveyor Only)
Preserving the Conveyor - Moving the Sides and Repeating Steps
Moving the Sides and Repeating Steps
► Now move all conveyor sides to the other side of the conveyor. Use the station software to set the
dual conveyor to single conveyor mode (left).
► Now perform the above mentioned cleaning and preserving steps to the other side of the conveyor.
See also
1.2 Preparatory Work... [ ➙ 12]
NOTICE
Width Adjustment
The clamping surfaces in the vicinity of the width adjustment may be difficult to access.
► In this case, move the width adjustment by carefully pulling on its belt, so that you can ac-
cess these areas and clean them.
CAUTION
Make sure that you do not get any oil on the clamping surfaces of the conveyor sides.
If you get oil on the clamping surfaces, their clamping force could be impaired.
► Clean this area thoroughly before you move the conveyor sides, to gain access to any areas
which have not been cleaned.
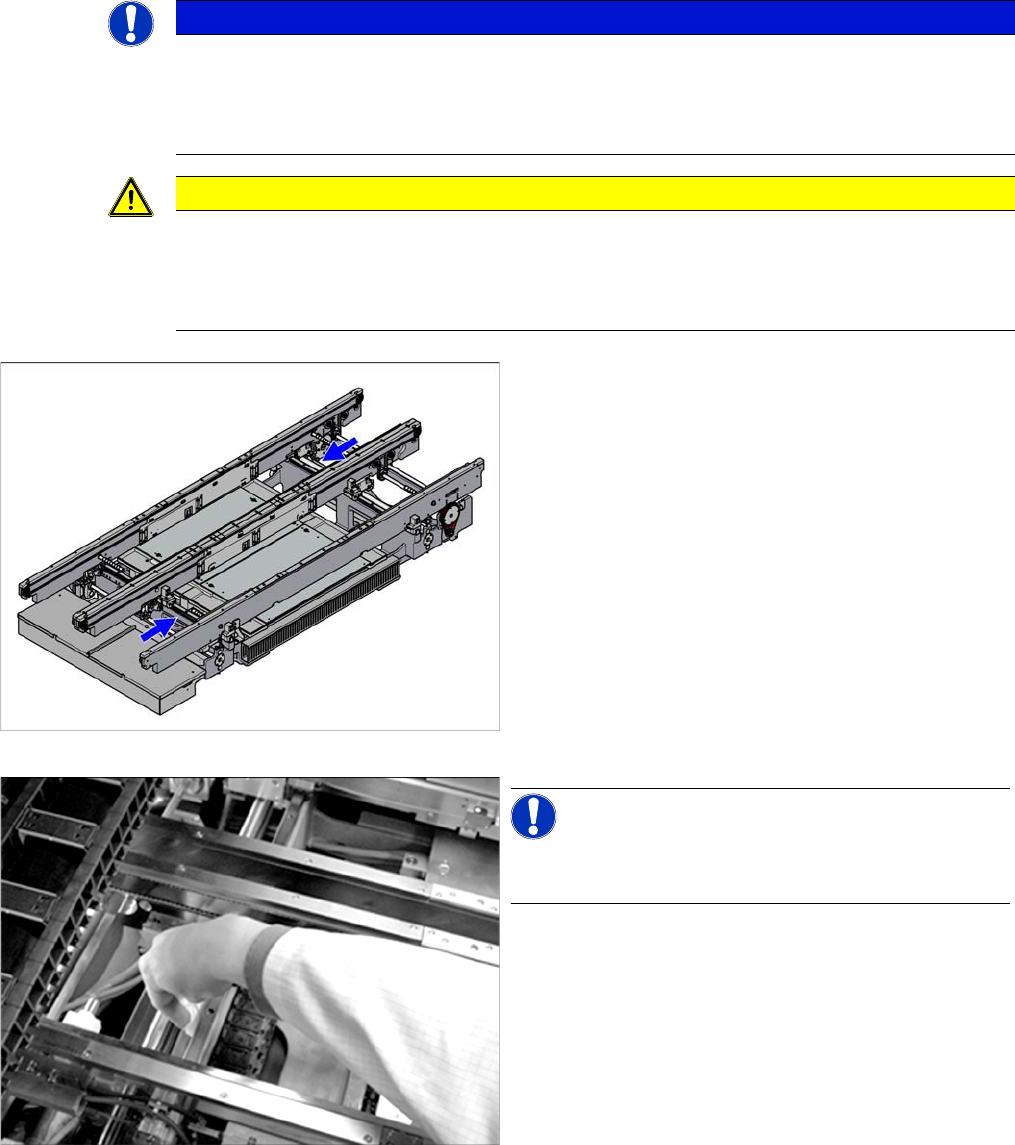
Overview of the clamping surfaces in the conveyor
NOTICE!
The clamping surfaces/clamping unit do not need to be
cleaned in single conveyors.
► Use a lint-free cloth and ethanol to remove the dirt
and any excess oil on the side clamping surfaces.
► Repeat the procedure for all clamping surfaces in the
conveyor.