00197191-02_IM_SIPLACE_Pro_10.1_EN.pdf - 第23页
4 Installation of SIPLACE Pro and possible Setup Types Installation Manual Edition 09/2012 SIPLACE Pro 10.1 21 4.2 S t arting inst allation – first step s These steps are ide ntical for all setup types. T he subsequent s…
Installation Manual 4 Installation of SIPLACE Pro and possible Setup Types
SIPLACE Pro 10.1 Edition 09/2012
20
4
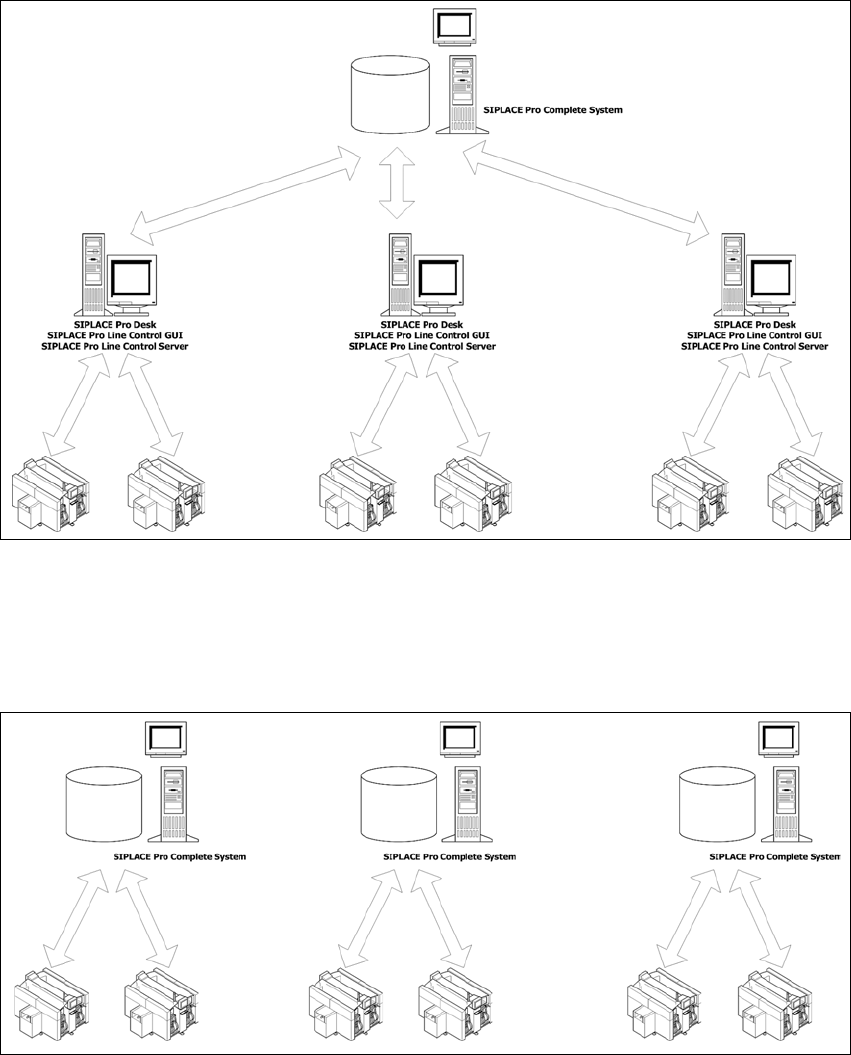
Fig. 4.1 - 1 Central Database
4.1.2 Dedicated Database
For every Line you have a dedicated SIPLACE Pro Server. Databases are independent.
4
Fig. 4.1 - 2 Dedicated Database
4 Installation of SIPLACE Pro and possible Setup Types Installation Manual
Edition 09/2012 SIPLACE Pro 10.1
21
4.2 Starting installation – first steps
These steps are identical for all setup types. The subsequent steps only differ once you have
selected the setup type you require.
Run through the following steps to start the installation and then refer to the relevant section
for your specific setup type.
Step 1
Insert the SIPLACE Pro installation CD into the CD-ROM drive. The installation routine starts
automatically.
You can also start the installation by running the Setup program located in the root directory
on the installation CD.
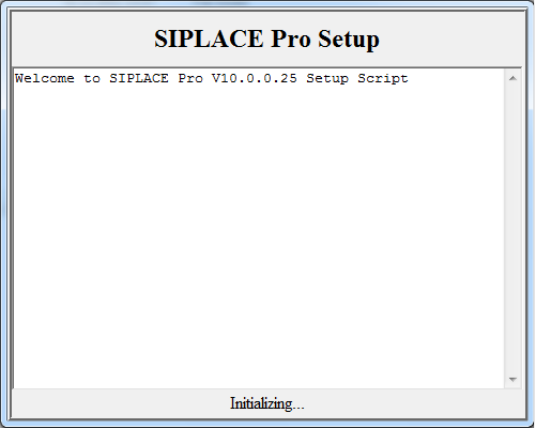
This starts the Initializing screen 4
4
Fig. 4.2 - 1 Example of "Initializing" dialog box
After initialization, Setup will check for already installed versions of SIPLACE Pro. 4
If Setup doesn't find a version which needs to be upgraded, the window will close and Setup
will skip to the language selection. See Step 2 on page 24. 4
Installation Manual 4 Installation of SIPLACE Pro and possible Setup Types
SIPLACE Pro 10.1 Edition 09/2012
22
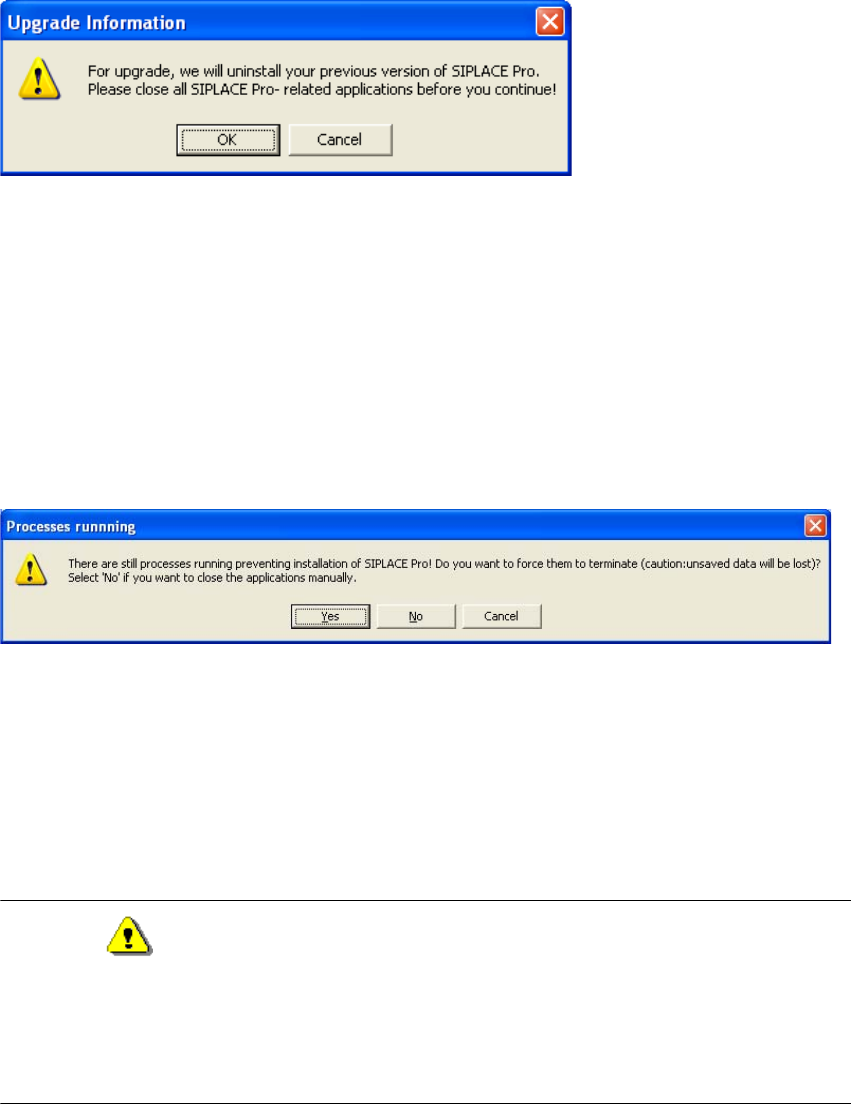
If Setup has found a previous version of SIPLACE Pro which is compatible for upgrade, the
following message will be shown: 4
4
Fig. 4.2 - 2 Upgrade Information Message
To continue with upgrade, you need to close SIPLACE Pro- related applications. If you find
that closing SIPLACE Pro- related applications is not appropriate just now, you may cancel
the upgrade by clicking on Cancel.
If you want to continue with Upgrade, you have to close all SIPLACE Pro- related applications
and click on OK.
After clicking OK, if SIPLACE Pro- related applications have still been found, the following
message will be shown 4
4
Fig. 4.2 - 3 Processes Running Message
To cancel the upgrade, click the Cancel button.
If you've closed SIPLACE Pro- related applications and want to check for remaining, click the
No button.
If you want to terminate all SIPLACE- Pro related applications automatically without unsaved
data being saved, click the Yes button.
Warning
It's strongly recommended to close all SIPLACE Pro- related applications manually, since
this ensures all unsaved data being saved. Terminating SIPLACE Pro- related applications
automatically should only be chosen if all data has been saved and you've problems iden-
tifying remaining applications. 4