N7201A617E00_0317.pdf - 第250页
NPM-W 2 EJM7DE-MB-07 M-00 Cleaning the no zzle holder 2 (Light weight16-/12-/8-nozzle head(option)) Detaching the nozzle holders 7-1 -3 Maintenance 7-1 ● For the rear side, 1 ● Y-axis of the front placemen t head moves t…

NPM-W2 EJM7DE-MB-07M-00
Every
1000
hours
PeriodicPeriodicPeriodic
inspection
7-1-2
NPM-W2 EJM7DE-MB-07M-00
Cleaning the nozzle holder 2
(Light weight16-/12-/8-nozzle head(option))
Detaching the nozzle holders
7-1-3
Maintenance
7-1
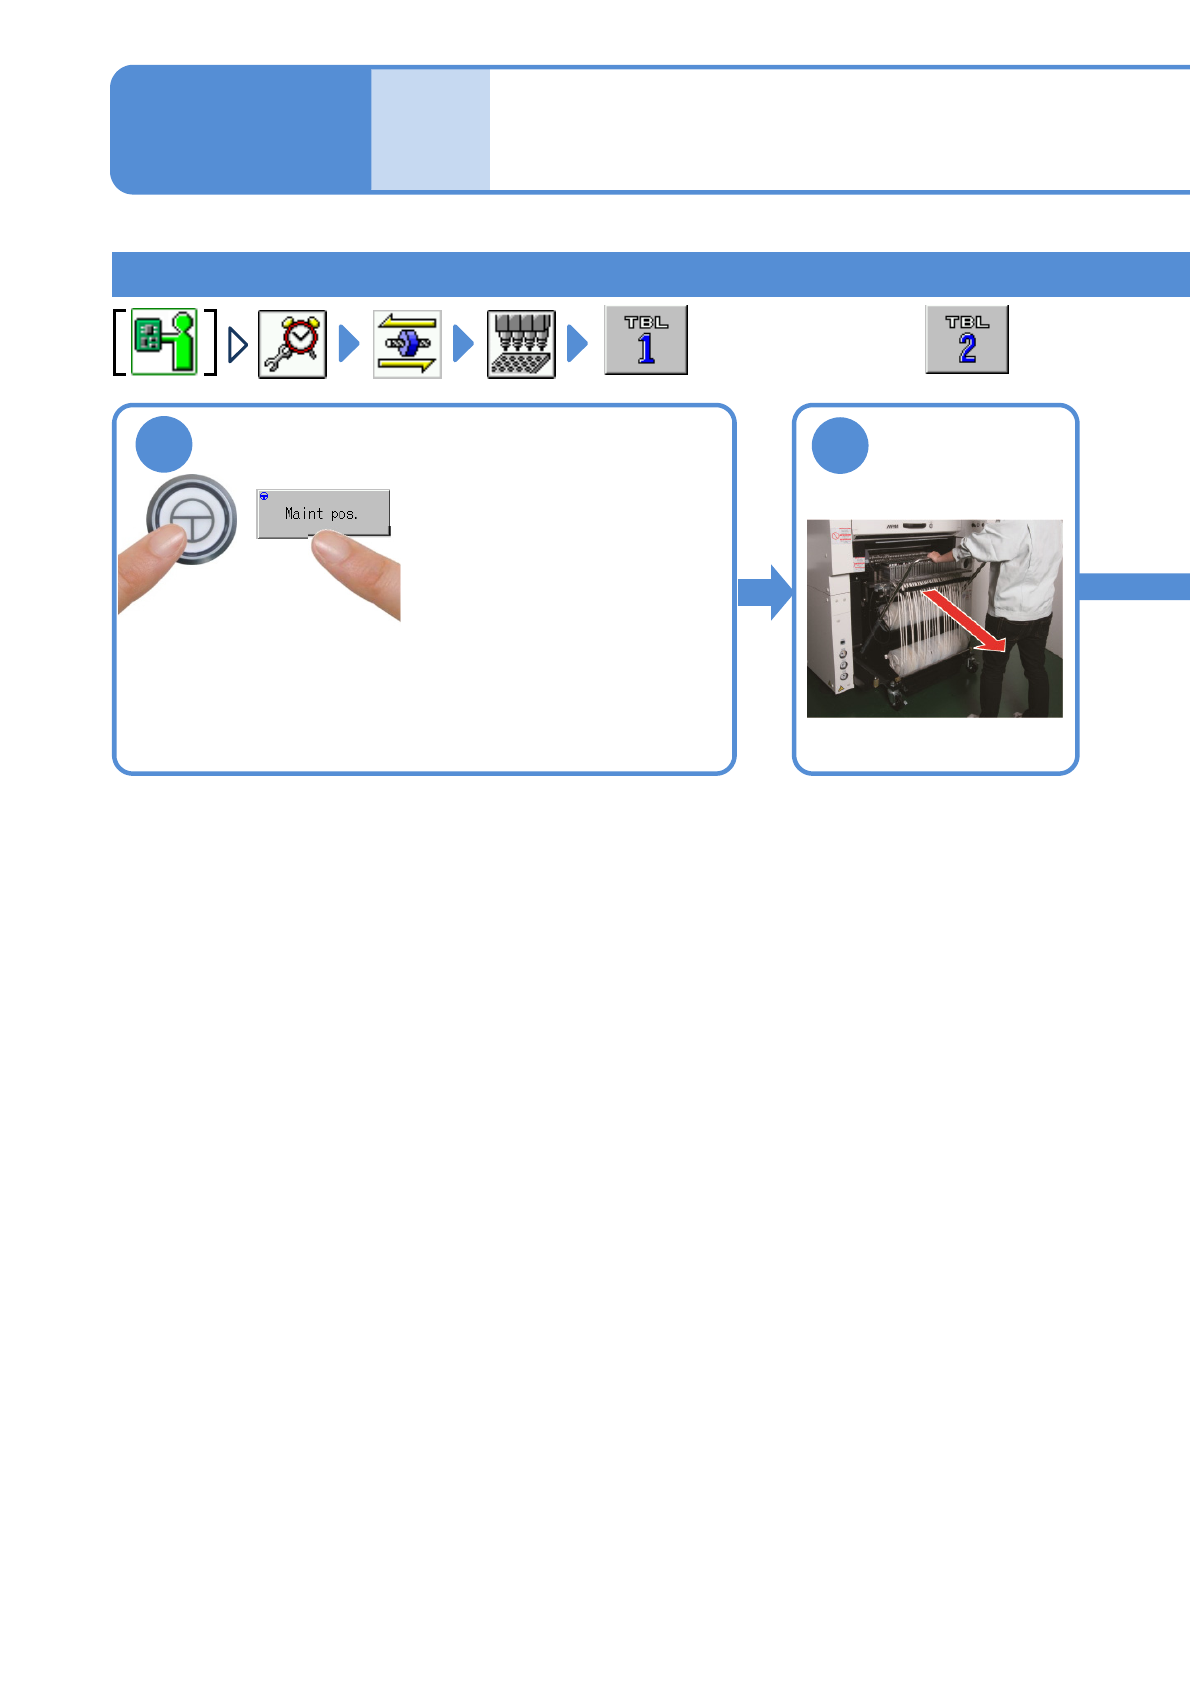
●For the rear side,
1
●Y-axis of the front placement
head moves to the front side.
●For feeder cart specification,
Y-axis of the rear placement
head moves to the rear side,
and for tray feeder
specification, it moves to the
front side.
Detach the
feeder cart
(→P.3-2)
2

NPM-W2 EJM7DE-MB-07M-00
To
5
7-1-4
4
Pull the nozzle out
Nozzle holderNozzle
●Pull it straight out. If pulled out at
an angle, the clamp claws could
be damaged.
NOTICE
3
Detach the nozzle holder
●Turn the nozzle clockwise as viewed from below while
pushing up it.
●Be careful not to let the nozzle cushion use spring pop out.
●The spring for holding clamp claws can be easily
deformed so you should avoid pressing it tightly with your
fingers.
●Follow the same procedure to detach all nozzle holders
from the transfer head.
■With nozzles attached
●Use the nozzle holder shaft cleaning tool (option).
●Align the groove on the 12-nozzle cleaning side with the
positioning pins of the nozzle holder.
●Turn the nozzle clockwise as viewed from below while
pushing up the cleaning tool.
■Without nozzles attached
Positioning pin
Cleaning tool
Groove
5
To
●Move the head to the position where your workability enhances.
●Work at the front side for front feeder cart specification and rear tray feeder specification.
●Work at the rear side for rear feeder cart specification.
Every
1000
hours
PeriodicPeriodicPeriodic
inspection