00198586-02_JC_PMWF2_TX_V2_EN.pdf - 第41页
13 WF 2 TX-Series V2 Maintenance Calibrate the maintained C&P20x 3 min 3 / 4 C A U T I O N ! R e f e r t o s a f e t y i n s t r u c t i o n s i n u s e r m a n u a l b e f o r e c o m m e n c i n g M a i n t e n a…
13 WF 2 TX-Series V2 Maintenance Calibrate the maintained C&P20x 3 min 2 / 4
CAUTION! Refer to safety instructions in user manual before commencing Maintenance
Machine Status ON Conveyor Empty
NOTICE! ESD guidelines are to be followed Tool:
T2, T4, T100
Wear Part:
W25
Consumables:
www.asm-smt.com
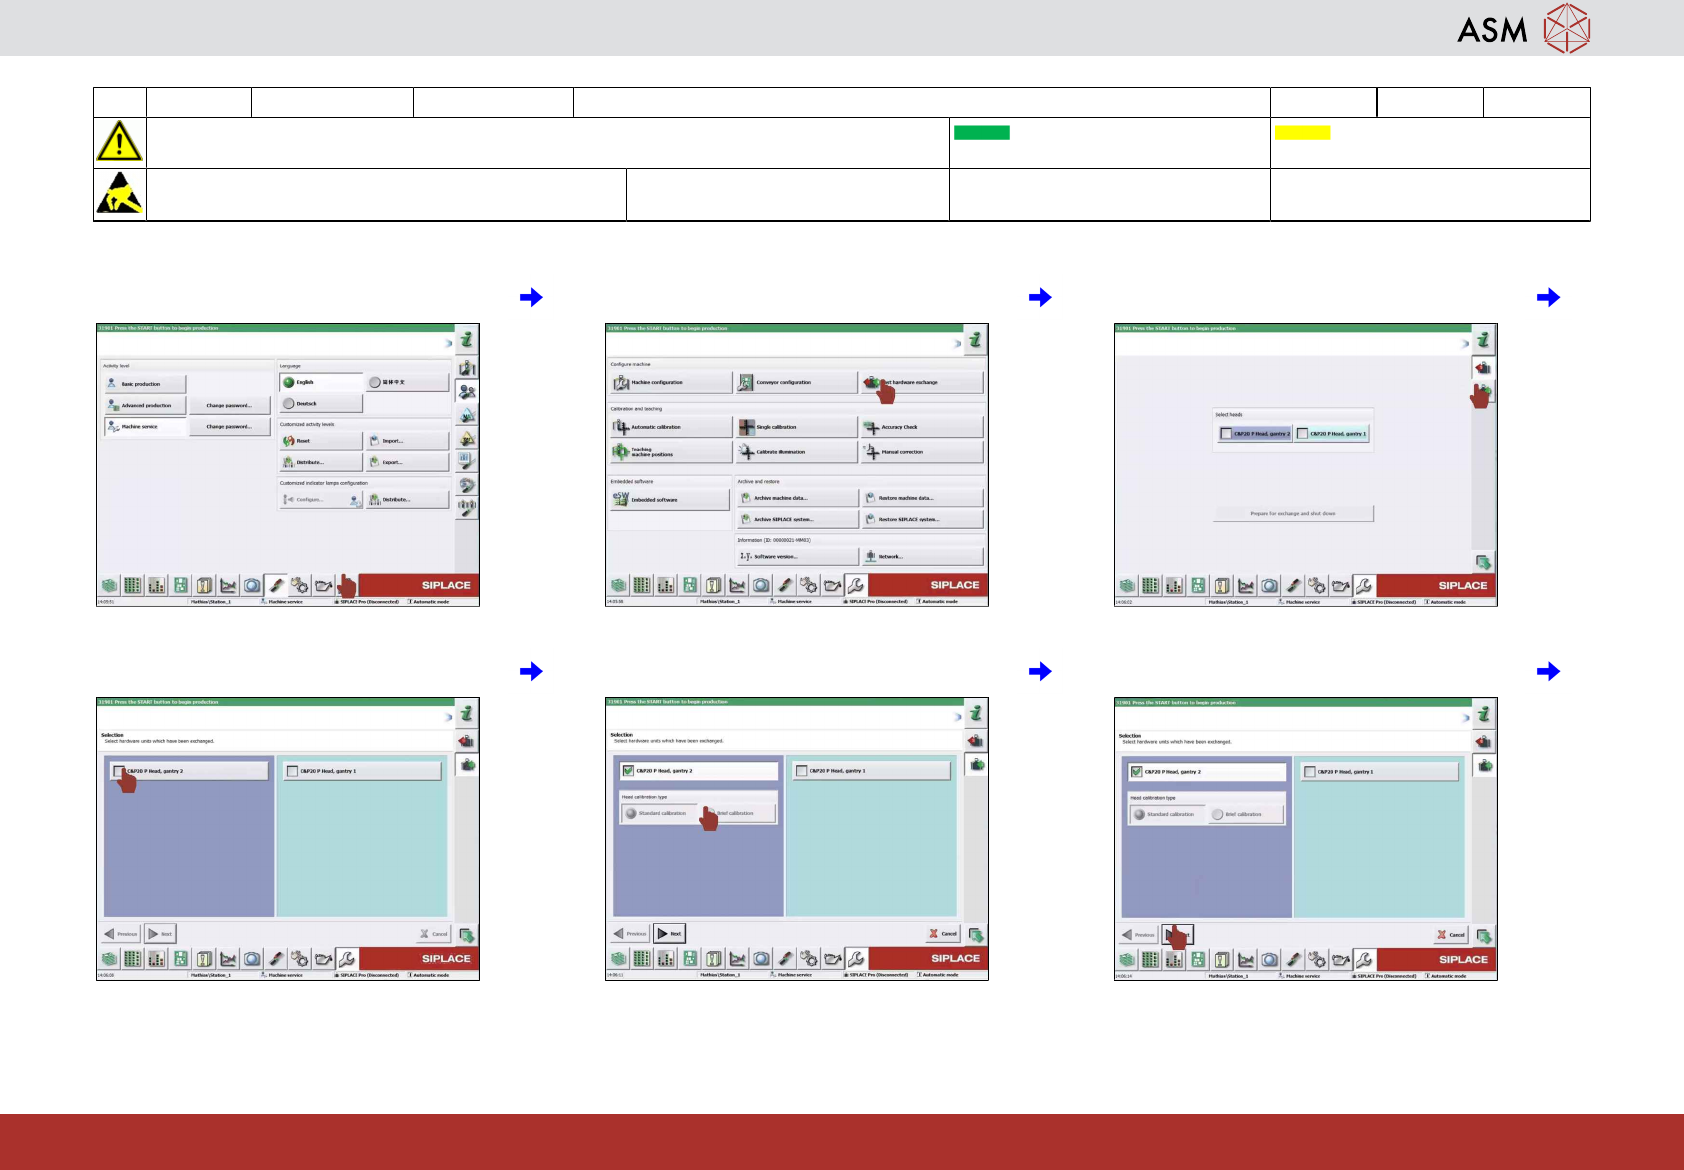
7 Click on "Machine calibration". 8 Click on "Fast hardware exchange". 9 Click on "Head exchange".
10 Select the head to be calibrated. 11 Select "Brief calibration" if possible. 12 Click on "Next".

13 WF 2 TX-Series V2 Maintenance Calibrate the maintained C&P20x 3 min 3 / 4
CAUTION! Refer to safety instructions in user manual before commencing Maintenance
Machine Status ON Conveyor Empty
NOTICE! ESD guidelines are to be followed Tool:
T2, T4, T100
Wear Part:
W25
Consumables:
www.asm-smt.com
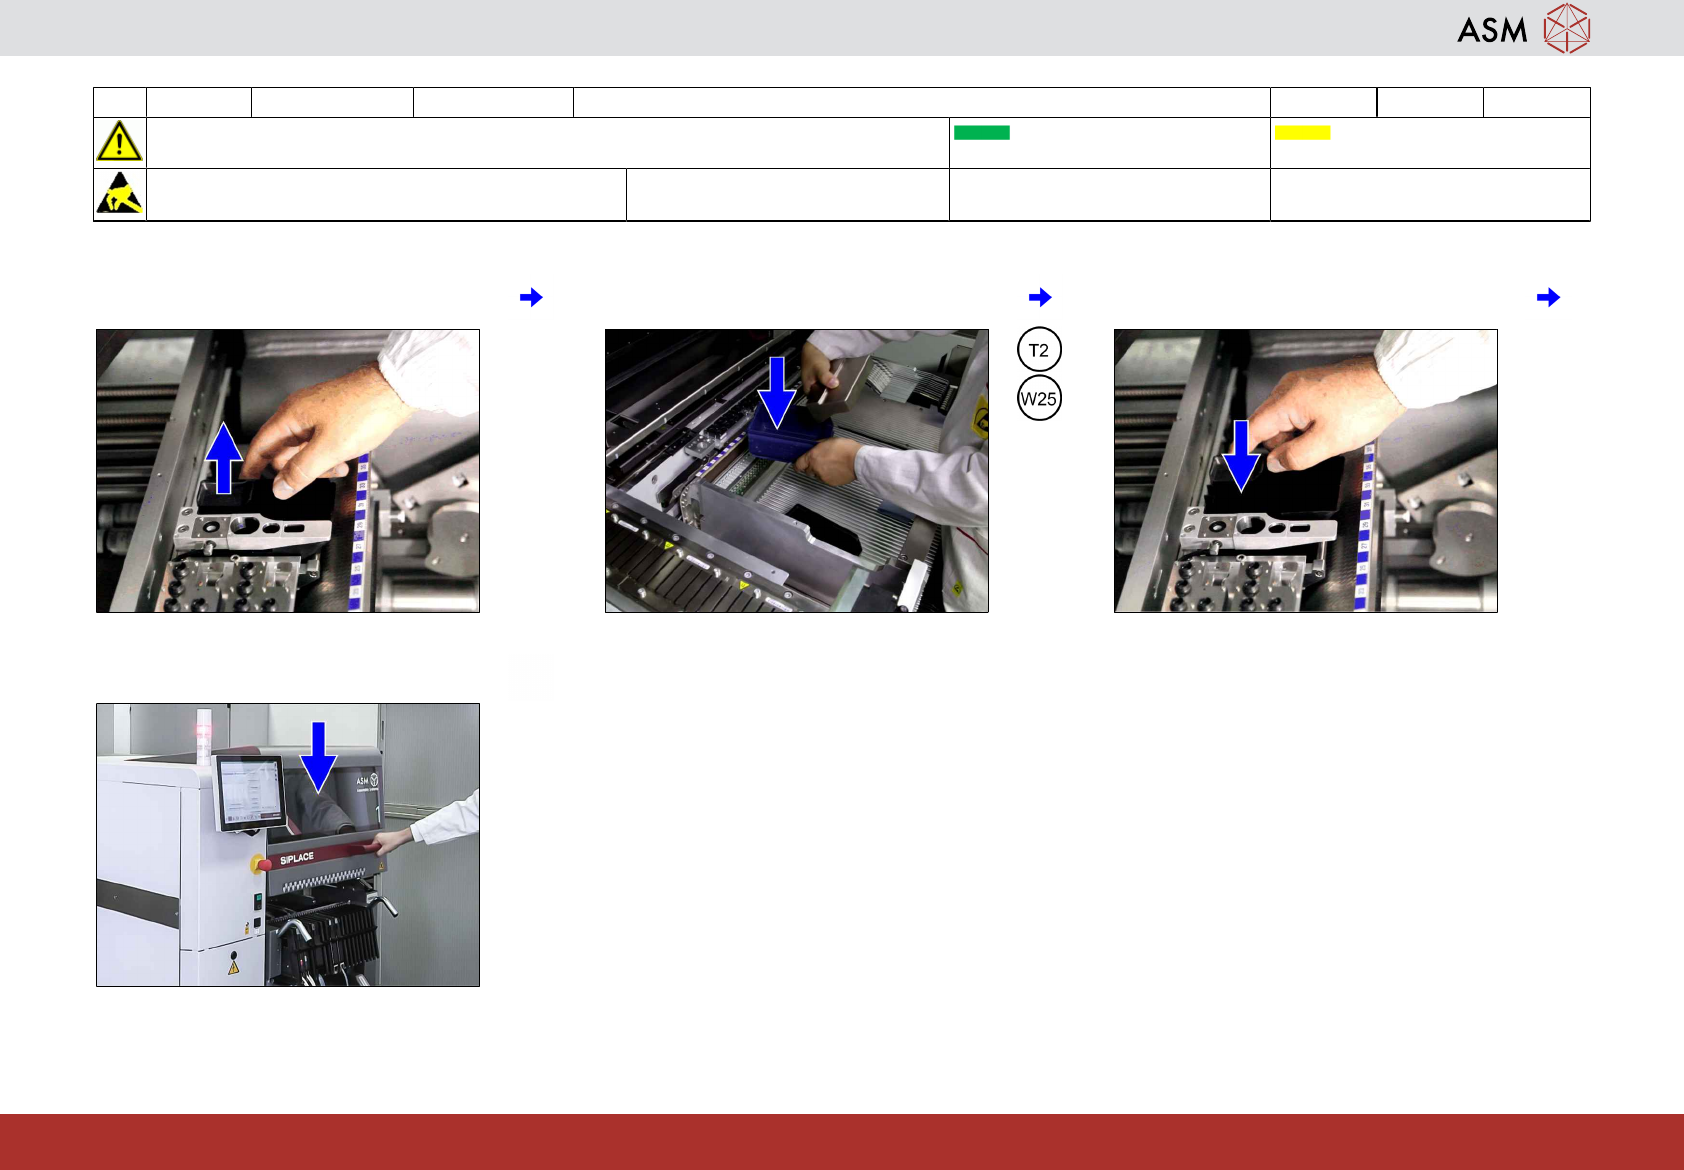
13 Check / modify nozzle configuration and
click on "Start".
14 Press the start button. 15 Click on "Finish".
16 Press the stop button. 17 Open the cover. 18 Remove the calibration tool.
13 WF 2 TX-Series V2 Maintenance Calibrate the maintained C&P20x 3 min 4 / 4
CAUTION! Refer to safety instructions in user manual before commencing Maintenance
Machine Status ON Conveyor Empty
NOTICE! ESD guidelines are to be followed Tool:
T2, T4, T100
Wear Part:
W25
Consumables:
www.asm-smt.com
19 Remove the reject bin. 20 Remove the calibration nozzles from the
reject bin.
21 Return the reject bin.
22 Close the cover.