Preventive_Maintenance.pdf - 第5页
Preventive Maintenance - XPM 2 5 Revision Date: October 2004 PREVENTIVE MAINTENANCE PROCEDURES Procedure 1: Lubricate Transport Convey or Chain (Interval - 2 weeks) NOTE : This procedure is automatic on Ovens equipped wi…
Preventive Maintenance - XPM
2
4 Revision Date: October 2004
PREVENTATIVE MAINTENANCE TIME ESTIMATES
Recommended Maintenance & Estimated Time (Based on 40 hour workweek, 52 weeks per year)
Procedure Interval Time Weekly Monthly Yearly
1 2 Weeks 5 Min 2.5 Min 10 Min 2 Hr 10 Min
2 2 Weeks 3 Min 1.5 Min 6 Min 1 Hr 18 Min
3 2 Weeks 5 Min 2.5 Min 10 Min 2 Hr 10 Min
4 3 Weeks 25 Min 8.33 Min 33.33 Min 7 Hr 13 Min
5 3 Months 25 Min 2.08 Min 8.33 Min 1 Hr 48 Min
6 3 Months 5 Min .42 Min 1.67 Min 21.67 Min
7 3 Months 30 Min 2.5 Min 10 Min 2 Hr 10 Min
8 3 Months 30 Min 2.5 Min 10 Min 2 Hr 10 Min
9 3 Months 5 Min 0.4 Min 1.15 Min 20 Min
10 6 Months 15 Min .58 Min 2.31 Min 32.5 Min
11 6 Months 10 Min .38 Min 1.54 Min 20 Min
12 6 Months 30 Min 1.15 Min 4.62 Min 60 Min
13 12 Months 5 Min .10 Min .38 Min 5.0 Min
14 12 Months 25 Min 0.5 Min 2.1 Min 25 Min
Totals: 25.43 Min 1 Hr, 42 Min 20 Hr 15 Min
Preventive Maintenance - XPM
2
5 Revision Date: October 2004
PREVENTIVE MAINTENANCE PROCEDURES
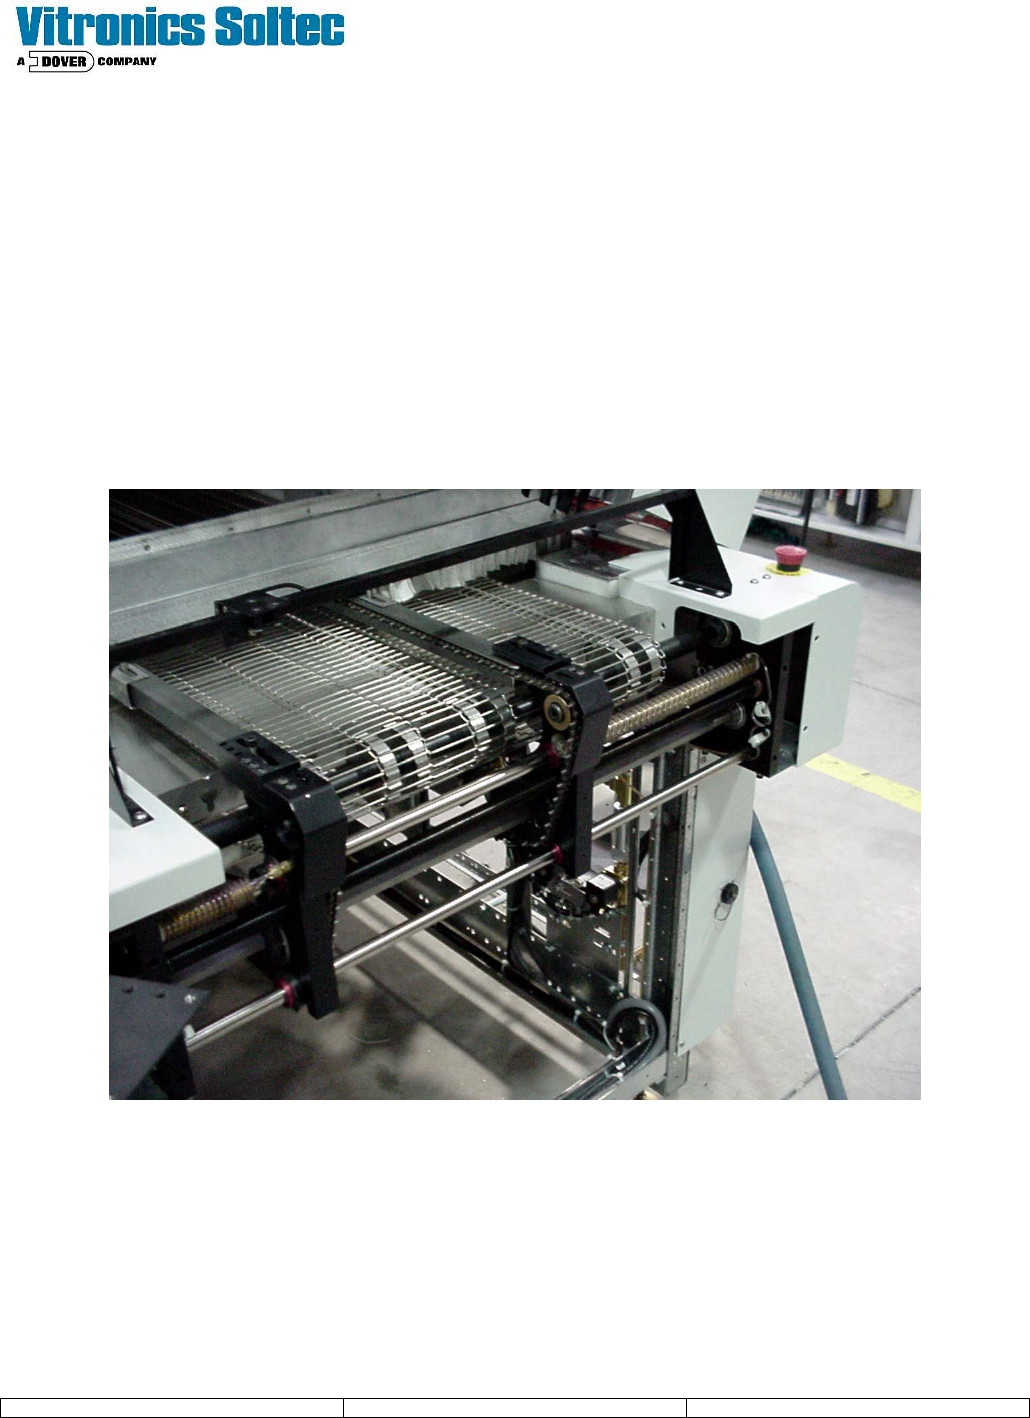
Procedure 1: Lubricate Transport Conveyor Chain
(Interval - 2 weeks)
NOTE: This procedure is automatic on Ovens equipped with the Computer Controlled Chain Lube option
On systems equipped with the Edge/Rail conveyor system, check the conveyor transport chain for lubrication.
The chain should be lubricated if it looks dry or the chain links do not move freely over the sprockets, Use
“Darmex” 773ND lubricant or equivalent. Remove the chain guards at the offload end of the system; apply the
lubricant with a small brush at the opening of the chain plates. Avoid getting lubricant on the product transport
pins. Apply the lubricant sparingly, do not soak the chain or apply it such quantities where the lubricant drips off.
Make sure the factory exhaust system is on and operating properly, as you may notice some fumes when the
heaters are turned on.
Remove Chain Guards
Preventive Maintenance - XPM
2
6 Revision Date: October 2004
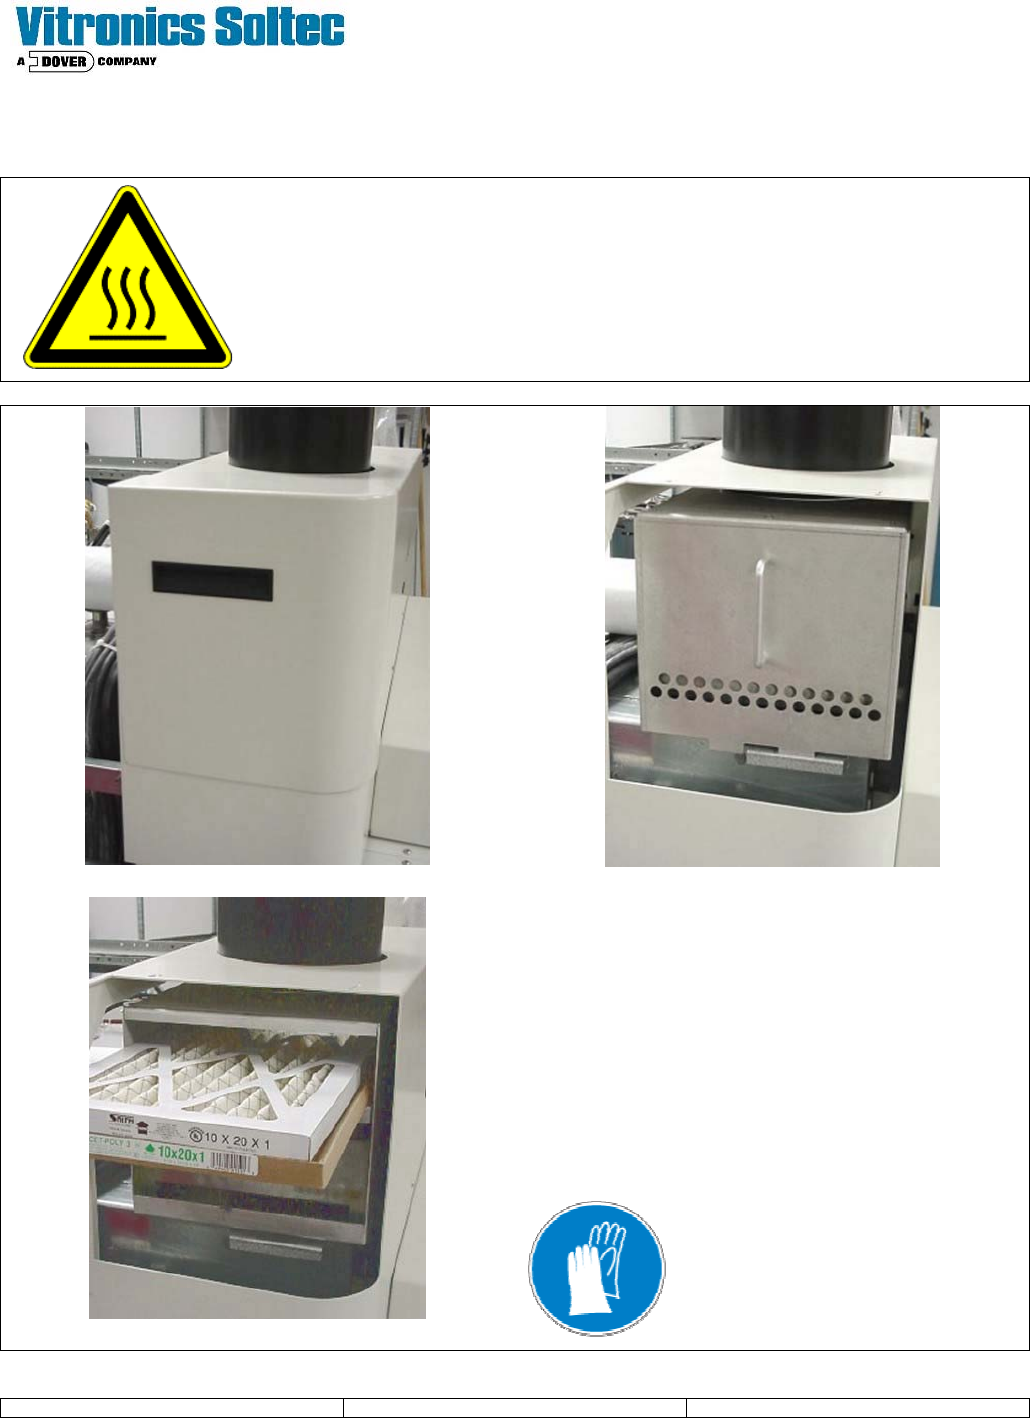
Procedure 2: Inspect and Replace the Exhaust Stack Filter
Interval - 2 weeks
.
All surfaces inside of the oven may be hot. This can include the
exhaust filter chamber and filters. Make sure that the system is
safe to touch before attempting this procedure
Figure 1
Figure 2
1. Lift up on handle to remove rear access panel (this
cover may be on either end depending on oven
configuration)
2. Lift up to remove inner filter cover.
3. Slide stack filters out and replace. Make sure that
the arrows printed on edge of filter are pointing up
in the direction of airflow.
Part # 1481601 Filter 1 x 10 x 20 Polyester
Part # 1481701 Filter 1 x 10 x 20 Sep Pleated
Figure 3
Caution: Filters may contain
hazardous materials. Use
appropriate personal protective
equipment and dispose of in
accordance with local regulations.