SA_HF_intern_0194307-02_eng.pdf - 第34页
3 Serv ice Gan tri es SIPL ACE HF-Ser ies Replacing the T railing Cable [03013940 -xx] 3-20 0019 43 07- 02 Is su e 1 1/ 2004 Copy ri gh t © 2 004 S ie m ens Adjust the tr ailing cable console (1) and press ure plates ,…
SIPLACE HF-Series
Replacing the Trailing Cable [03013940-xx]
Service
Gantries
3
Copyright © 2004 Siemens 00194307-02 Issue 11/2004 3-19
2
5
4
6
6
1
3
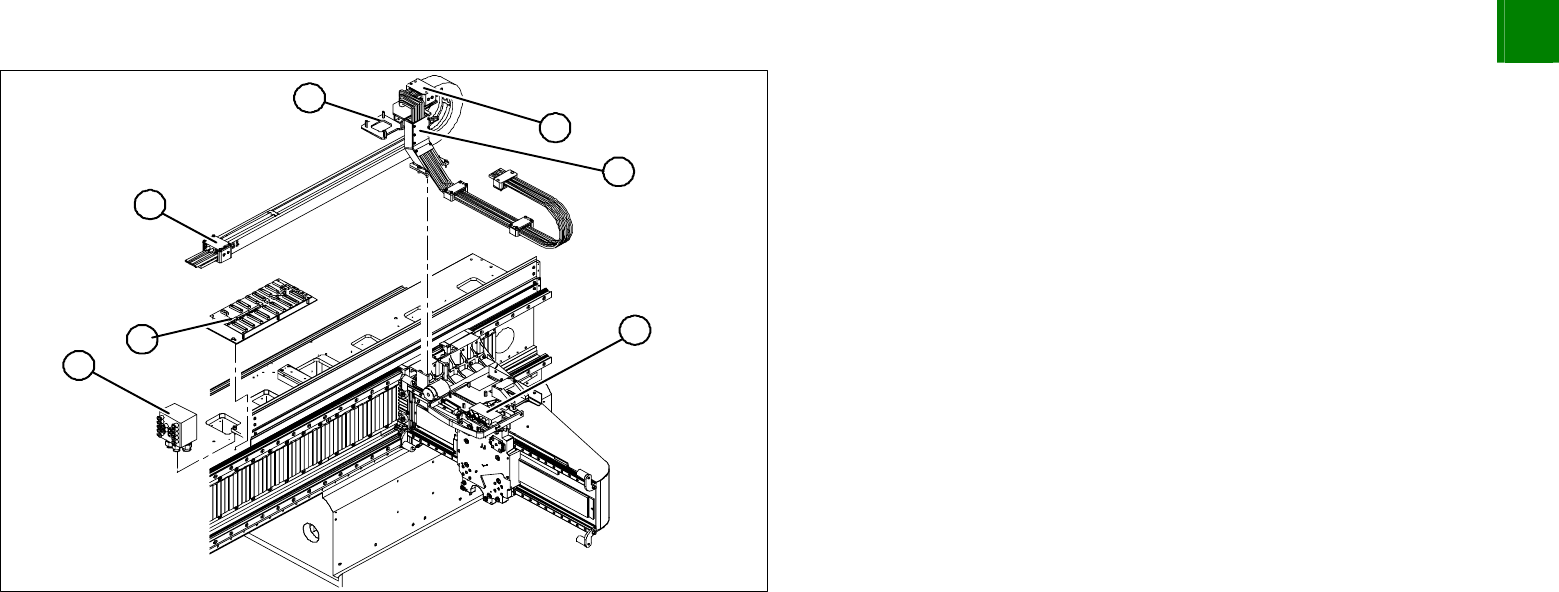
Install the gantry interface board onto the cable clamp (4) of the
new trailing cable.
Loosely fasten the trailing cable console (1) with a screw.
Clean the trailing cable contact surface on the machine base
with a dry cloth.
Starting from the trailing cable console (1), run the flat ribbon
cable and hoses to the appropriate connections:
Pneumatic distributor (2)
Trailing unit interface gantry (3)
Gantry interface (4)
Gantry distributor (5)
Reconnect to the electricity supply. Observe the correct
connector assignment.
Shorten the compressed air hoses to the optimum length,
making sure that they are not too short or long. They must
engage firmly but should not buckle.
Reconnect to the compressed air supply. Observe the correct
connector assignment.
Loosely fasten the pressure plates (6) to the machine base.
Check that the power track chain can run along the top of the
machine base without obstruction. Move the Y-axis back and
forth to check this.

3
Service
Gantries
SIPLACE HF-Series
Replacing the Trailing Cable [03013940-xx]
3-20
00194307-02 Issue 11/2004 Copyright © 2004 Siemens
Adjust the trailing cable console (1) and pressure plates, where
necessary.
Fix the two pressure plates (6) and the trailing cable console (1)
with Loctite 242.
Tighten the fastening screws for the trailing cable console (1)
crosswise.
SIPLACE HF-Series
Replacing the Trailing Cable [03013940-xx]
Service
Gantries
3
Copyright © 2004 Siemens 00194307-02 Issue 11/2004 3-21
5
1
3
2
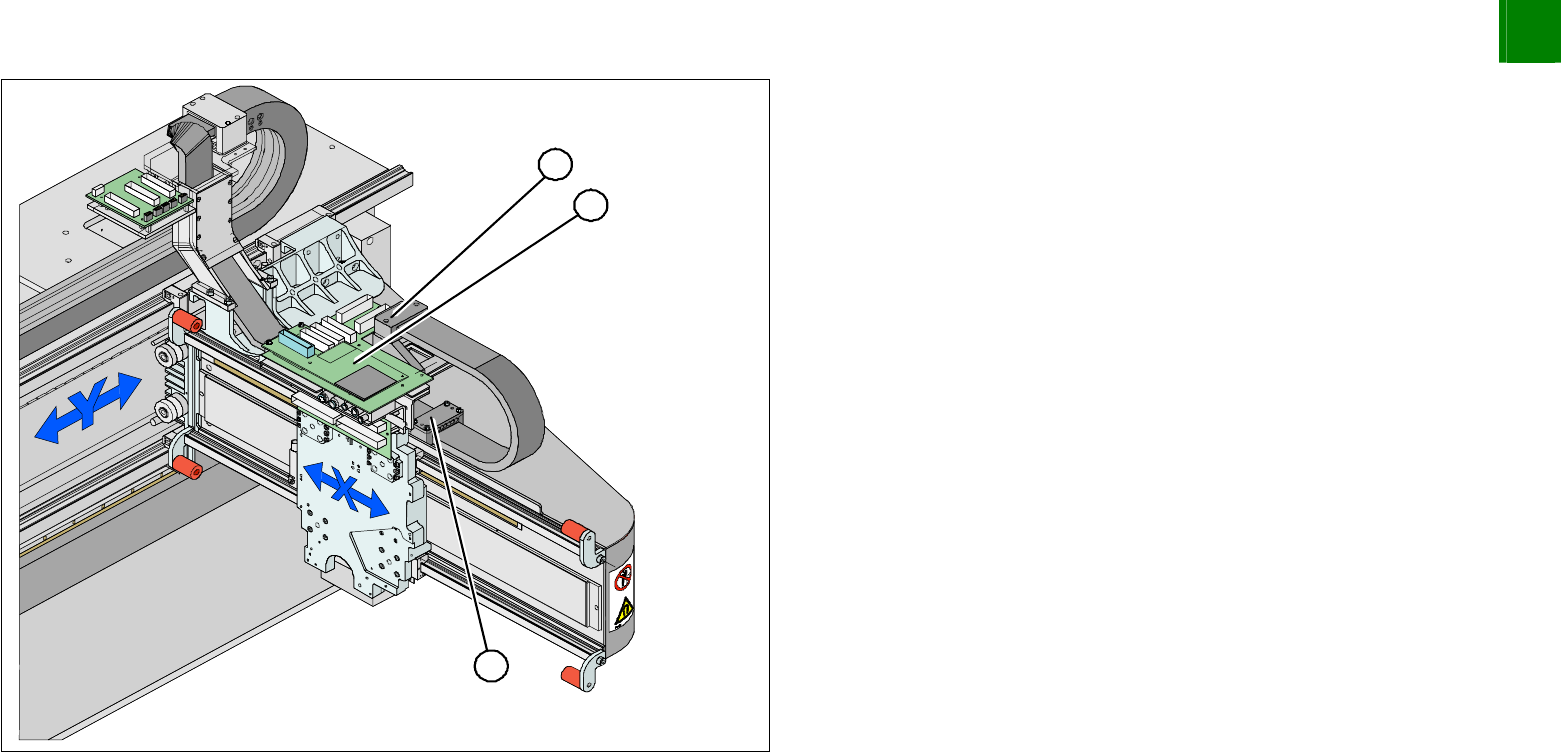
Reconnect the cooling tubes to the Y-axis motor.
Install the 3 pressure plates (1) on the gantry and head mount
(2).
Install the head board (3). Make sure you do not lose the
contact disks or spacer bolts.
Plug in all connections/terminals. Observe the correct connector
assignment.
Fasten new cable ties at the original points.
Replace all cover plates.