00198545-01_JCPM_WF2_CA4V2_EN.pdf - 第40页
13 WF2 CA4 V2 Calibrate the C&P20 A/P/M2 head 14 min 2 / 4 C A U T I O N ! R e f e r t o s a f e t y i n s t r u c t i o n s i n u s e r m a n u a l b e f o r e c o m m e n c i n g M a i n t e n a n c e Machine Sta…
13 WF2 CA4 V2 Calibrate the C&P20 A/P/M2 head 14 min 1 / 4
CAUTION! Refer to safety instructions in user manual before commencing Maintenance
Machine Status ON Transport Empty
NOTICE! ESD guidelines are to be followed Tool:
T2, T4 or T100
Wear Part: Consumables:
www.asm-smt.com
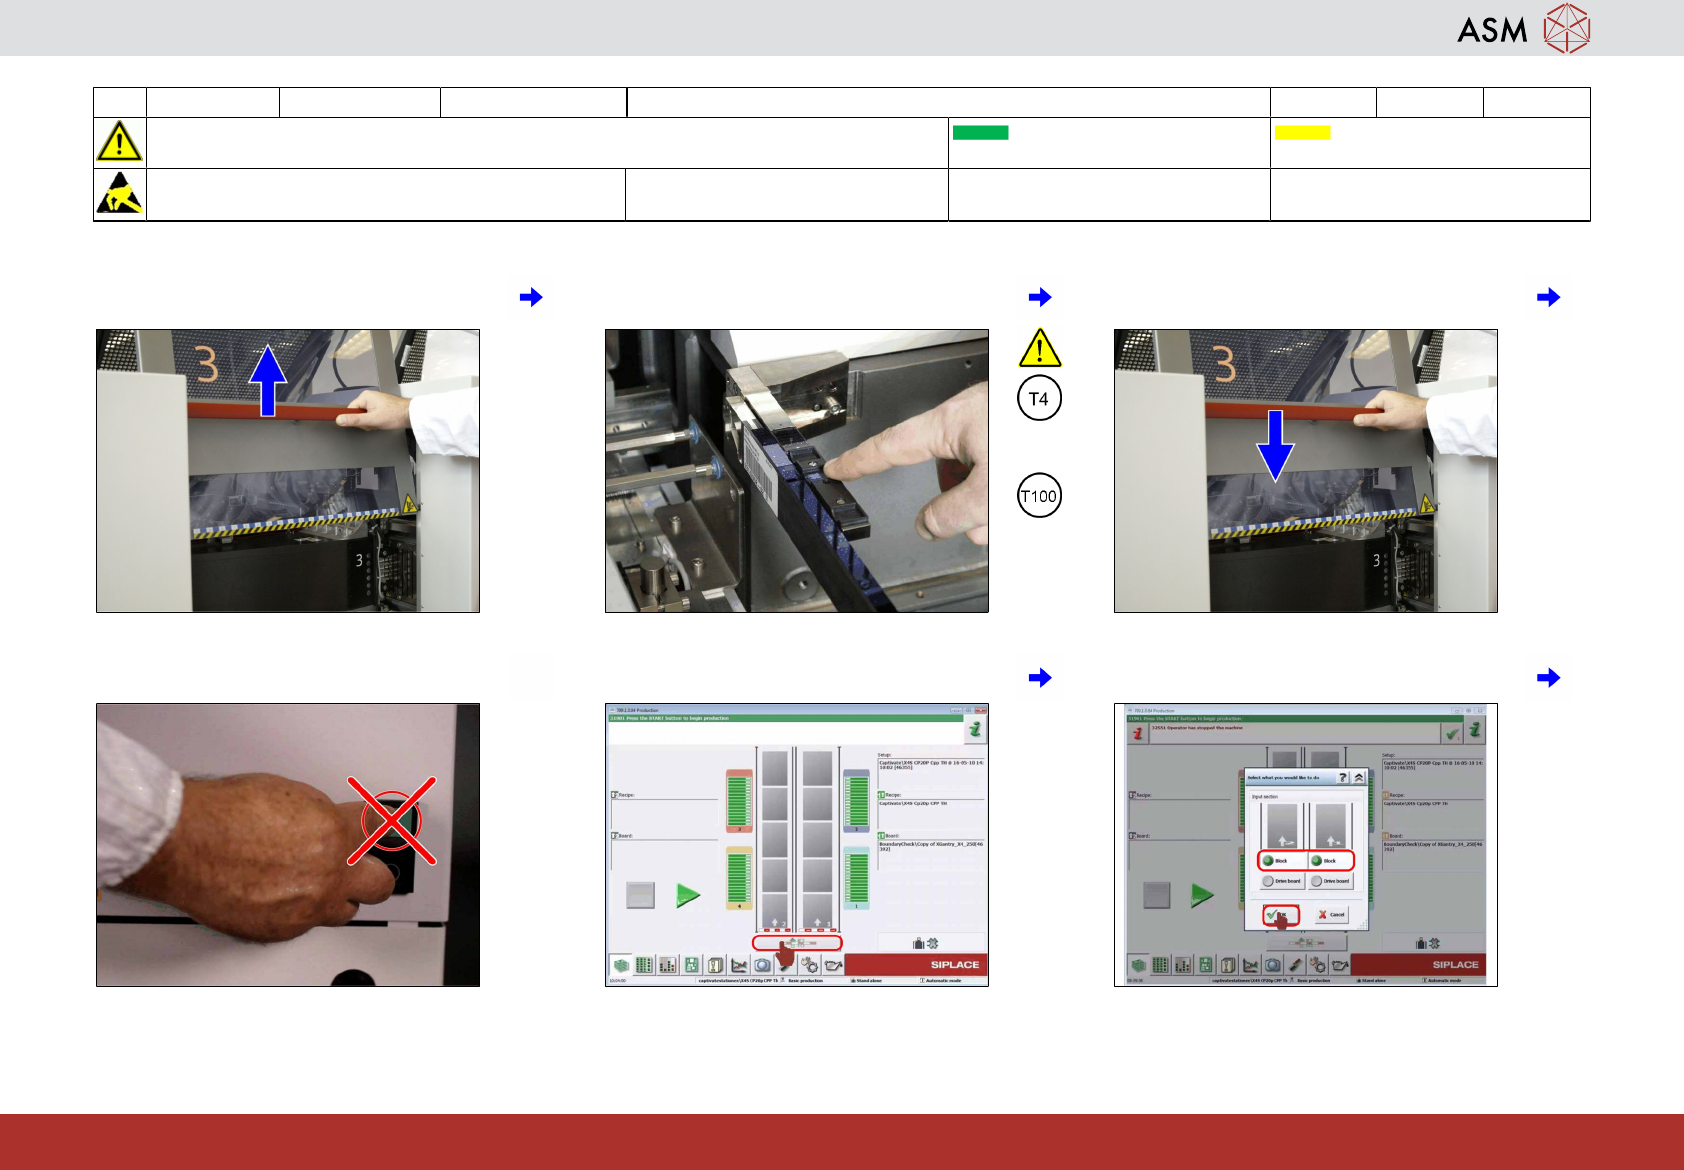
1 Open the cover. 2 Ensure the presence of a suitable cali-
bration tool.
3 Close the cover.
or
4 Do not press the machine start button! 5 Click on the "Block Conveyor" icon. 6 Block both lanes and click on "OK".
13 WF2 CA4 V2 Calibrate the C&P20 A/P/M2 head 14 min 2 / 4
CAUTION! Refer to safety instructions in user manual before commencing Maintenance
Machine Status ON Transport Empty
NOTICE! ESD guidelines are to be followed Tool:
T2, T4 or T100
Wear Part: Consumables:
www.asm-smt.com
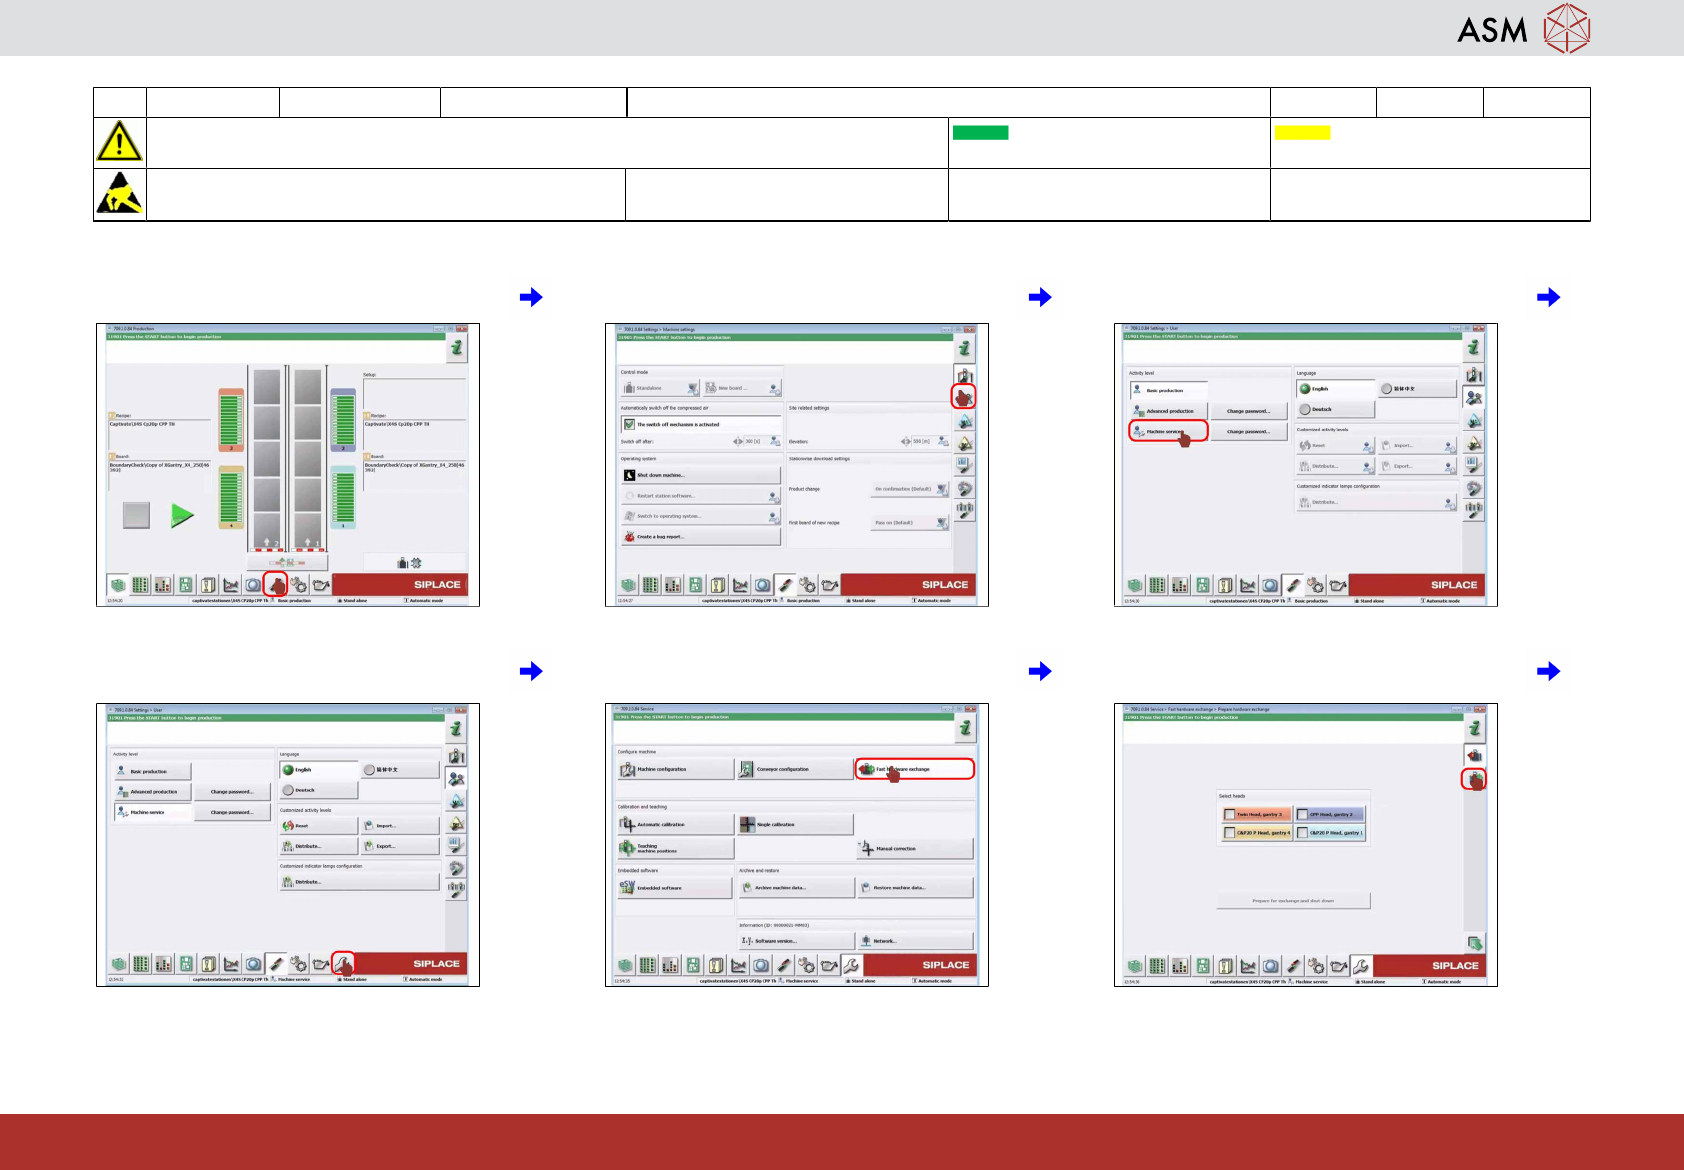
7 Click on the "Settings and options" icon. 8 Click on the "User settings" icon. 9 Click on the "Machine service" icon.
10 Click on the "Calibration" icon. 11 Click on the "Fast hardware exchange"
icon.
12 Click on the "Head exchange" icon.
13 WF2 CA4 V2 Calibrate the C&P20 A/P/M2 head 14 min 3 / 4
CAUTION! Refer to safety instructions in user manual before commencing Maintenance
Machine Status ON Transport Empty
NOTICE! ESD guidelines are to be followed Tool:
T2, T4 or T100
Wear Part: Consumables:
www.asm-smt.com
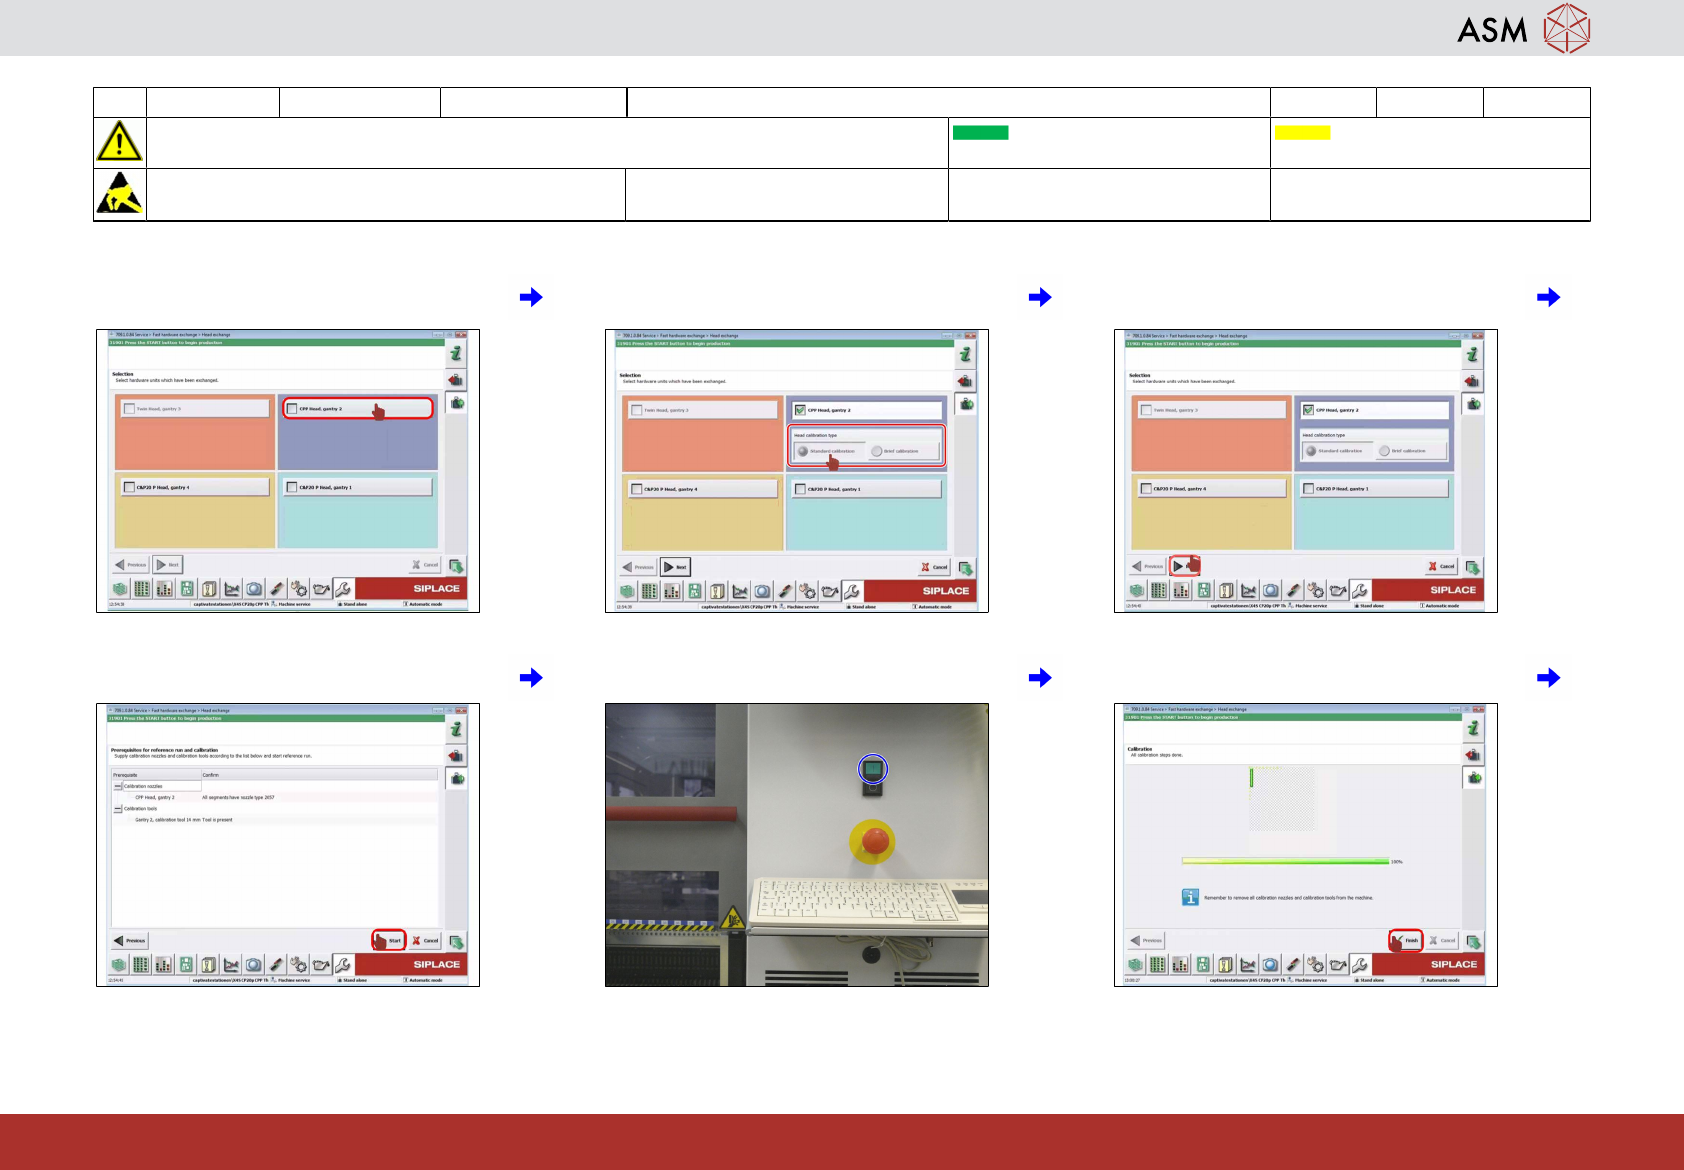
13 Select the head to be calibrated. 14 Select the head calibration type (standard
or brief).
15 Click on "Next".
16 Click on "Start". 17 Press the machine start button. 18 Click on "Finish".