COU2000 PRO计数器英文说明书 Operaton Manual-en(1).pdf - 第14页
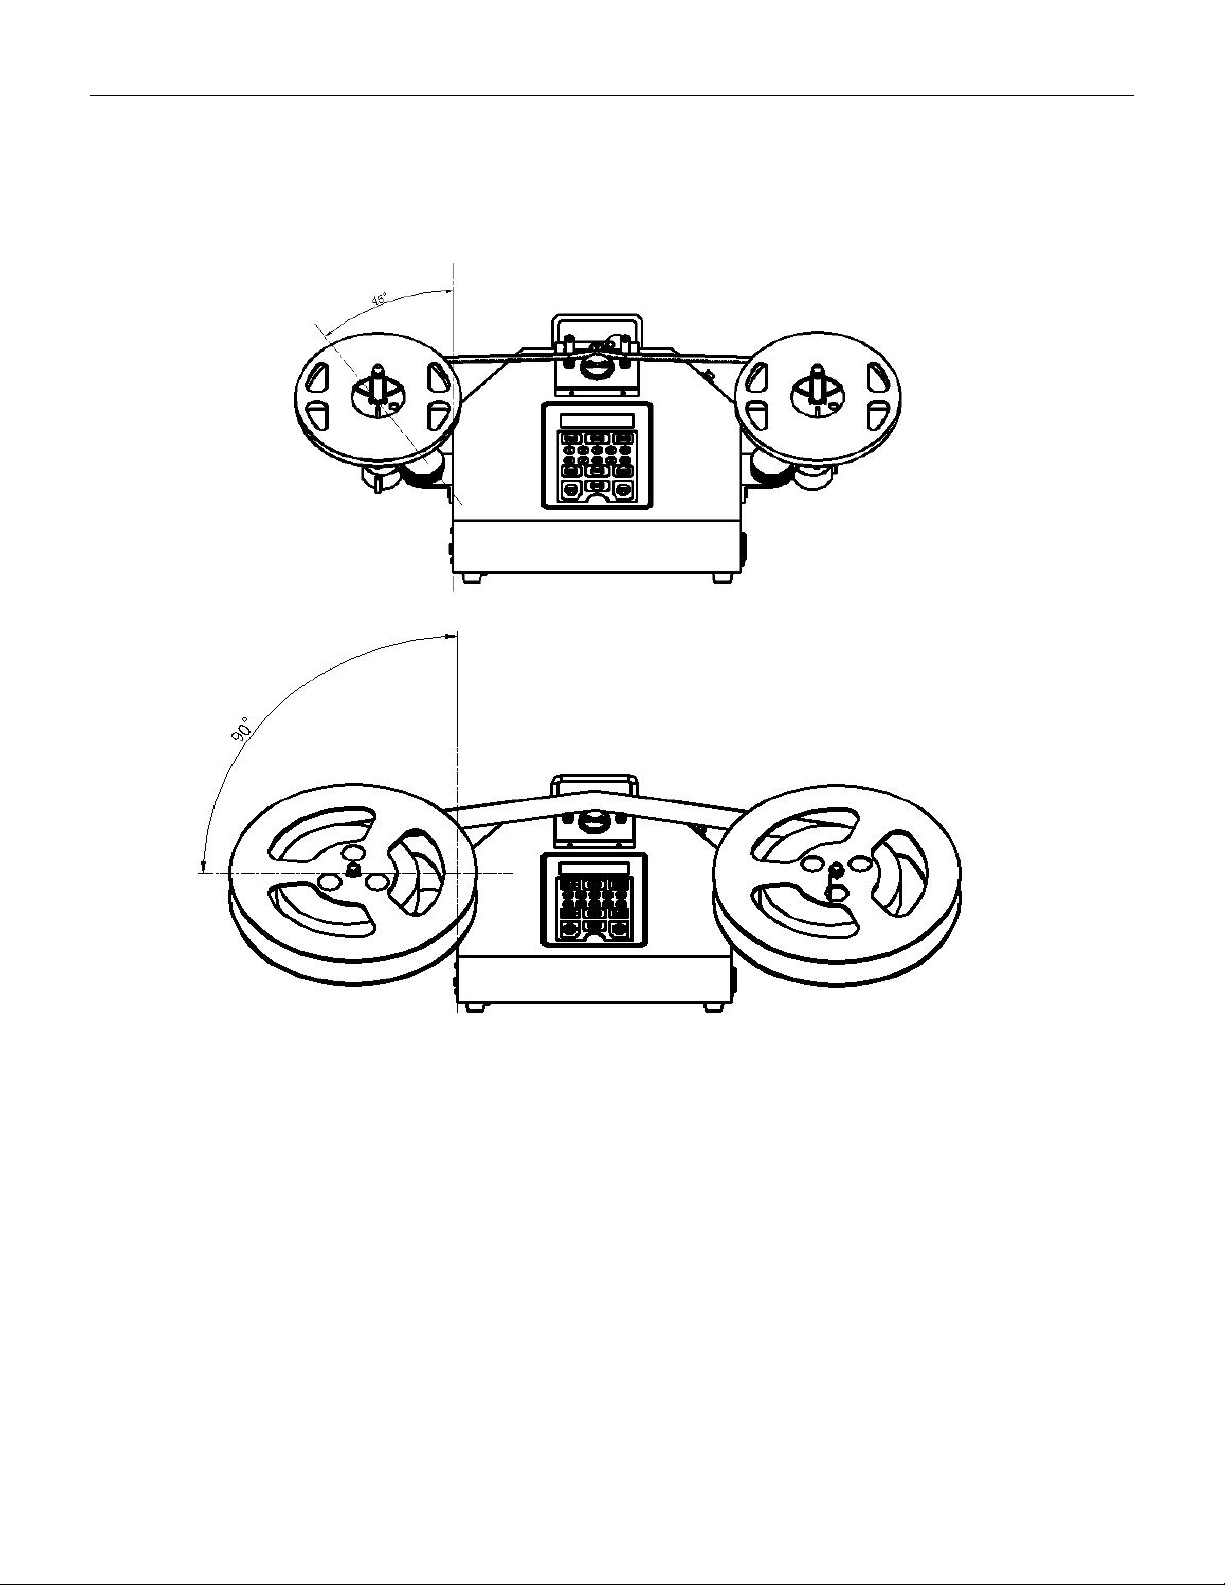
VERSION: .1.01 E 14 / 52 reel, place the arm at a 45 deg ree angl e to the chassis; When using a 1 3 inch/330 cm o r larger reel, please place the arm at a 90 de gree ang le to the chassis, rotate the locking knob clockw…

VERSION: .1.01 E
13 / 52
time, multiply the "DATA" count value by 4 to obtain the material spacing. For example, if
the count value of two adjacent materials is 3, then the material spacing is: 3 * 4mm=12mm.
PRESET:When it is expected to count a certain number of parts, we use the preset function
After pressing the PRESET key and entering the value, the machine will stop at the
corresponding position, and only minor adjustments are needed to obtain the required
quantity; Press the PRESET key again to clear the set value, and the pre stop function will be
disabled.
Note:
1. Due to the limitation of the counting range, preset values above 999999 are invalid;
2. Negative numbers can be preset.When setting a negatiive value, press "0" first, then press
other numbers。
CLEAR:When starting counting, be sure to reset it to zero first, otherwise the counting will
be inaccurate。
START :Press START key,the right motor starts to rotate clockwise, the left motor is driven,
and the count value increases. The reel strip gradually rolls into the temporary reel from the
original reel of the parts
STOP:Press STOP key to stop the motor rotation。
REWIND:The left motor starts to rotate counterclockwise, the right motor is driven, and the
count value decreases. The material strip is gradually rolled back to the original part reel
from the temporary reel. Note that when the count value decreases to zero, the machine
will automatically stop. At this time, the material strip should return to the starting point,
and the accuracy of the count can be confirmed again. Press the REWIND key again, and the
material strip will continue to rewind until it completely returns from the temporary reel to
the original part reel
4.1.4 Adjust the arm for reel in different size
Rotate the locking knob counterclockwise to adjust the arm: When using a 7-inch/180cm
DATA PITCH PRESET
000000 4mm ******
VERSION: .1.01 E
14 / 52
reel, place the arm at a 45 degree angle to the chassis; When using a 13 inch/330 cm or
larger reel, please place the arm at a 90 degree angle to the chassis, rotate the locking knob
clockwise, and lock the arm to the fixed bracket. We recommend fixing the arm angle at 45
degrees, which is compatible with both large and small material trays
7-inch/180cm reel --45°
13inch/330cm or larger --90°
VERSION: .1.01 E
15 / 52
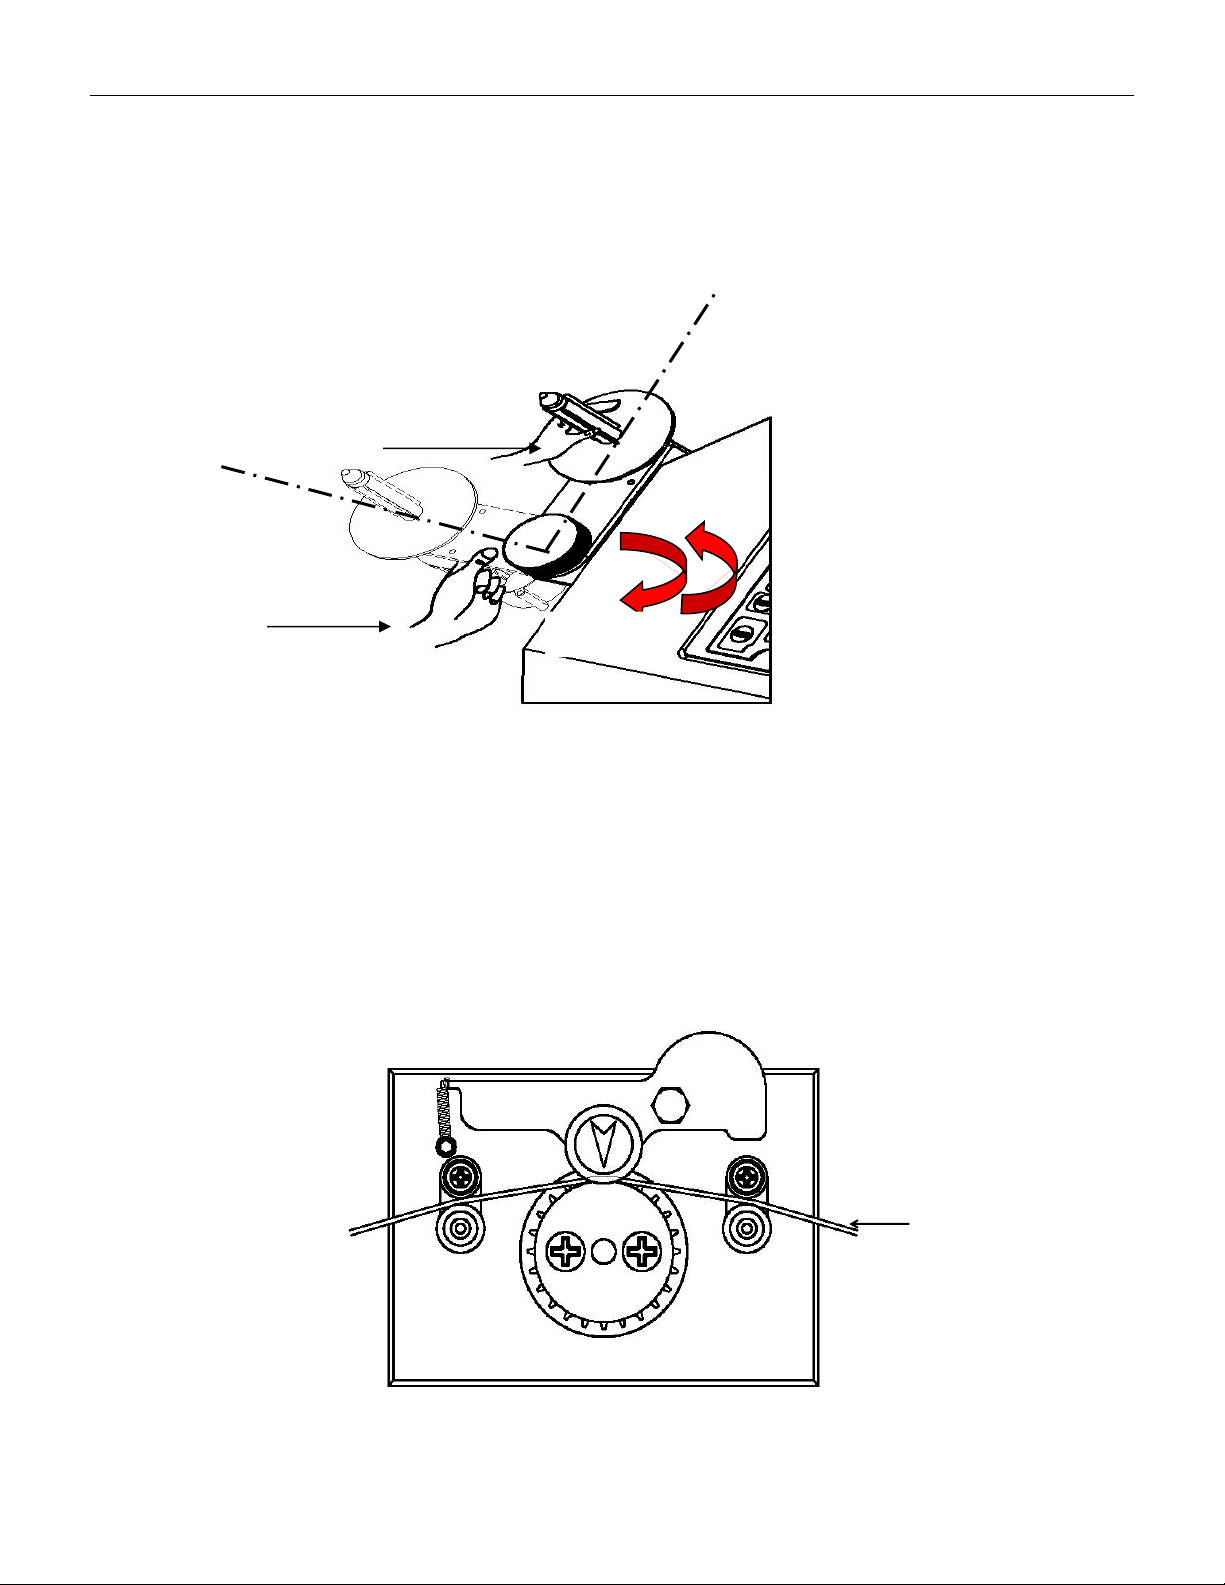
When adjusting the arm, first rotate the locking handle counterclockwise to make the arm
in a relaxed state, then gently rotate the arm to the desired angle by hand, and rotate the
locking handle clockwise to make the arm in a locked state; Please note that when rotating
the arm, do not use your hands to pull or push the belt shaft, as this may damage the
transmission. You can use your hands to gently apply force at the arm as shown in the
following diagram。
4.1.5 Set the reel onto the counter
Install the part reel to be counted onto reeling shaft on the left, so that the blades on
reeling shaft are locked to the reel; install temporary reels of corresponding widths on
the right; guide the starting part of the tape through the space between upper
guide pole and lower guide pole, press the guide pulley, and hang the tractive hole, namely,
D as below, of the reel onto counting gear.
Ree
l
Wrong
Correct
Tighten
Loose