00196931-01 SM internal DLM Star Repair.pdf - 第10页
Star Repair Workflow Verify that the vacuum elbows is straight and does not move 10 Service Manual Internal DLM Star Repair 3.3 Verify that the vacuum elbows is straight and does not move 1. The white vacuum inlet elbo w…
Star Repair Workflow
Visual inspection
Service Manual Internal DLM Star Repair 9
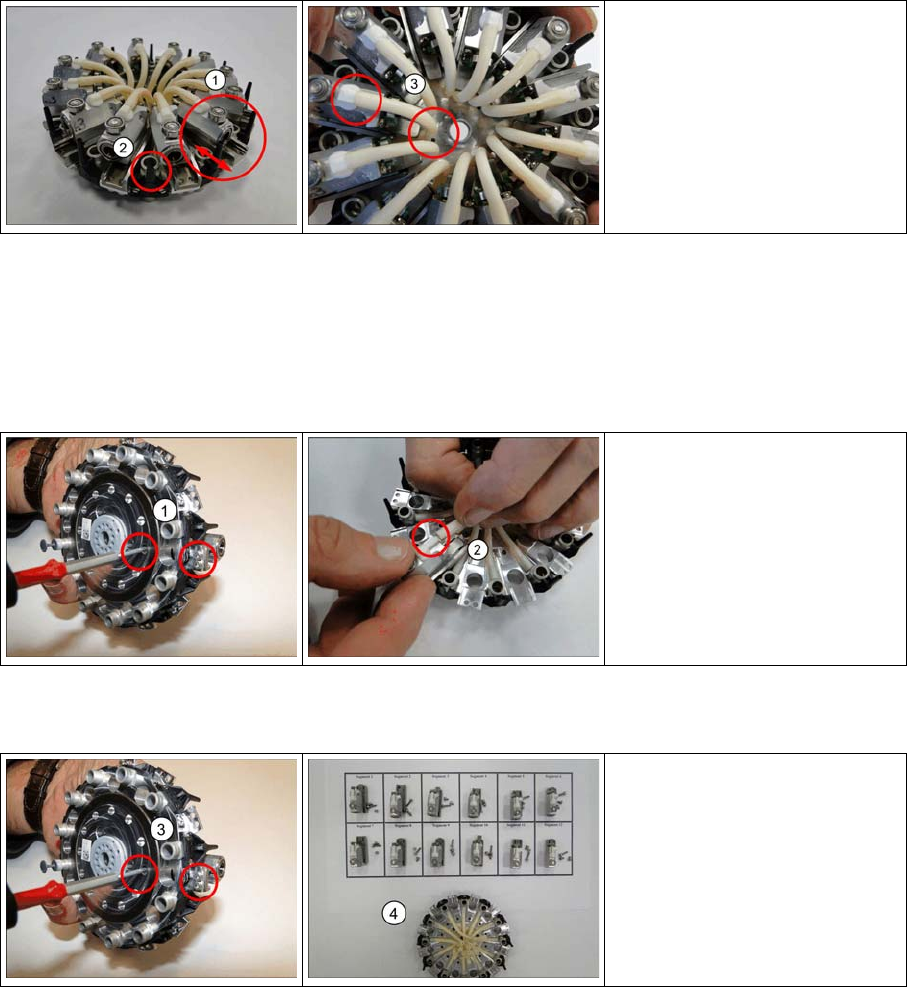
3 Star Repair Workflow
3.1 Visual inspection
1. Check the segment movement on sledge.
2. Check air inlets for damage.
3. Check if the hoses are dirty or damaged and exchange later if necessary.
3.2 Remove segments
1. Loosen and remove all 3 screws per segment.
2. Disconnect the hose from the segment.
3. Perform the above for all further 11 segments.
4. All 12 segments removed from the star.
Star Repair Workflow
Verify that the vacuum elbows is straight and does not move
10 Service Manual Internal DLM Star Repair
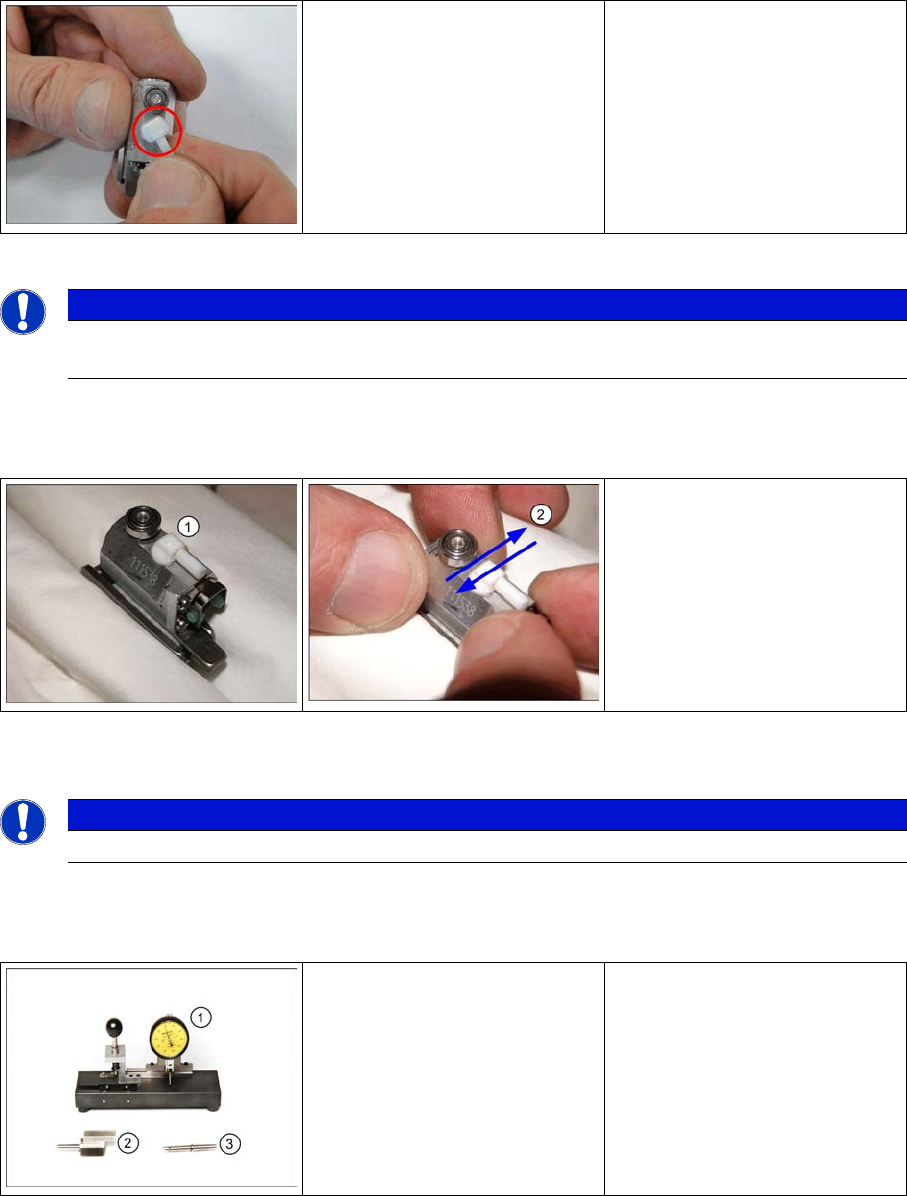
3.3 Verify that the vacuum elbows is straight and does not move
1. The white vacuum inlet elbow on the top of the segment must be straight and not move.
3.4 Verify alignment on sledge
1. Place a cloth on the vice in order not to scratch the surface or damage the segment.
2. Verify that there is no movement on the bearings sledge.
3.5 Verify segment alignment required tools
1. Star Mount Repair Jig
2. Standard block with test pin (for adjustment of dial gauge – Zero position) .
3. Gauge pin (for segment measurement)
HINWEIS
If the Vacuum inlet elbow moves, it should be replaced. Be careful when gluing the Vacuum
inlet elbow that no glue goes into the segment
HINWEIS
If you feel movement, the segment must be replaced!
Star Repair Workflow
Verify segment alignment
Service Manual Internal DLM Star Repair 11
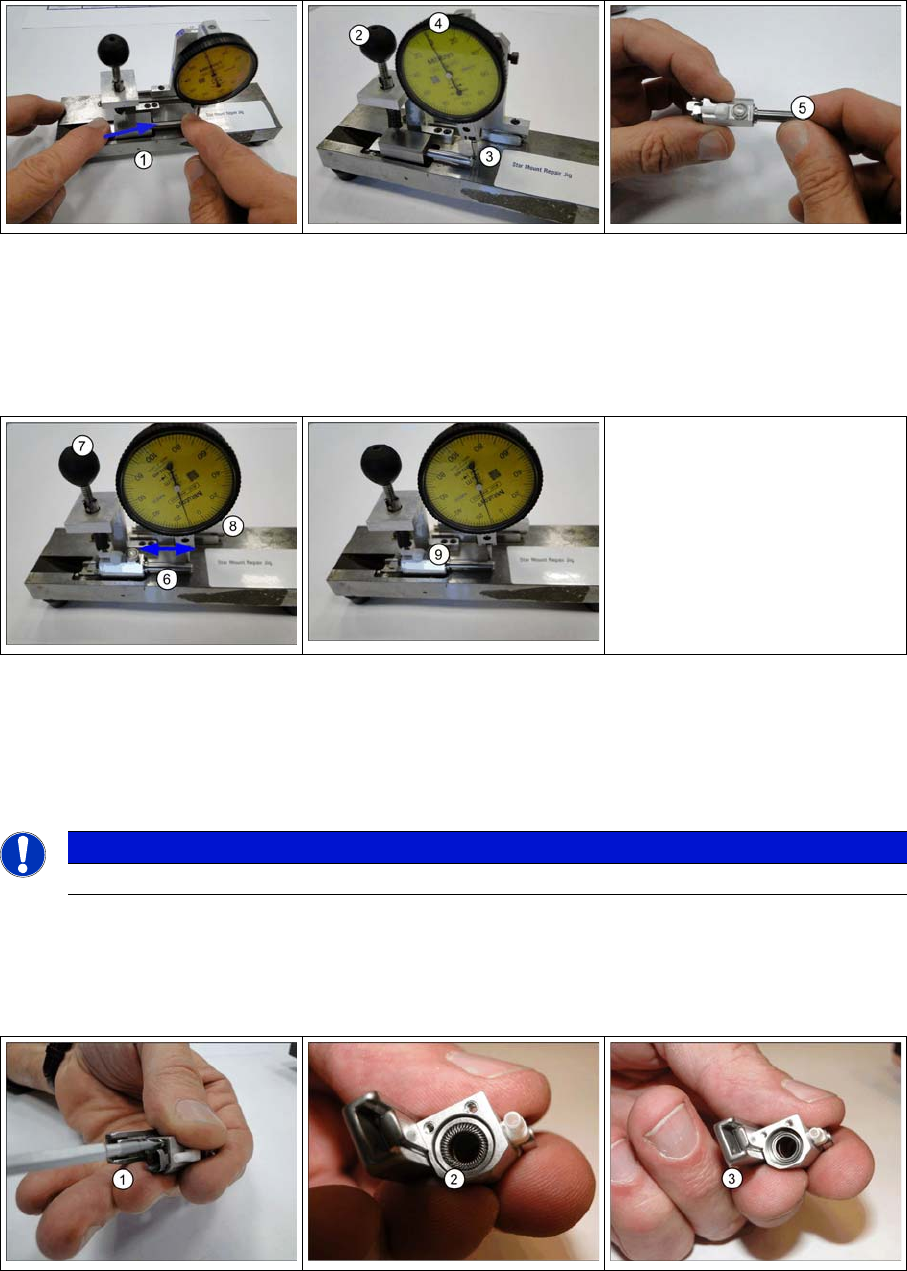
3.6 Verify segment alignment
1. Insert the standard block into the slot of the mechanical test device and push it to the stop right.
2. Move the black clamping handle downwards.
3. Move the measurement caliper until it touches the outer diameter of the test pin.
4. Turn the measurement scale until the indicator is positioned at "0".
5. Insert the gauge pin into the segment until it engages.
6. Insert the segment into the device, until it clamps.
7. Move the black clamping handle downwards.
8. Move the measurement caliper along the gauge pin and check:
→ The deviation must remain within 10 scale lines. 1 scale line = 2 µm.
9. Perform the above for all further 11 segments.
3.7 Exchange the segment brake and upgrade the radial spring to
bearings where applicable
1. Release the two screws that secure the brake to the segment.
2. Take out the ring and the radial spring from the slot
3. The ring and the radial spring are removed from the slot
HINWEIS
If the deviation is larger, replace the segment.