00196931-01 SM internal DLM Star Repair.pdf - 第12页
Star Repair Workflow Replacement of defective parts V acuum hoses, Valve s, O-Rings.se gment 12 Service Manual Internal DLM Star Repair 4. The bearing is positioned correctly 5. Pass the clamp over the segmen t and place…
Star Repair Workflow
Verify segment alignment
Service Manual Internal DLM Star Repair 11
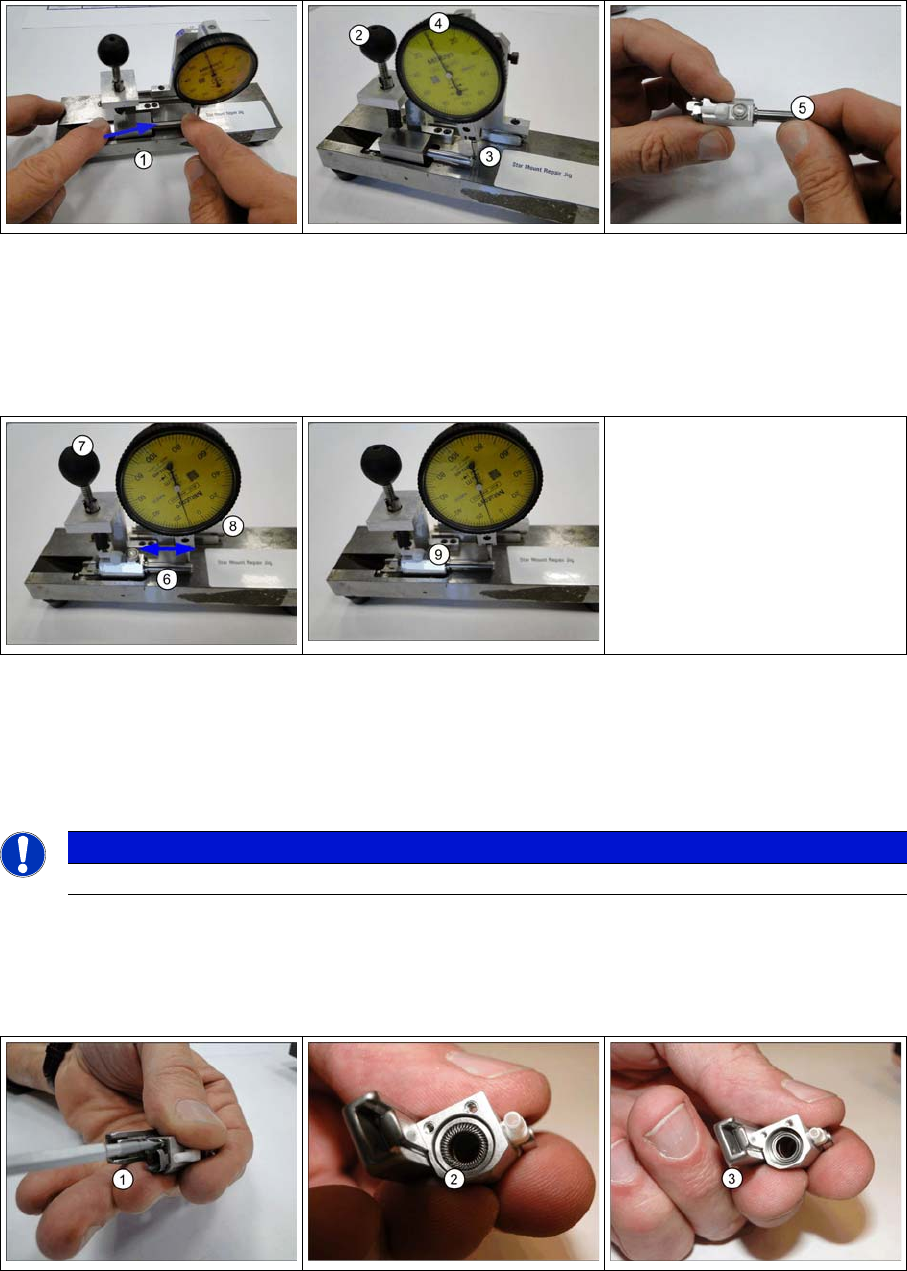
3.6 Verify segment alignment
1. Insert the standard block into the slot of the mechanical test device and push it to the stop right.
2. Move the black clamping handle downwards.
3. Move the measurement caliper until it touches the outer diameter of the test pin.
4. Turn the measurement scale until the indicator is positioned at "0".
5. Insert the gauge pin into the segment until it engages.
6. Insert the segment into the device, until it clamps.
7. Move the black clamping handle downwards.
8. Move the measurement caliper along the gauge pin and check:
→ The deviation must remain within 10 scale lines. 1 scale line = 2 µm.
9. Perform the above for all further 11 segments.
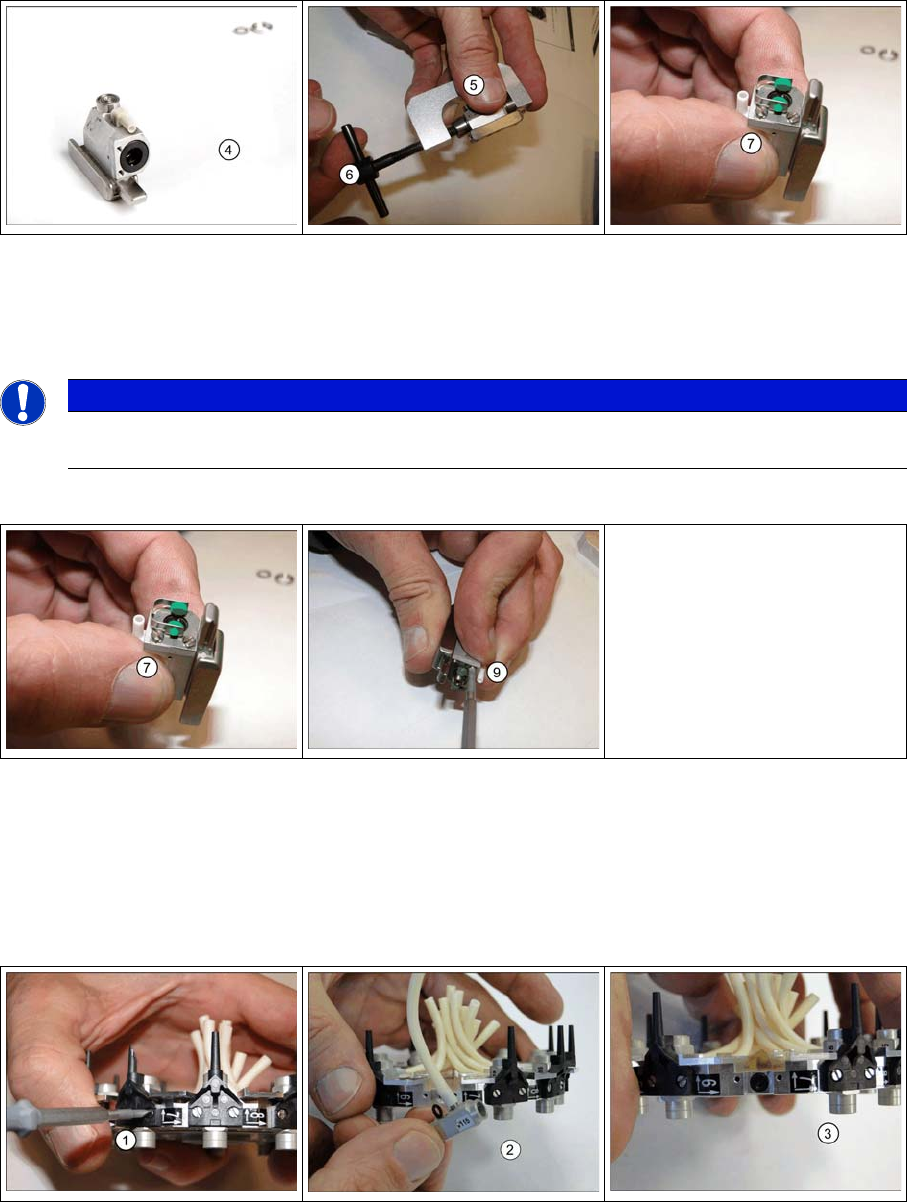
3.7 Exchange the segment brake and upgrade the radial spring to
bearings where applicable
1. Release the two screws that secure the brake to the segment.
2. Take out the ring and the radial spring from the slot
3. The ring and the radial spring are removed from the slot
HINWEIS
If the deviation is larger, replace the segment.
Star Repair Workflow
Replacement of defective parts Vacuum hoses, Valves, O-Rings.segment
12 Service Manual Internal DLM Star Repair
4. The bearing is positioned correctly
5. Pass the clamp over the segment and place it against the rear of the segment.
The shape of the tool exactly matches the segment where you have already removed the brake.
6. Now tighten the other part of the tool into the segment.
7. Take the new brake and fasten it lightly with two screws .
8. Insert a Sleeve and ensure the brake is sitting correctly.
9. When the brake is sitting correctly, tighten the screws to 13Ncm
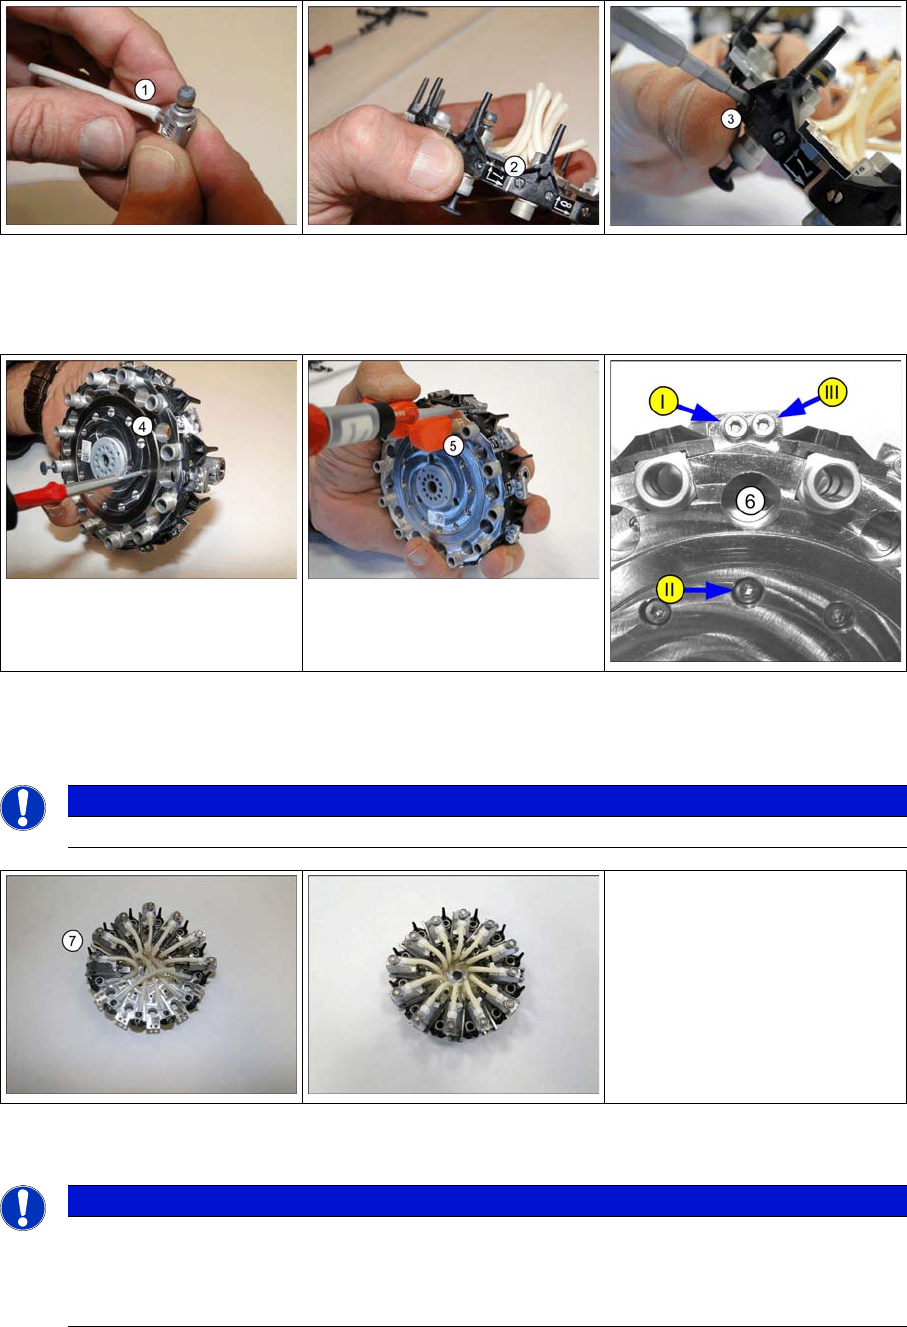
3.8 Replacement of defective parts Vacuum hoses, Valves, O-
Rings.segment
1. Release the two screws that secure the air kiss inlet to the segment
2. Remove the valve with its hose and the O-ring.
3. Replace the O-ring and lightly grease with Unsilikon.
HINWEIS
You cannot over tighten the tool, as both the caps have a stopper. In some segments, you will
hear a cracking sound. This happens when the ball bearing has shifted
Star Repair Workflow
Replacement of defective parts Vacuum hoses, Valves, O-Rings.segment
Service Manual Internal DLM Star Repair 13
1. When exchanging hoses ensure the hose is pushed to the end.
2. Attach the valve and Air-inlet on the star
3. Tighten the air kiss inlet with two screws (13Ncm).
4. Place the segment on the star and screw lightly. → Do this for all 12 Segments.
5. Use the Segment Adjustment Tool to position the segment on the star correctly.
begin with Segment 1 through 12. → Tighten the screws with 45Ncm Torque Screwdriver.
7. When connecting the silicone hoses make sure that they are not damaged by rubbing against one
another.
HINWEIS
Be careful the tightening order of the screws is very important. Tighten from I to III.
HINWEIS
To ensure this, make sure that the silicone hoses have the exact length and that they are pu-
shed onto the respective connection pieces as far as possible (up to the stopper). Check the
distance while pushing all segments all the way in and out. Ideally the distances should all be
the same.