Mr. JF Sun ALL syringe_IPS.pdf - 第176页
Edition 4.0 H08M(Q) Head Repair T raining T ext FK-9F98-86-0E 5-12 FUJI M ACHINE MFG . CO., L TD . 10. Press and hold the l ower button to display an asterisk mark next to b oth the “R CURRENT” and “L CURRENT” values. T …
Edition 4.0 H08M(Q) Head Repair Training Text
FK-9F98-86-0E 5-11 FUJI MACHINE MFG. CO., LTD.
5. If the grayscale values are outside the target values, adjust them as shown below.
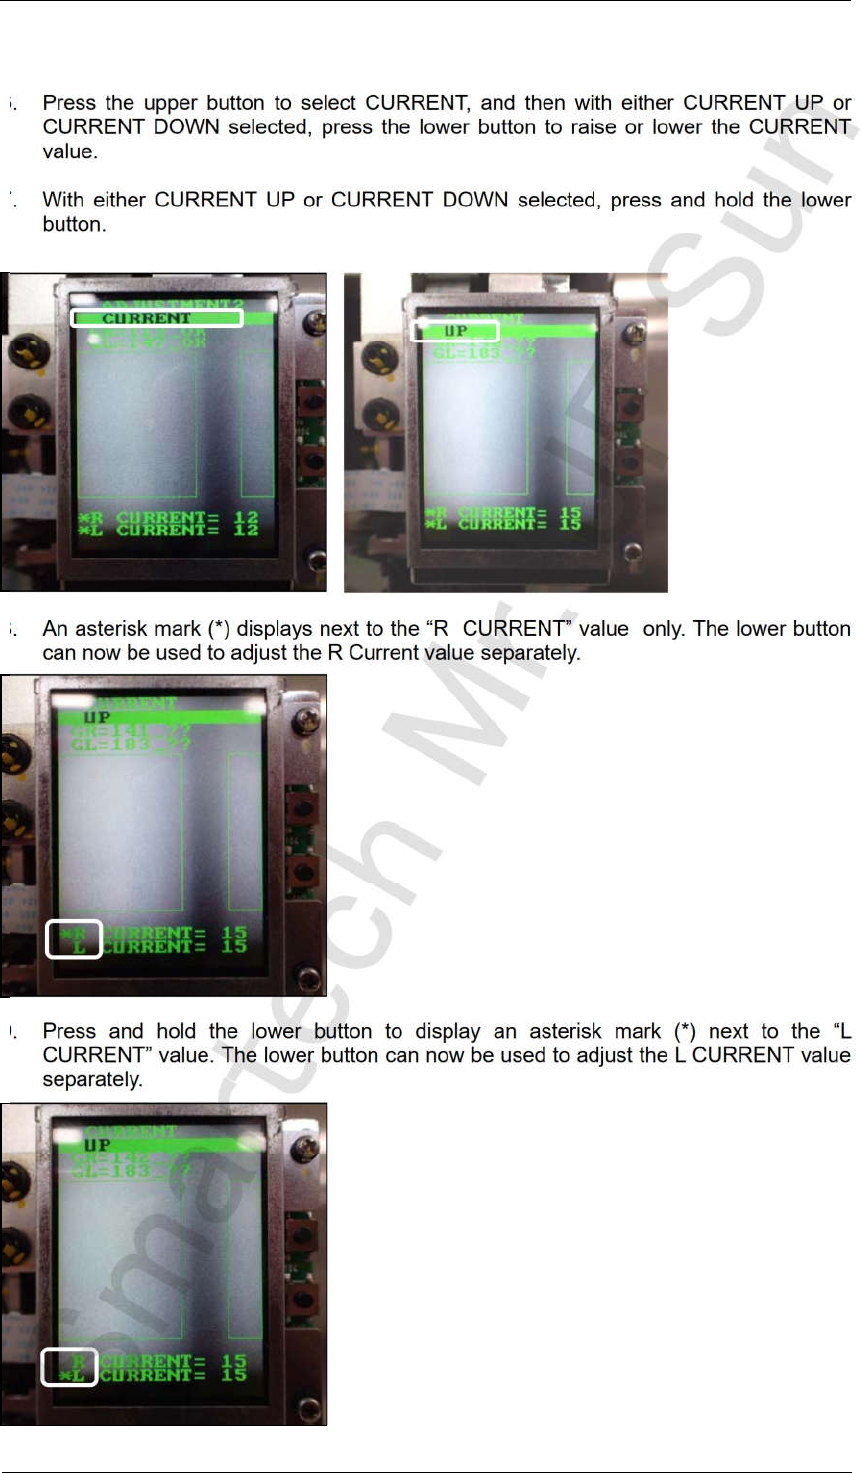
6. Press the upper button to select CURRENT, and then with either CURRENT UP or
CURRENT DOWN selected, press the lower button to raise or lower the CURRENT
value.
7. With either CURRENT UP or CURRENT DOWN selected, press and hold the lower
button.
8. An asterisk mark (*) displays next to the “R CURRENT” value only. The lower button
can now be used to adjust the R Current value separately.
9. Press and hold the lower button to display an asterisk mark (*) next to the “L
CURRENT” value. The lower button can now be used to adjust the L CURRENT value
separately.
CONFIDENTIAL
Edition 4.0 H08M(Q) Head Repair Training Text
FK-9F98-86-0E 5-12 FUJI MACHINE MFG. CO., LTD.
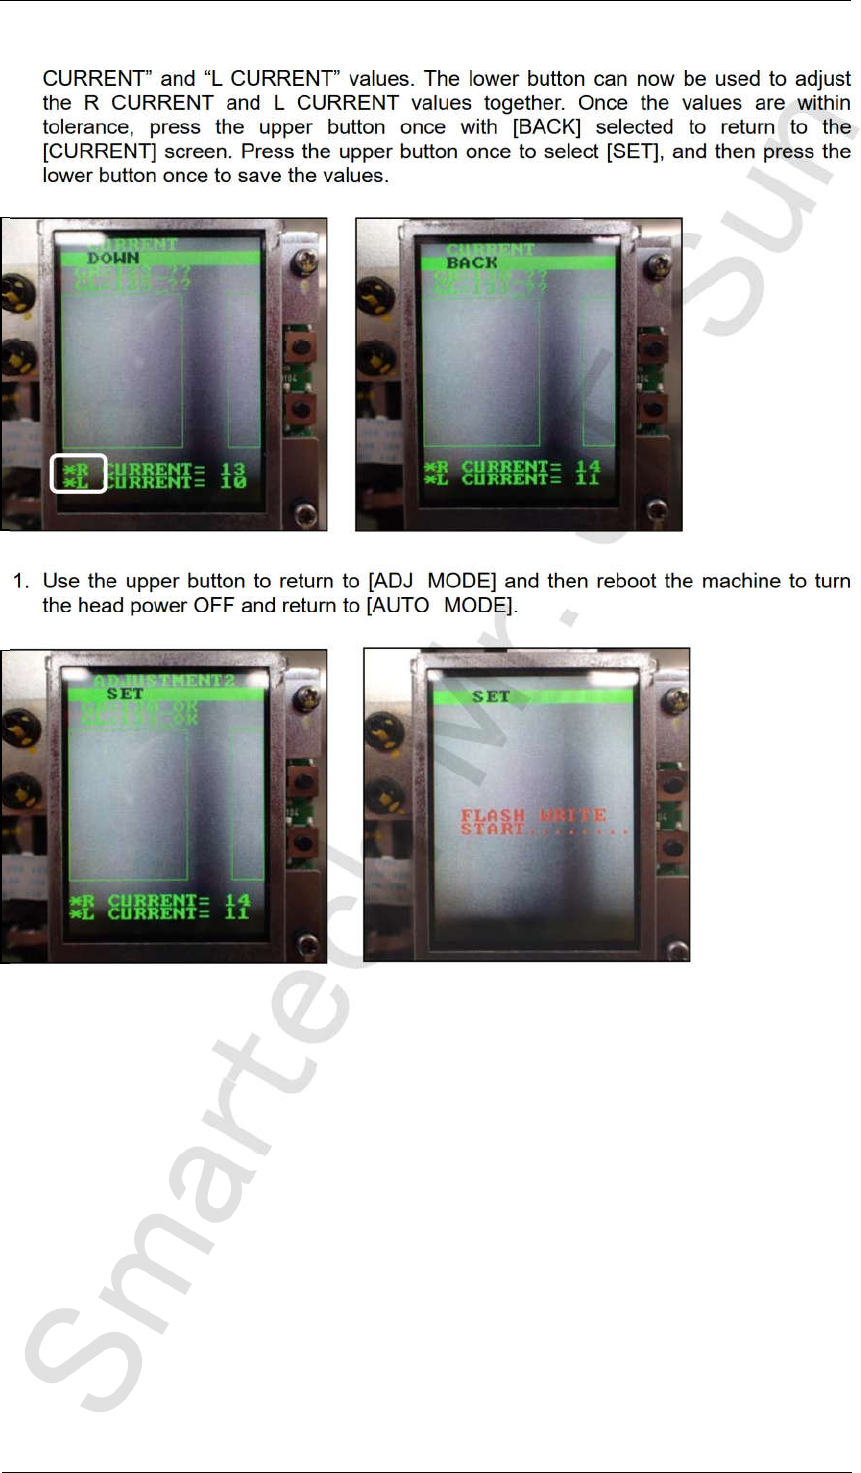
10. Press and hold the lower button to display an asterisk mark next to both the “R
CURRENT” and “L CURRENT” values. The lower button can now be used to adjust
the R CURRENT and L CURRENT values together. Once the values are within
tolerance, press the upper button once with [BACK] selected to return to the
[CURRENT] screen. Press the upper button once to select [SET], and then press the
lower button once to save the values.
11. Use the upper button to return to [ADJ MODE] and then reboot the machine to turn
the head power OFF and return to [AUTO MODE].
CONFIDENTIAL
Edition 4.0 H08M(Q) Head Repair Training Text
FK-9F98-86-0E 5-13 FUJI MACHINE MFG. CO., LTD.
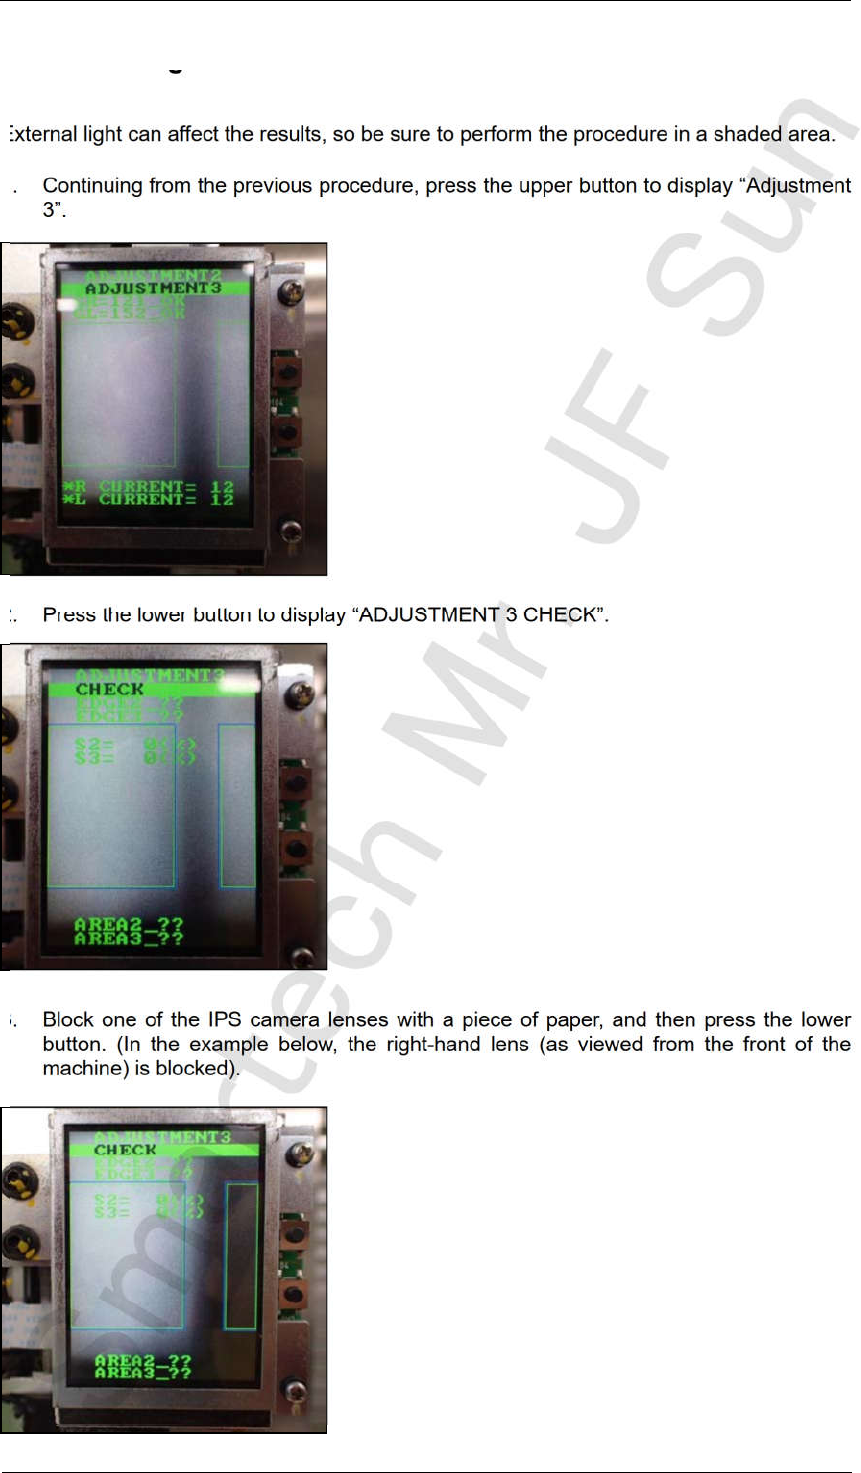
5.7 Checking the field of vision
External light can affect the results, so be sure to perform the procedure in a shaded area.
1. Continuing from the previous procedure, press the upper button to display “Adjustment
3”.
2. Press the lower button to display “ADJUSTMENT 3 CHECK”.
3. Block one of the IPS camera lenses with a piece of paper, and then press the lower
button. (In the example below, the right-hand lens (as viewed from the front of the
machine) is blocked).
CONFIDENTIAL