Mr. JF Sun ALL syringe_IPS.pdf - 第178页
Edition 4.0 H08M(Q) Head Repair T raining T ext FK-9F98-86-0E 5-14 FUJI M ACHINE MFG . CO., L TD . 4. Check that “EDGE2_NG , EDGE3_OK” displays. Also check that S 2 = 10 0 %, S 3 = 0 % displays. 5. Block t he other lens …
Edition 4.0 H08M(Q) Head Repair Training Text
FK-9F98-86-0E 5-13 FUJI MACHINE MFG. CO., LTD.
5.7 Checking the field of vision
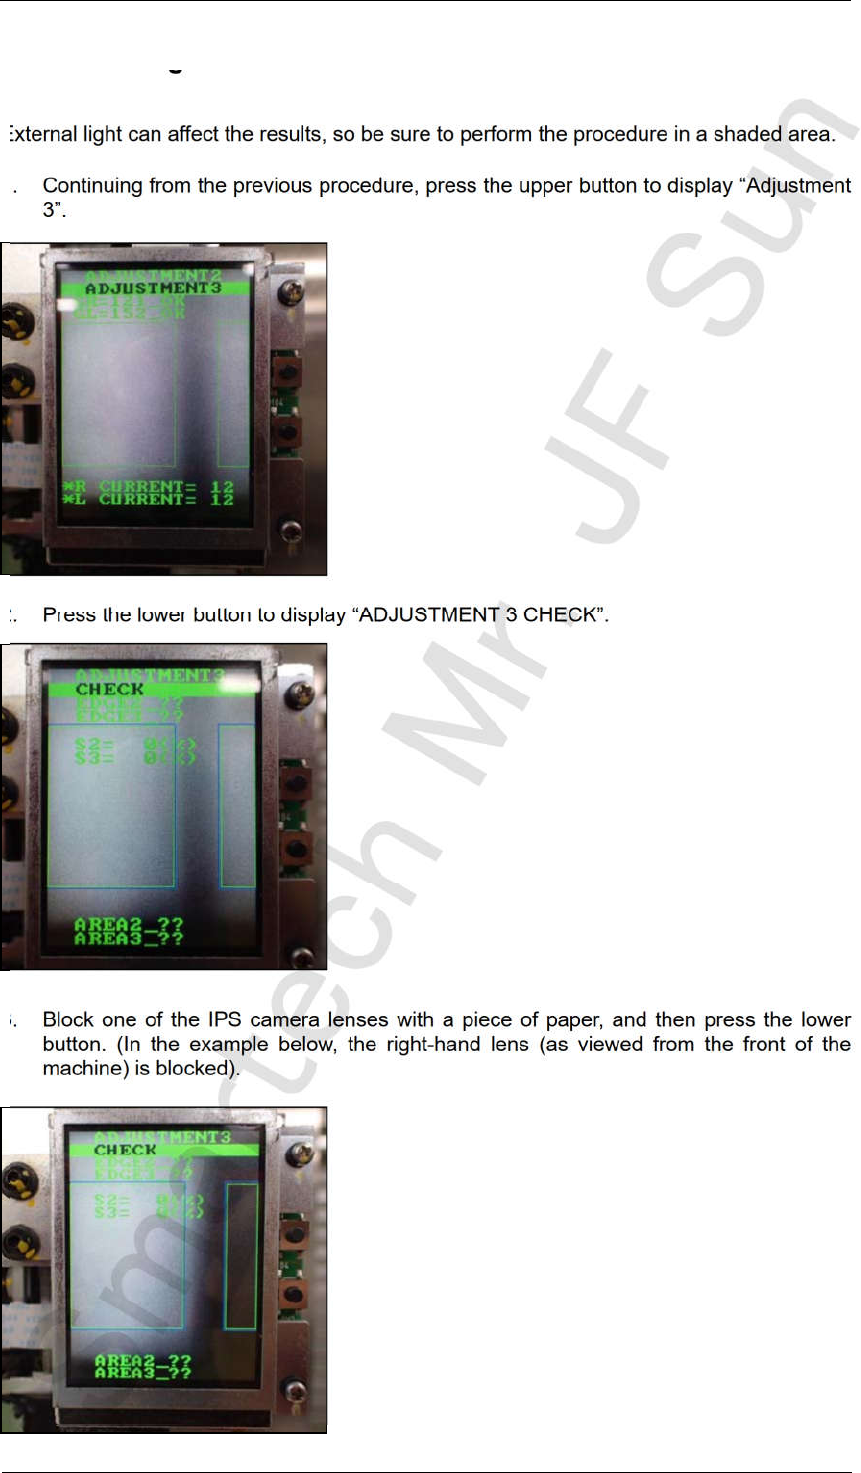
External light can affect the results, so be sure to perform the procedure in a shaded area.
1. Continuing from the previous procedure, press the upper button to display “Adjustment
3”.
2. Press the lower button to display “ADJUSTMENT 3 CHECK”.
3. Block one of the IPS camera lenses with a piece of paper, and then press the lower
button. (In the example below, the right-hand lens (as viewed from the front of the
machine) is blocked).
CONFIDENTIAL
Edition 4.0 H08M(Q) Head Repair Training Text
FK-9F98-86-0E 5-14 FUJI MACHINE MFG. CO., LTD.
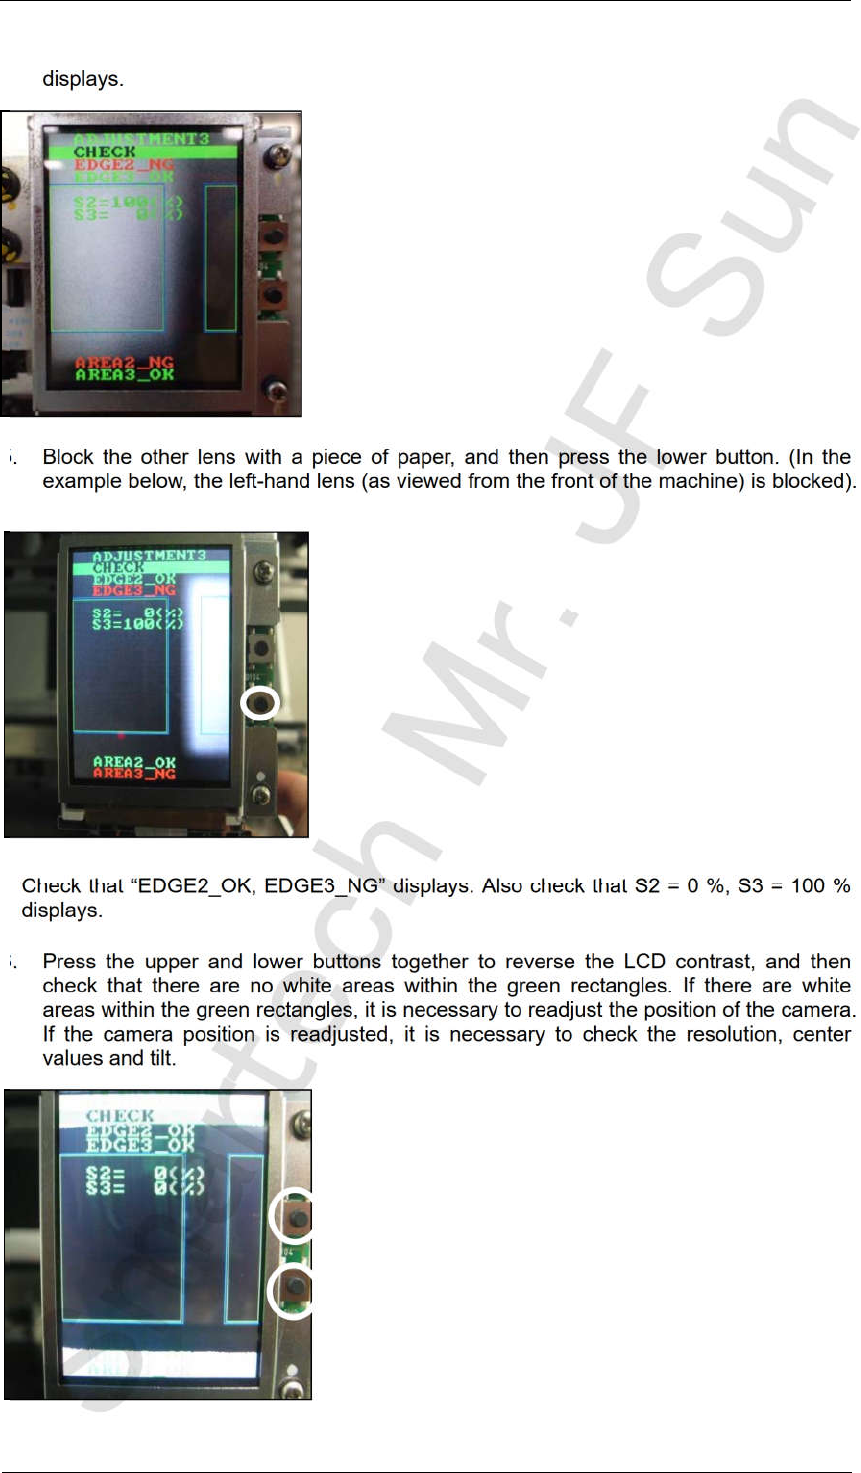
4. Check that “EDGE2_NG, EDGE3_OK” displays. Also check that S2 = 100 %, S3 = 0 %
displays.
5. Block the other lens with a piece of paper, and then press the lower button. (In the
example below, the left-hand lens (as viewed from the front of the machine) is blocked).
Check that “EDGE2_OK, EDGE3_NG” displays. Also check that S2 = 0 %, S3 = 100 %
displays.
6. Press the upper and lower buttons together to reverse the LCD contrast, and then
check that there are no white areas within the green rectangles. If there are white
areas within the green rectangles, it is necessary to readjust the position of the camera.
If the camera position is readjusted, it is necessary to check the resolution, center
values and tilt.
CONFIDENTIAL

Edition 4.0 H08M(Q) Head Repair Training Text
FK-9F98-86-0E 5-15 FUJI MACHINE MFG. CO., LTD.
7. Press the upper button to display “ADJUSTMENT 3, BACK”.
8. Press the lower button to display “ADJUSTMENT 2 CURRENT”.
9. Press the upper button to display “ADJUSTMENT 2 SET”.
10. Press the upper button to display “ADJUSTMENT 2 ADJUSTMENT 3”.
10. Press the upper button to display “ADJUSTMENT 2 BACK”.
11. Press the lower button to display “ADJUSTMENT 1 SET”.
12. Press the upper button to display ADJUSTMENT 1 ADJUSTMENT 2 .
13. Press the upper button to display “ADJUSTMENT 1 BACK”.
14. Press the lower button to display ADJ MODE .
15. The field of vision check is now complete.
CONFIDENTIAL