M1_ServiceManual_e.pdf - 第11页
1 Installation 1-4 Installing the Mounter Do not touch terminals of electric components when the power is on to prevent electric shock and m achine damage. Make sure to ground the mount er to prevent electric shock. ACTI…
1 Installation
1-3
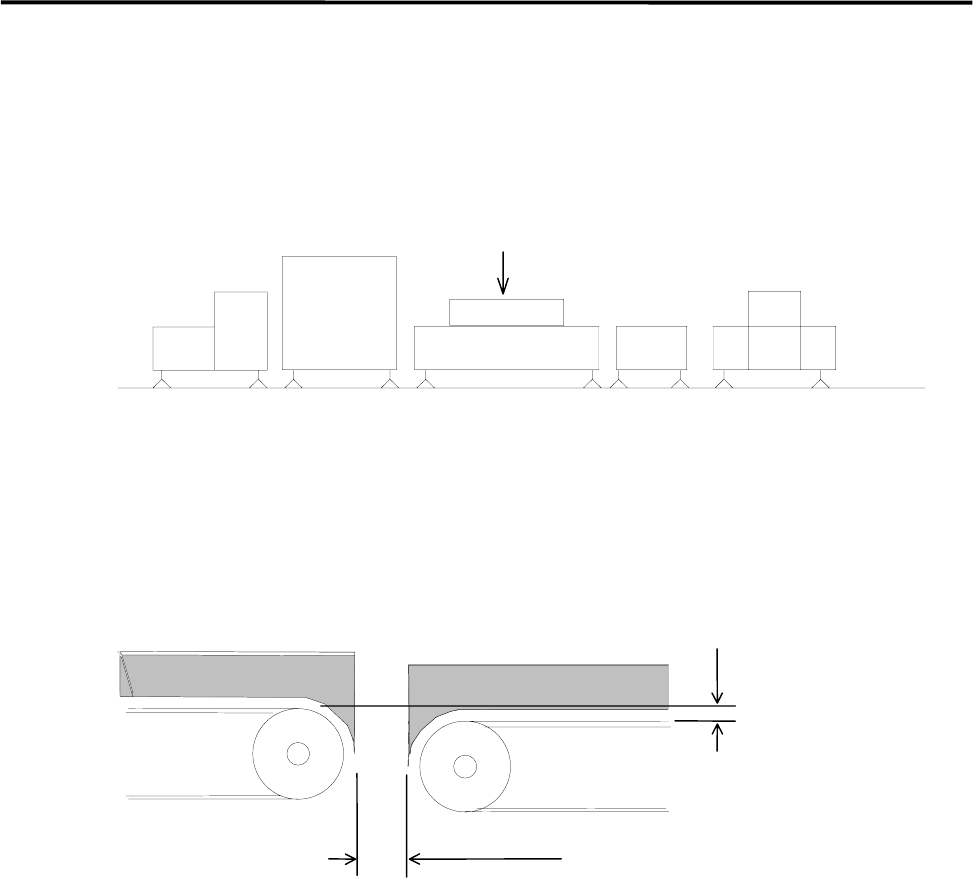
Production Line
To align your assembly line, first install the heaviest unit. Then install peripheral units using the first unit as
a reference.
Reference
Loader Mounter Reflow Oven Conveyor Unloader
To transfer the PCB (printed circuit board) smoothly, clearance between units are quite important. Be sure
that the clearance between units is approximately 5 mm as below figure shows. Adjust the height of the
downstream unit a little lower (0-0.5 mm) so that the PCB is transferred smoothly.
0 - 0.5mm
Approx. 5mm
DownstreamUpstream
側
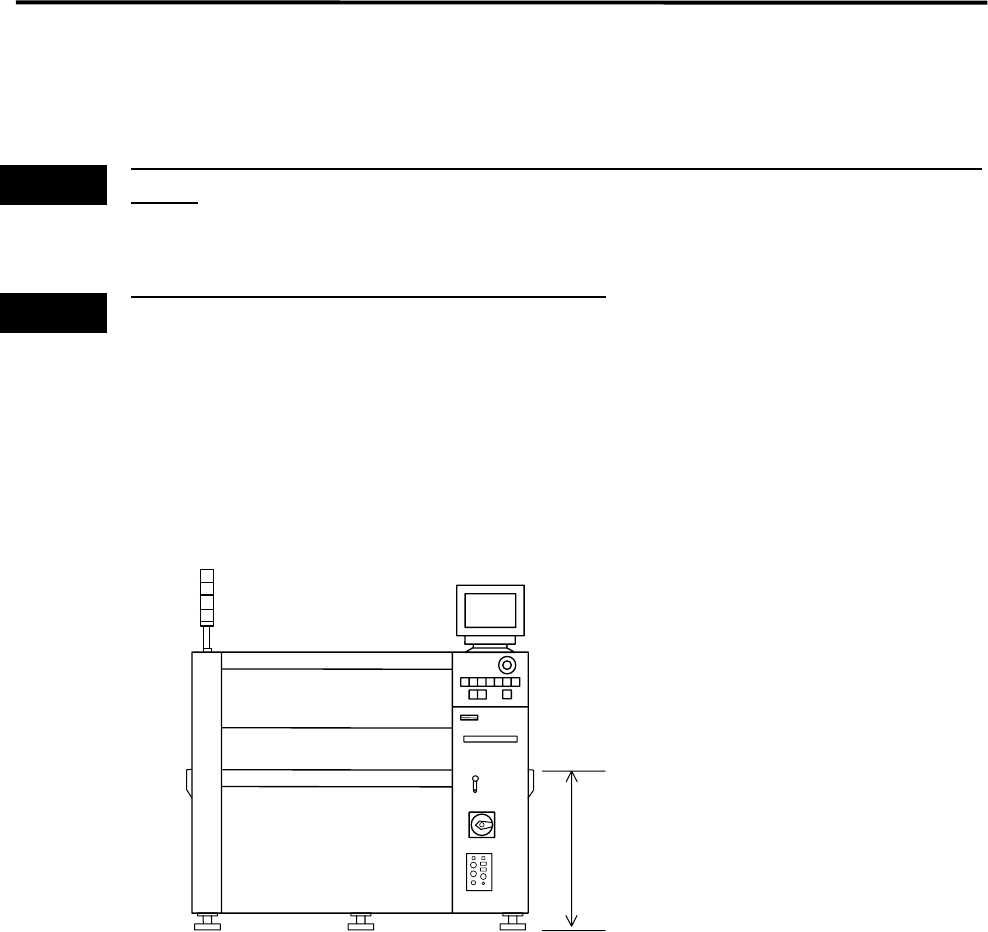
1 Installation
1-4
Installing the Mounter
Do not touch terminals of electric components when the power is on to prevent electric shock and machine
damage.
Make sure to ground the mounter to prevent electric shock.
ACTION:
① Locate the mounter to the specified place.
② Adjust the conveyor height to 900 mm by rotating the adjust feet.
900+/-20mm
or
950+/-20mm(SMEMA)
③ Place a level on the conveyor and adjust the height so that the mounter is level lengthwise and
crosswise.
Warning
Warning
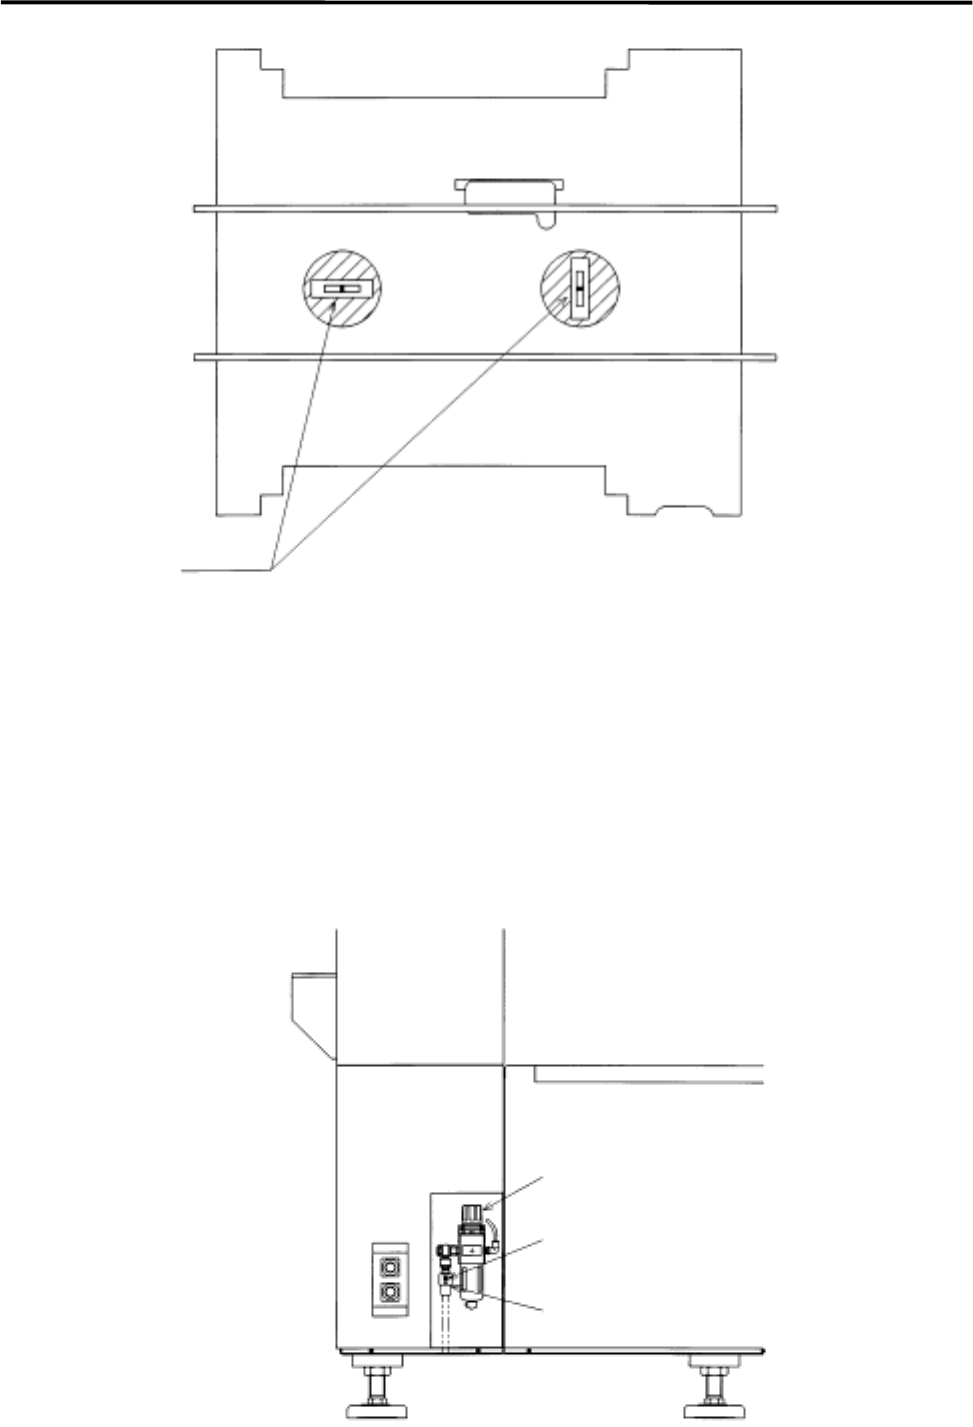
1 Installation
1-5
④ When the conveyor has become level, check if the height is 900+/-20 mm. Then fix the adjust feet
with nuts.
⑤ The head assy. is fixed to the XY shafts with nylon ties. Take them off with nippers.
⑥ Connect the power cable and ground line independently of other machines which may be a noise
source, such as a compressor, welding machine.
⑦ Connect the air supply coupler 65SN or 85SN (Nitto) or an alternate to the air coupler on the filter
regulator in the mounter. Then, make sure the filter regulator indicates 0.49 MPa (5 kgf/cm
2
).
Level
Air Coupler 65SN or 85SN
Air Coupler
Filter Regulator