Besi JTF2 Traystak Feeder.pdf - 第39页
Retrofit instructions: Besi JTF2 (Traystak feeder) SIPLACE S-25 HM / S-27 HM / HS-50 / HS-60 / HF-series / X-series 11/2006 Edition 39 : Screw the adapter in place with the M10 x 60 mm screw .. 2 2 2.7.3 With clamp, with…
Retrofit instructions: Besi JTF2 (Traystak feeder) SIPLACE S-25 HM / S-27 HM / HS-50 / HS-60 / HF-series / X-series
11/2006 Edition
38
: Use the 8.4 mm drill bit to drill a shallow countersink through the drilling hole as a marker for
the 4 mm drill bit.
: Drill a hole with a depth of about 20 mm into the table with the 4 mm bit.
: Drill the hole with the 8.4 mm bit.
: Remove any burrs with the countersink.
: Use the thread cutter and the cutting oil to cut an M10 thread in the hole
(thread deepness about 10 - 15 mm).
: Repeat the process as required for the Traystak feeder to be fitted.
: Clean the table.
2.7.2 Without clamp, with hole
: Unplug the table and dock it out of the placement machine.
: Remove the clamp on the adapter plate.
: Position the adapter at the relevant position.
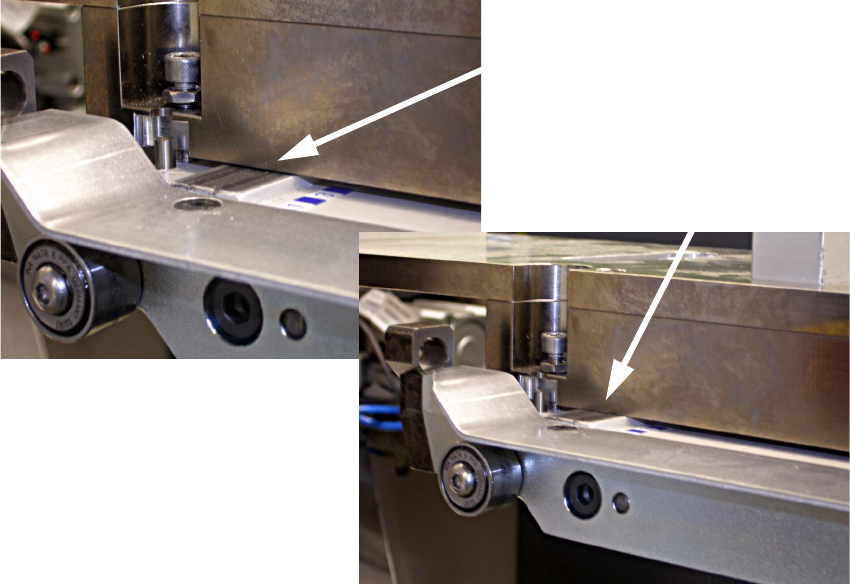
: Use the two outer screws to adjust the adapter so that it lies flat on the table's magnetic rail.
They are provided to prevent the magnetic rail being damaged when you tighten the screws
on the adapter.
2
With gap: WRONG!!!
Without gap: RIGHT!!!
Retrofit instructions: Besi JTF2 (Traystak feeder) SIPLACE S-25 HM / S-27 HM / HS-50 / HS-60 / HF-series / X-series
11/2006 Edition
39
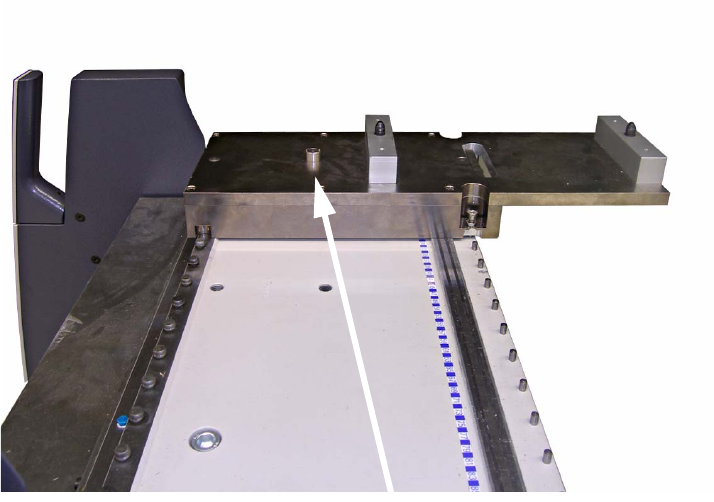
: Screw the adapter in place with the M10 x 60 mm screw..
2
2
2.7.3 With clamp, without hole
The clamp does not work on the HF-series / X-series. 2
: Unplug the table and dock it out of the placement machine.
: Loosen the screws on the front of the adapter.
: Position the adapter at the desired position (which must fit with the SIPLACE tape guide chan-
nel special design).
2
2
2
2
2
2
2
2
Screw
Retrofit instructions: Besi JTF2 (Traystak feeder) SIPLACE S-25 HM / S-27 HM / HS-50 / HS-60 / HF-series / X-series
11/2006 Edition
40
: Use the two outer screws to adjust the adapter so that it lies flat on the table's magnetic rail.
They are provided to prevent the magnetic rail being damaged when you tighten the screws
on the adapter.
2
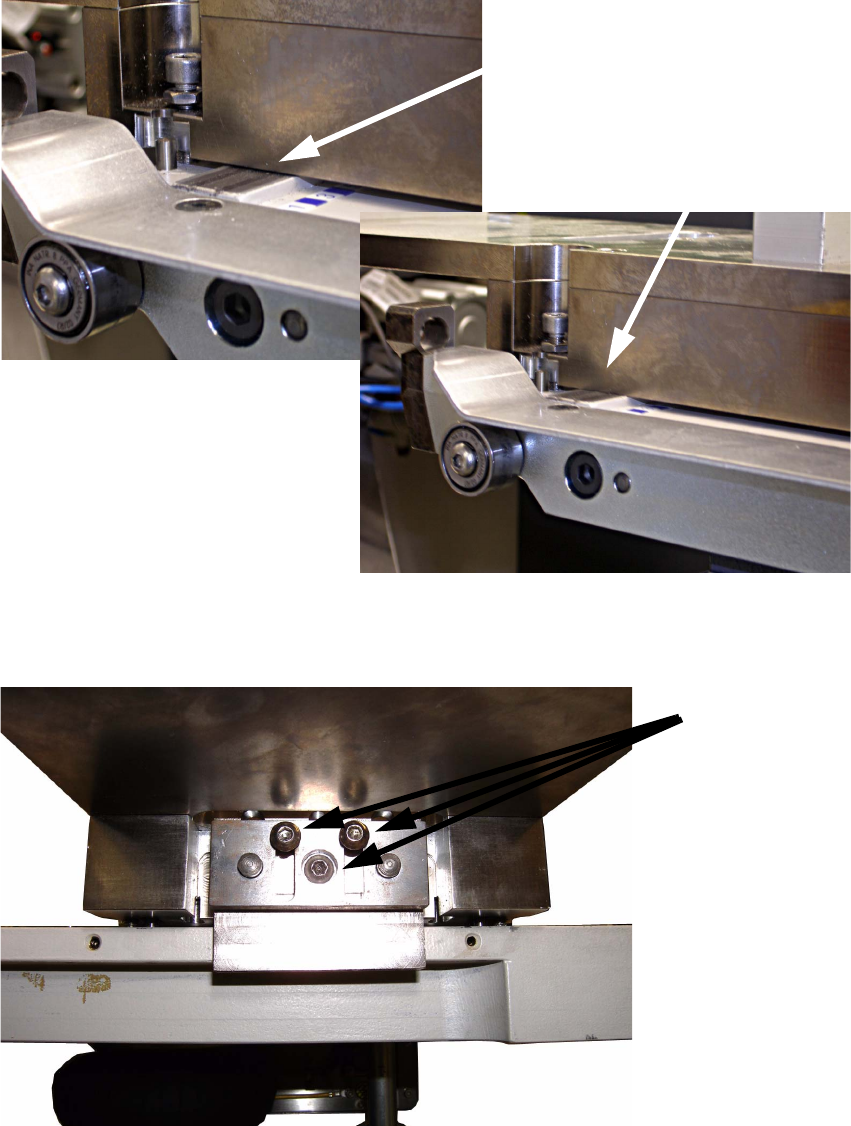
: Fix the adapter using the 3 screws on the front panel of the adapter so that it is seated firmly
on the table.
2
With gap: WRONG!!!
Without gap: RIGHT!!!
3 screws