00198424-03_JC_PM_WF3_JTF-ML2_EN.pdf - 第25页
5 WF3 JTF-ML2 Maintenance Remove Tower 5 min 1 / 1 C A U T I O N ! R e f e r t o s a f e t y i n s t r u c t i o n s i n u s e r m a n u a l b e f o r e c o m m e n c i n g M a i n t e n a n c e Machine Status OFF Conv…
4 WF3 JTF-ML2 Maintenance Remove Conveyor 5 min 2 / 2
CAUTION! Refer to safety instructions in user manual before commencing Maintenance
Machine Status OFF Conveyor Empty
NOTICE! ESD guidelines are to be followed Tool:
T31, T69
Wear Part: Consumables:
www.asm-smt.com
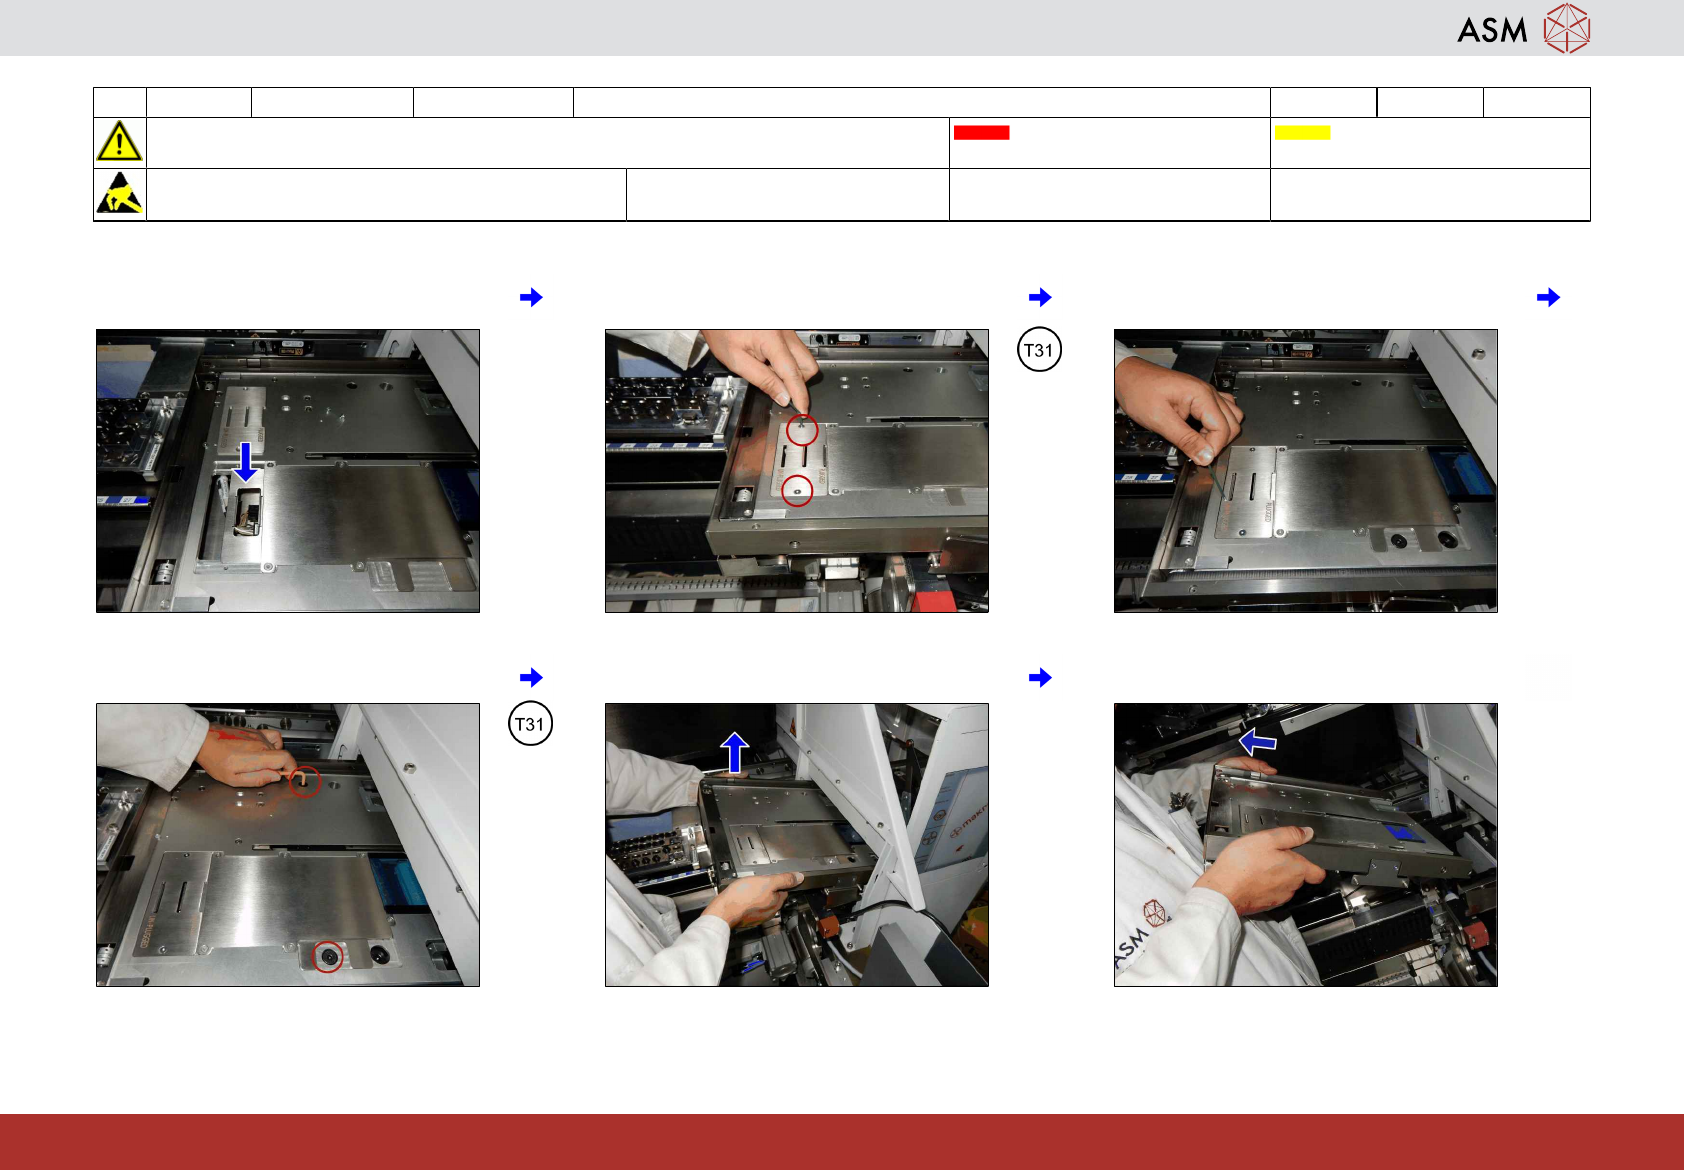
7 Reinsert the PCB mounting cover. 8 Put in the two screws. 9 The cover is now in unplugged position
and the screw is now accessible.
10 Remove the two screws. 11 Lift the conveyor up. 12 Pull the Conveyor out.
5 WF3 JTF-ML2 Maintenance Remove Tower 5 min 1 / 1
CAUTION! Refer to safety instructions in user manual before commencing Maintenance
Machine Status OFF Conveyor Empty
NOTICE! ESD guidelines are to be followed Tool:
T31
Wear Part: Consumables:
www.asm-smt.com
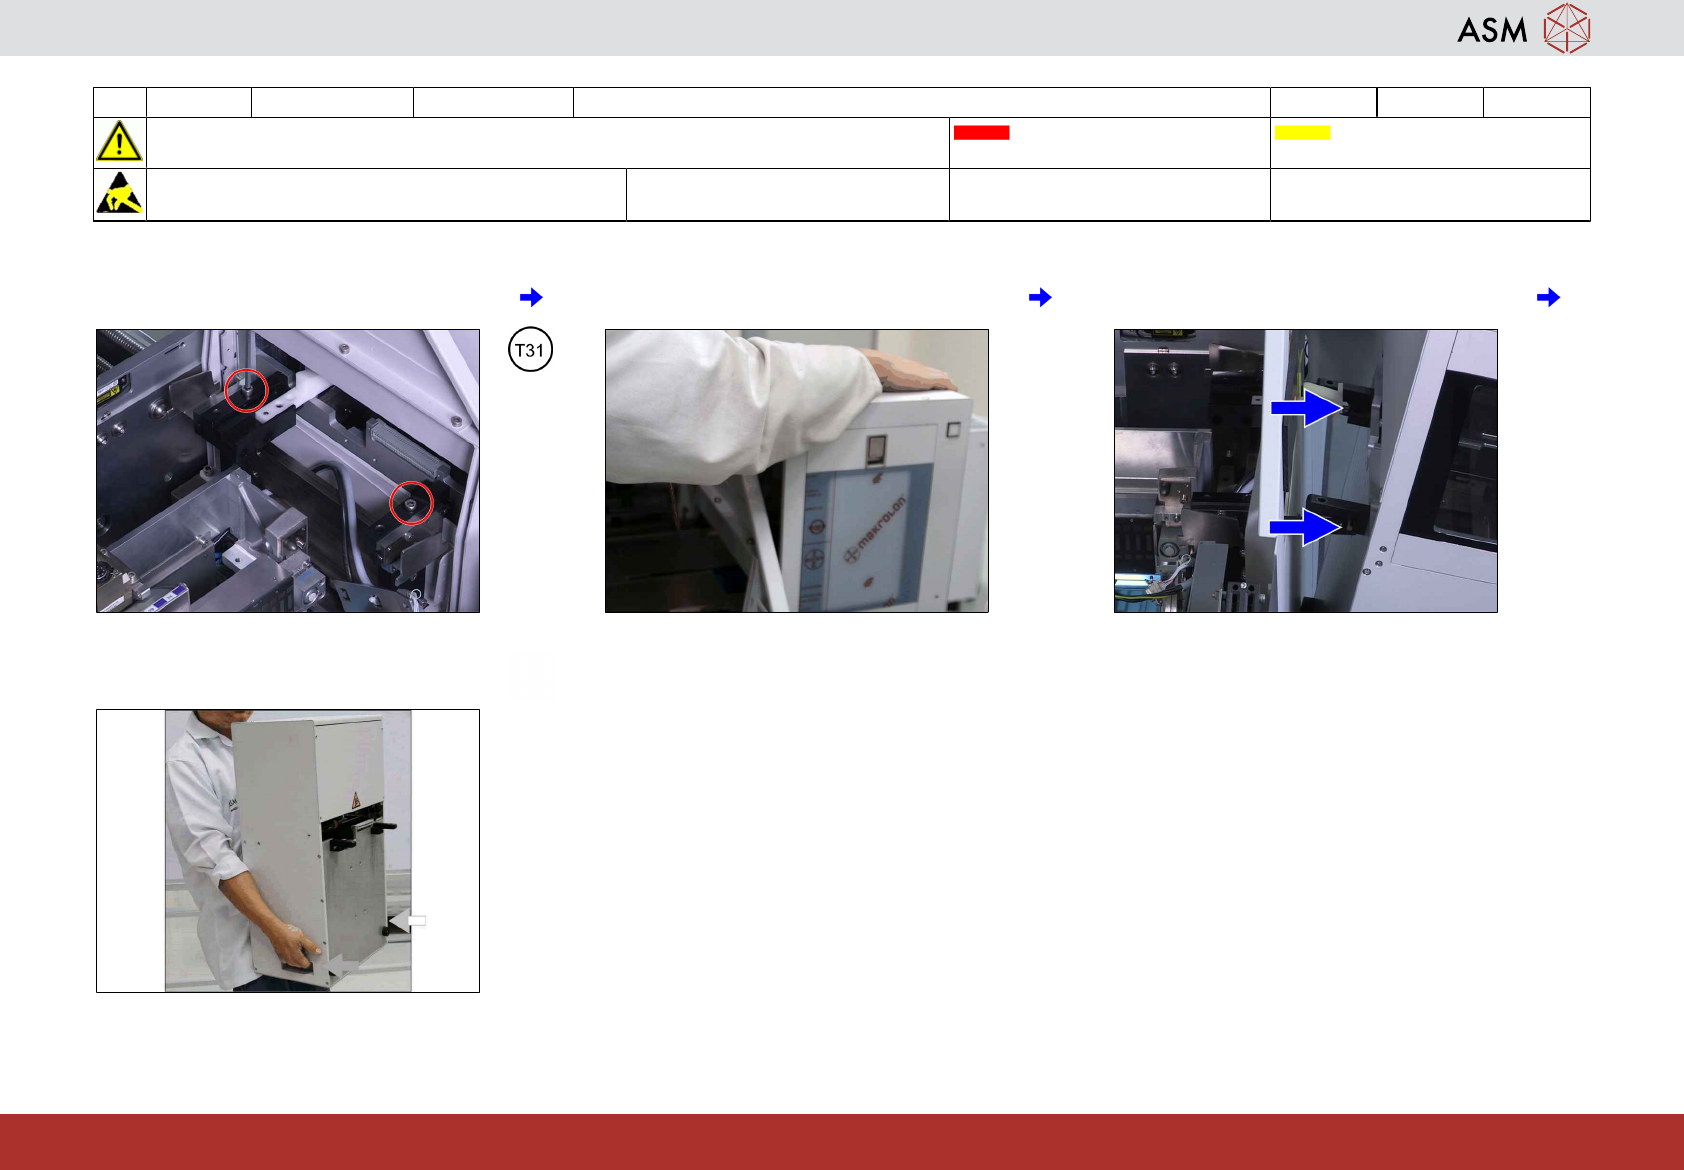
1 Remove the two screws. 2 Move the tower while removing the screws
to reduce pressure.
3 Pull the tower out of the machine from the
slidings.
4 Place the tower at service area for main-
tenance.

www.asm-smt.com