00197962-01_2nd_HMI_and_Tower_Light_en.pdf - 第38页
Installing the 2 Tower Light Kit or the 3 Tower Light Kit Installing the 2 Tower Light or 3 Towe r Light Kits 38 Assembly Instructions SIPLACE E 3.3 3 . 3 I n s t a llin g t h e 2 T o w e r L ig h t o r 3 T o w e r L ig …
Installing the 2 Tower Light Kit or the 3 Tower Light Kit
Tools Required
Assembly Instructions SIPLACE E 37
3
3 Installing the 2 Tower Light Kit or the 3 Tower Light Kit
Installing the 2 Tower Light Kit or the 3 Tower Light
Kit
This section describes how to replace the standard (one) tower light kit in SIPLACE E series machines
with the 2 tower light option or the 3 tower light option.
3.1
3.1 Tools Required
Tools Required
▪ Phillips M4 screwdriver
3.2
3.2 Parts
Parts
2 Tower Light kit [03110193-xx] for SIPLACE E series
3 Tower Light kit [03102106-xx] for SIPLACE E series
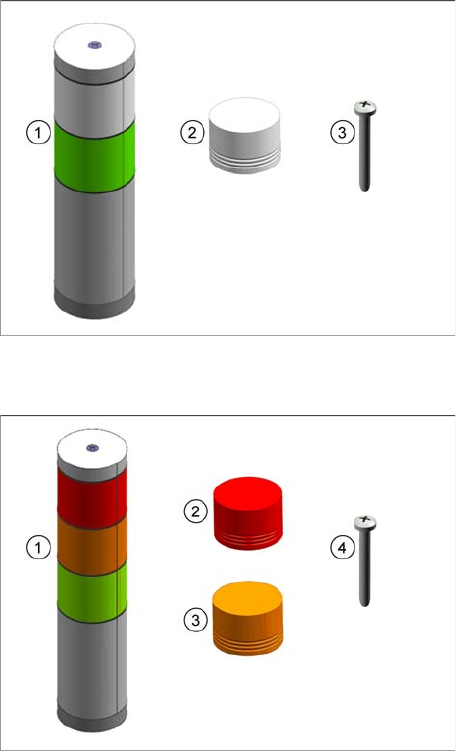
The installation kit consists of the following parts:
▪ (1) 2 Tower Light Kit [03110193-xx]
– (2) LED module (Clear) [03117710-xx]
– (3) Pan Head screw M4x75 (Patlite)
[03117711-xx]
The installation kit consists of the following parts:
▪ (1) 3 Tower Light kit [03102106-xx]
– (2) LED module (Red) [03117716-xx]
– (3) LED module (Amber) [03117717-xx]
– (4) Pan Head screw M4x105 (Patlite)
[03117715-xx]
Installing the 2 Tower Light Kit or the 3 Tower Light Kit
Installing the 2 Tower Light or 3 Tower Light Kits
38 Assembly Instructions SIPLACE E
3.3
3.3 Installing the 2 Tower Light or 3 Tower Light Kits
Installing the 2 Tower Light or 3 Tower Light Kits
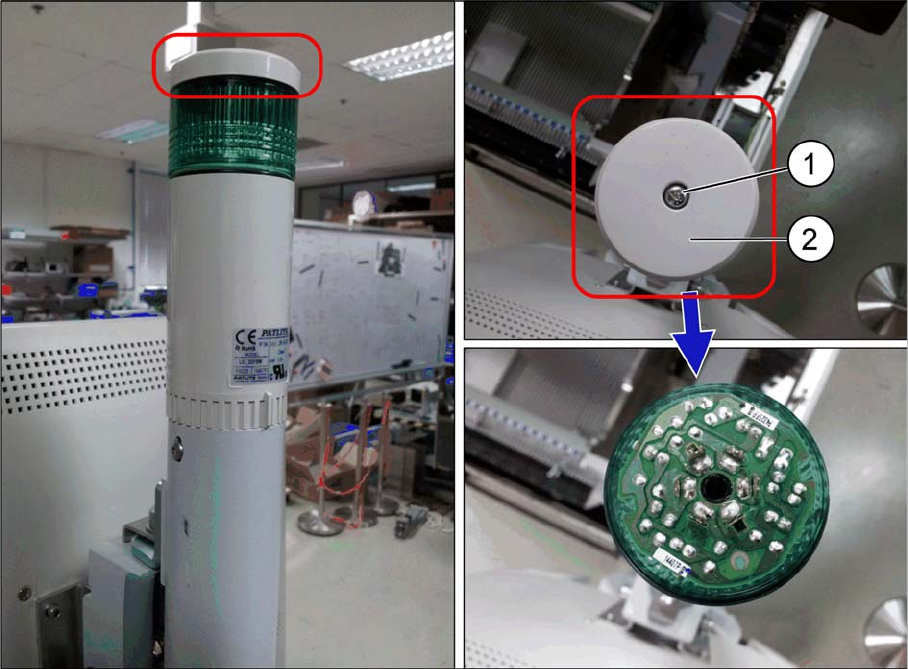
Step 1:
► Ensure that the machine is in power-off state.
► Remove the M4x45 pan head screw (1) and the cover (2) on the top of the tower light.
Installing the 2 Tower Light Kit or the 3 Tower Light Kit
Installing the 2 Tower Light or 3 Tower Light Kits
Assembly Instructions SIPLACE E 39
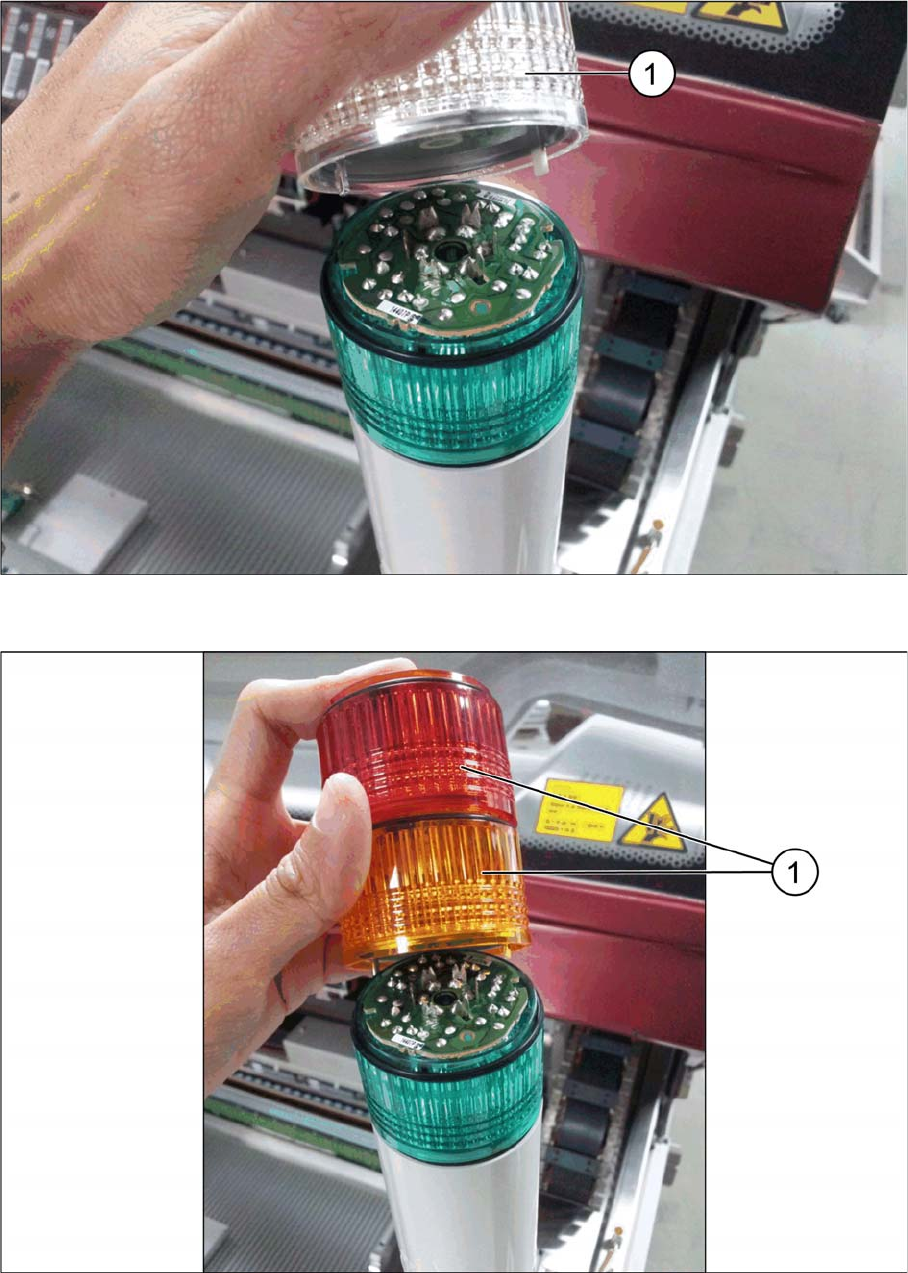
Step 2:
► For 2 tower light kit, align the clear LED (1) on top of the green LED using the two key slots on the
PCB.
► For 3 tower light kit, align the orange and red LEDs (1) on top of the green LED using the two key
slots on the PCB.