Printer 710_810 v8 High Throughput Conveyor Module.pdf - 第33页
HIGH THROUG HPUT CONVE YOR (HTC ) MODULE REPLACEMENT PROCEDURES Chapter Issue 3 Oct 06 Technical Reference Manual 17.33 Clamp s to Snuggers WARNING BOARD CLAMPS. EXTREME CAR E MUST BE EXERCISED WHEN W ORKING IN THE TOOLI…
HIGH THROUGHPUT CONVEYOR (HTC) MODULE
REPLACEMENT PROCEDURES
17.32 Technical Reference Manual Chapter Issue 3 Oct 06
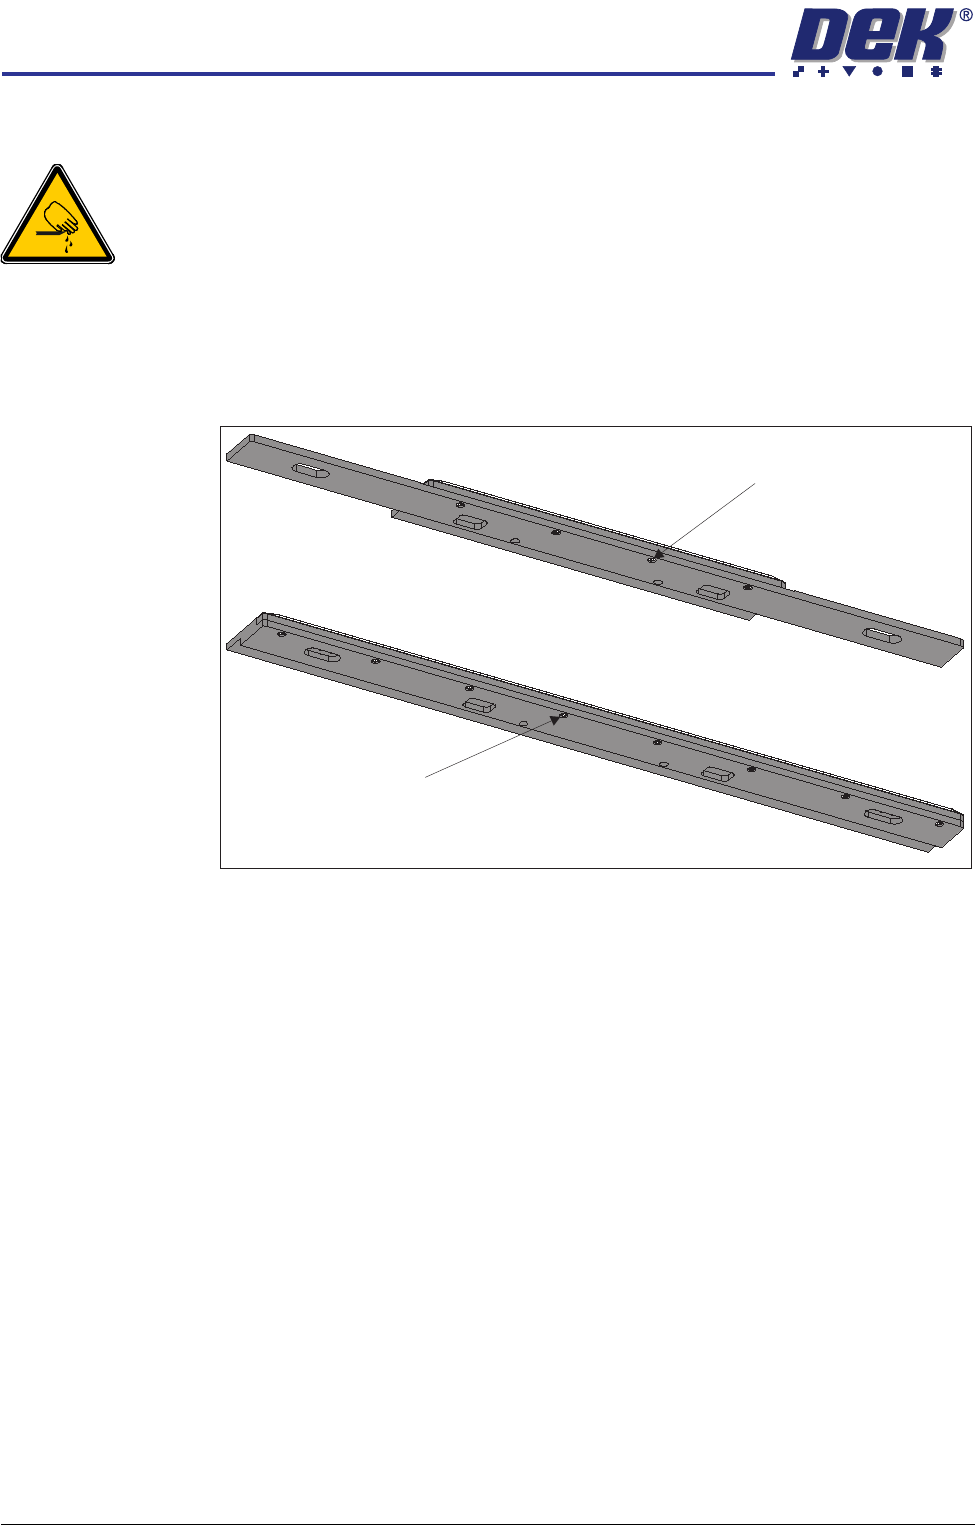
Board Clamp Foil Replacement
WARNING
BOARD CLAMPS. EXTREME CARE MUST BE EXERCISED WHEN WORKING IN
THE TOOLING AREA OF THE MACHINE TO AVOID INJURY. THE FOILS ON THE
FRONT AND REAR BOARD CLAMPS ARE VERY SHARP.
If the board clamp is fitted to the machine, use the Board Clamp Replacement
procedure to remove and refit the board clamps.
1. Remove the M2.5 x 6mm pan headed slotted screws securing the foil to the
board clamp. Discard the foil and retain the screws.
2. Fit the new foil with the screws removed in Step 1.
Board Clamp Foil Securing Screw (in 4 positions)
Board Clamp Foil Securing Screw (in 8 positions)
View on Underside of
250mm Board Clamp Mechanism
View on Underside of
500mm Board Clamp Mechanism

HIGH THROUGHPUT CONVEYOR (HTC) MODULE
REPLACEMENT PROCEDURES
Chapter Issue 3 Oct 06 Technical Reference Manual 17.33
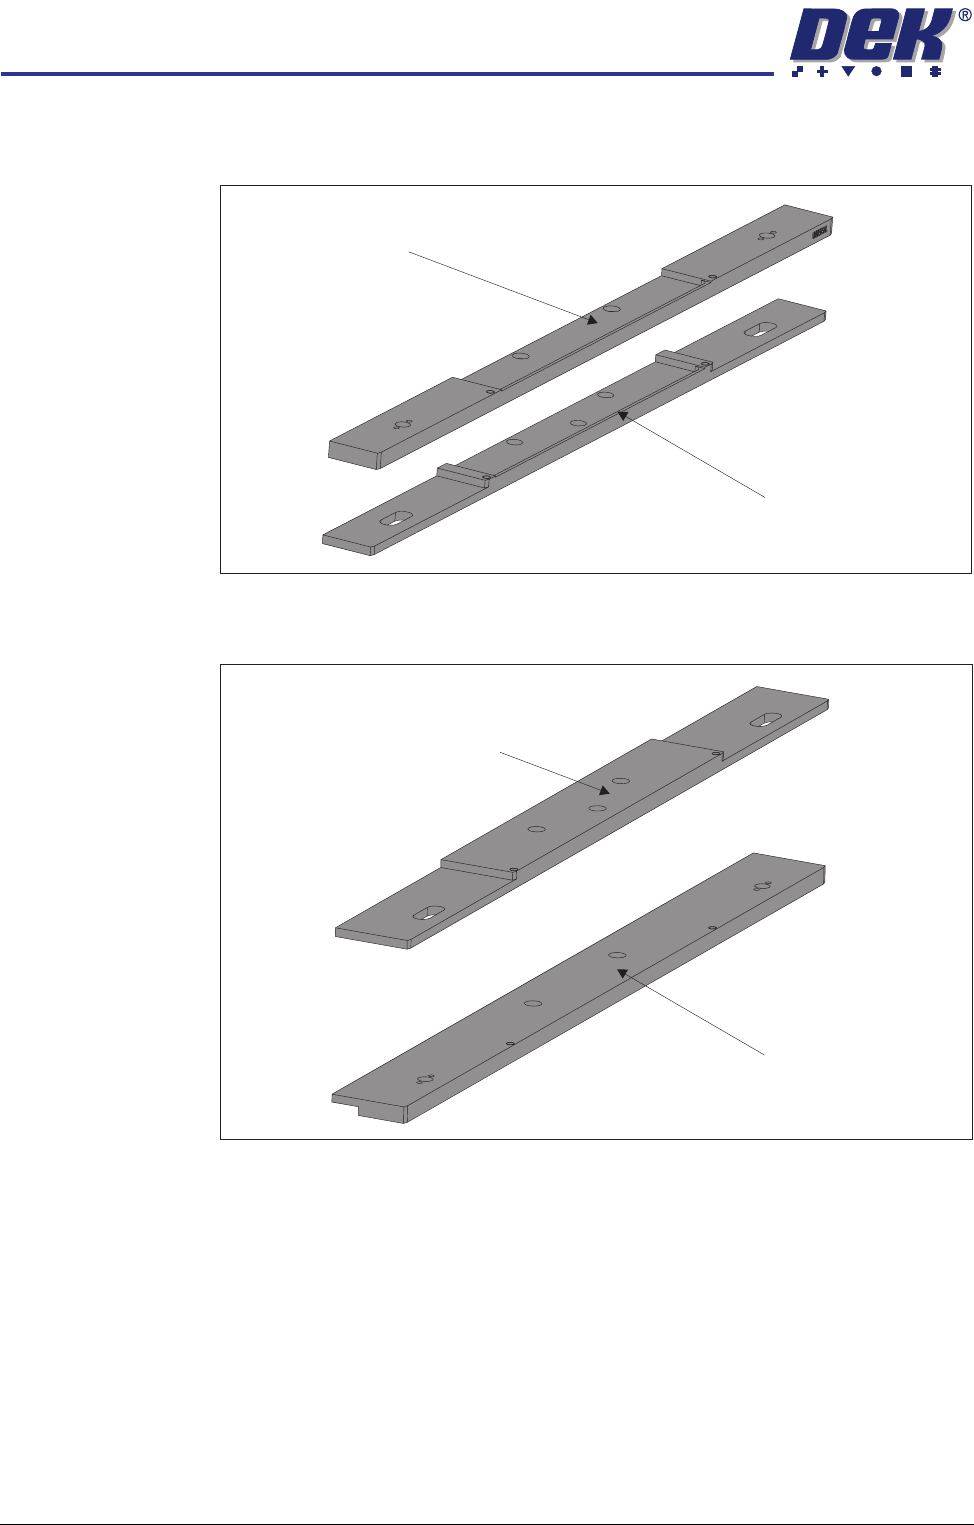
Clamps to Snuggers
WARNING
BOARD CLAMPS. EXTREME CARE MUST BE EXERCISED WHEN WORKING IN
THE TOOLING AREA OF THE MACHINE TO AVOID INJURY. THE FOILS ON THE
FRONT AND REAR BOARD CLAMPS ARE VERY SHARP.
NOTE
This procedure is valid when converting from either board clamps or foil-less
clamps.
1. Open the front printhead cover.
2. Remove the securing screws from the rear board clamp and remove the
board clamp.
3. Repeat Step 2 for the front board clamp.
500mm Board Clamp Mechanism
Board Clamp Securing Screws
250mm Board Clamp Mechanism
Board Clamp Securing Screws
HIGH THROUGHPUT CONVEYOR (HTC) MODULE
REPLACEMENT PROCEDURES
17.34 Technical Reference Manual Chapter Issue 3 Oct 06
4. Fit the appropriate snugger base plate to the rear rail and secure using the
M4 pan head screws.
5. Fit the appropriate front snugger plate to the front rail and secure using the
M4 pan head screws.
Snugger Base Plate -
Fixed Width Chase
Snugger Base Plate -
Adjustable Screen Mount (ASM)
Front Snugger Plate -
Fixed Width Chase
Front Snugger Plate -
Adjustable Screen Mount (ASM)