51074冲击扳手说明书.pdf - 第20页
中文 EN DE RU KO PT JA ES 51074 20 Warning: Before starting the machine, mak e sure that the screwdriver bit is fully fixed by the chuck. 7 . Work light: Machine is equipped with the work light: when the switch is pressed,…
中文
EN DE RU KO PT JA ES
51074
19
Operation:
1. Start/stop (see Figure B):
Press and hold the switch (1) to start the machine, and release it to stop the machine.
2.Speed regulation:
Change the force applied to the switch to regulate the rotating speed. The range of adjustment is between 0 and the maximum rotating
speed. The smaller the force is, the lower the rotating speed is. The drilling starts slowly and stably After the stable and reliable start,
press the switch fully for higher speed.
3.Speed position selection (see Figure C):
First select the position, and then regulate the rotating speed with switch; the highest position is selected at delivery and there are three
position indicators (6) where three ones going on means the high position, two ones going on means the mid position and one going on
means the low position: Change the position once each time you press the mark.
4.Switch lock (see Figure D):
The switch has the lock protection function which helps to avoid the accidental activation of the hand drill. Lock the machine by adjusting
the reversing yoke (2) to the center position.
5.Rotation reversing (see Figure D):
Forward: Push the side of reversing yoke (2) marked with " " to the end (left side) for drilling and driving the screw. Reverse: Push
the side of reversing yoke marked with " " to the end (right side) for releasing or unscrewing the screw the screw.
Warning:
The rotating speed can only be changed after the machine is completely still.
6.Installation or removal of sleeve (see Figure E):
Caution:
When installing or removing the sleeve, be sure to confirm that the drill has been turned off and that the battery pack has
been removed.
1 )Sleeve without O-ring and pin:
a) Install the sleeve: press it on the square driving head (1) of tool until it is fully seated.
b) Remove the sleeve: just unplug it.Gently tap it if necessary.
2 )Sleeve with O-ring and pin:
a)Install the sleeve: Move the O-ring out of the sleeve groove, remove the pin on the sleeve, place the sleeve on the square driving
head (1), align the hole in the sleeve with that on the square driving head, and fit the pin through the holes in the sleeve and
square driving head (1), and then return the O-ring to the original position in the sleeve to fix the pin.
b) Remove the sleeve: please follow the reverse steps of installation.
Warning:
Do not operate at low speed for a long time by pressing the switch. Otherwise the machine will be overheating inside. Change
the rotating speed after stop.
中文
EN DE RU KO PT JA ES
51074
20
Warning:
Before starting the machine, make sure that the screwdriver bit is fully fixed by the chuck.
7.Work light:
Machine is equipped with the work light: when the switch is pressed, the light will come on; when it is released, the light will go out 15s
later.
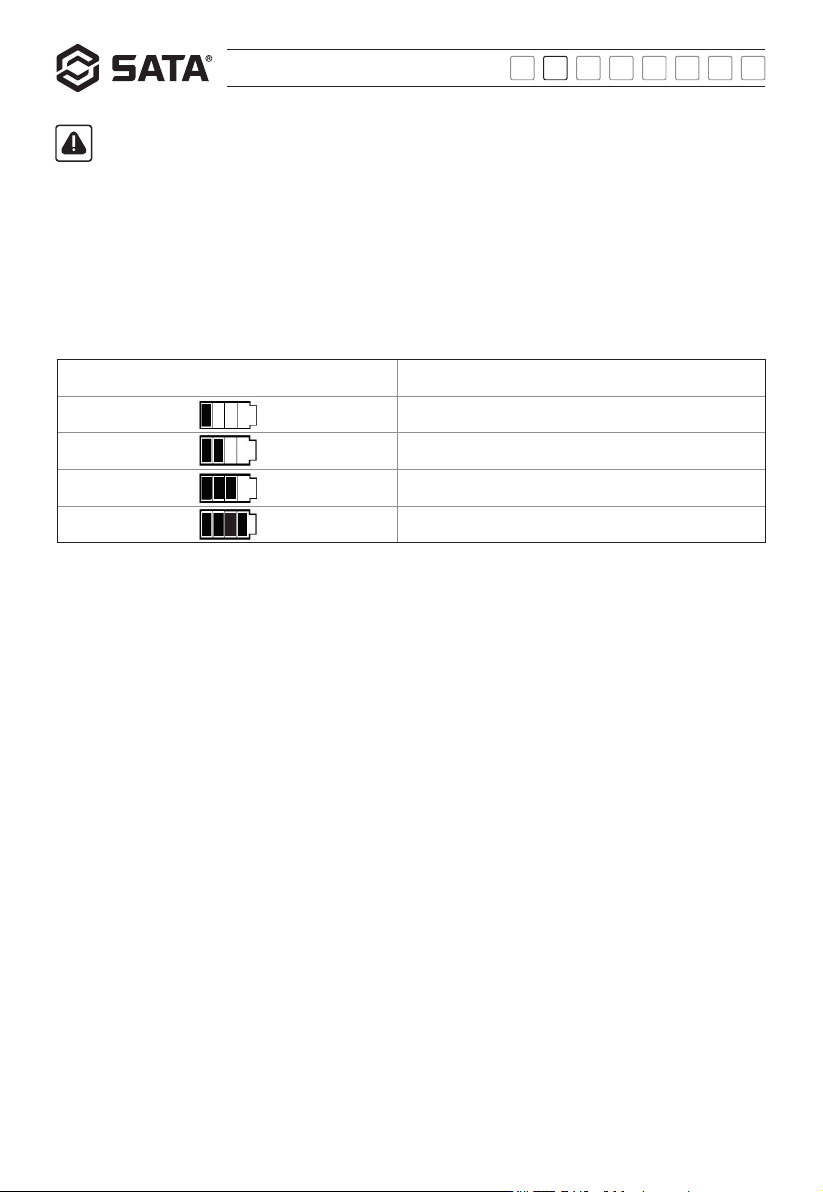
8.Battery level display:
When the machine switch is pressed, the battery indicator will stay on for 5s. The remaining capacity of battery pack may be determined
according to the following table.
LED display Remaining battery
0-25%
25-50%
50-75%
75-100%
9.Operation:
Be sure to fully lock the battery pack as it may accidentally fall out of the tool and cause injury to yourself or others. Hold the tool firmly
and place the sleeve above the bolt or nut, turn the machine on and tighten it properly.
The tightening torque may vary depending on the type or size of bolt and the material of workpiece to be fastened. Generally, the longer
the tightening time is, the larger the tightening torque is.
Note:
Align the tool straightly with the bolt or nut.
Excessive tightening torque may damage the bolt nut or sleeve. Before the operation, be sure to conduct the test run to determine the
proper tightening time for the bolt or nut.
If the tool keeps operating until the battery pack is exhausted, the operation shall stop for 15min, and then continue the operation with
the charged battery pack.
Tightening torque depends on the various factors described below. After tightening, be sure to confirm the torque with the torque wrench.
1 )When the battery pack is about to run out completely, the voltage will drop and the tightening torque will also decrease.
2 )Sleeve:
a)Incorrectly sized sleeve will result in the decrease of tightening torque.
b)Damaged sleeve (wear of hex end or rectangular end) will reduce the tightening torque.
3)Bolt:
a)Even if the torque coefficient and the bolt level are the same, the tightening torque is different because of the different
diameters.
b) Even if the diameter of bolt is the same, the required tightening torque is different depending on its toque coefficient and its
length.
4)Universal joint or extension rod will reduce the tightening force of the impact sleeve wrench to some extent, which can be
compensated by the extension of tightening time.
5)The way the tool is held or the material on the bolt will also affect the torque.

中文
EN DE RU KO PT JA ES
51074
21
6)Operating at low speed will also reduce the tightening torque.
Question and answer:
1)Why does the machine not operate after the switch is pressed?
The reversing yoke on the upper part of switch is locked. Turn it to the position where the rotation is in need, and then press the
button to rotate the machine.
2)Why does the machine stop when it is not tightened?
The machine has low-voltage protection. When the level of battery pack is too low, the machine will not work. Please confirm the level
of battery pack.
The machine has temperature protection. When the battery is working at full load for a long time, the battery pack will overheat and
the temperature protection system will start to stop the machine. Cool the machine to normal temperature before resumption.
3)Why is the service life of same kind of battery pack is different?
If a battery pack is left unused for a long time, its service life may be shortened. This is the matter of charging frequency. Repeated
charging and application may improve the situation. In case of heavy work, the battery pack will run out soon. Do not charge in a
temperature below 0 ° C or above 35℃ . Otherwise, the performance of battery pack will be affected.
Maintenance:
Be sure to pull off the plug before repairing or replacing the machine:
The electric tool does not require additional lubrication or other maintenance. Do not wash the electric tool with the water or chemical
cleaner. Wipe it off with a dry cloth. Tool shall be stored under the dry conditions and kept clean at the vent of motor. Try not to use it in
a dusty environment.
To prolong the service life of battery pack:
1 )Store the battery pack below 26 °C after charging it to 30%-50%.
2)Charge the battery pack fully once in less than 6 months.
Disposal of discarded battery pack:
To protect the natural environment, please recycle or dispose of the battery pack properly. The battery pack contains a Li-
ion battery. Please consult the local waste disposal department for the information on recycling and/or disposal. Exhaust the
battery pack with the hand drill, remove the battery pack, and wrap the pole port with strong tape to avoid the short circuit
and leakage. Do not attempt to open or remove any part.
Environmental protection:
Disposal of waste:
The damaged machine, accessories and packaging materials shall be classified in detail for recycling in line with environmental
protection requirements.All plastic parts are marked with material identifications to facilitate the classification and recycling.