1OM-1505-004_w.pdf - 第120页
1OM-1505 2. Squeegee Replacement and Solder Paste Replenishment : Chap.3 3-15 (7) Push down the mechanical valve switch (used to clamp the squeegee) to the left side (unclamping) and pull down the squeegee from the squee…
1OM-1505
3-14
2. Squeegee Replacement and Solder Paste Replenishment : Chap.3
2. Squeegee Replacement and Solder Paste
Replenishment
The squeegees can be replaced or solder paste can be replenished during the
automatic operation with the machine in the "STOP" or the "PAUSE" mode.
2.1 When "Squeegee Limit" is reached:
When the number of printing operations reaches the rate (percentage) specied
in the "Sqg. Limit" group box in the "Squeegee Change" tab sheet during the
automatic operation, an error alarm is issued and the machine stops running.
In this case, follow the steps below to replace the squeegees and restart the
automatic operation.
Procedure
(1) When the number of printing operations reaches the rate (percentage)
specied for the "Sqg. Limit", the error window appears.
(2) Press the [RESET] button to cancel the error alarm.
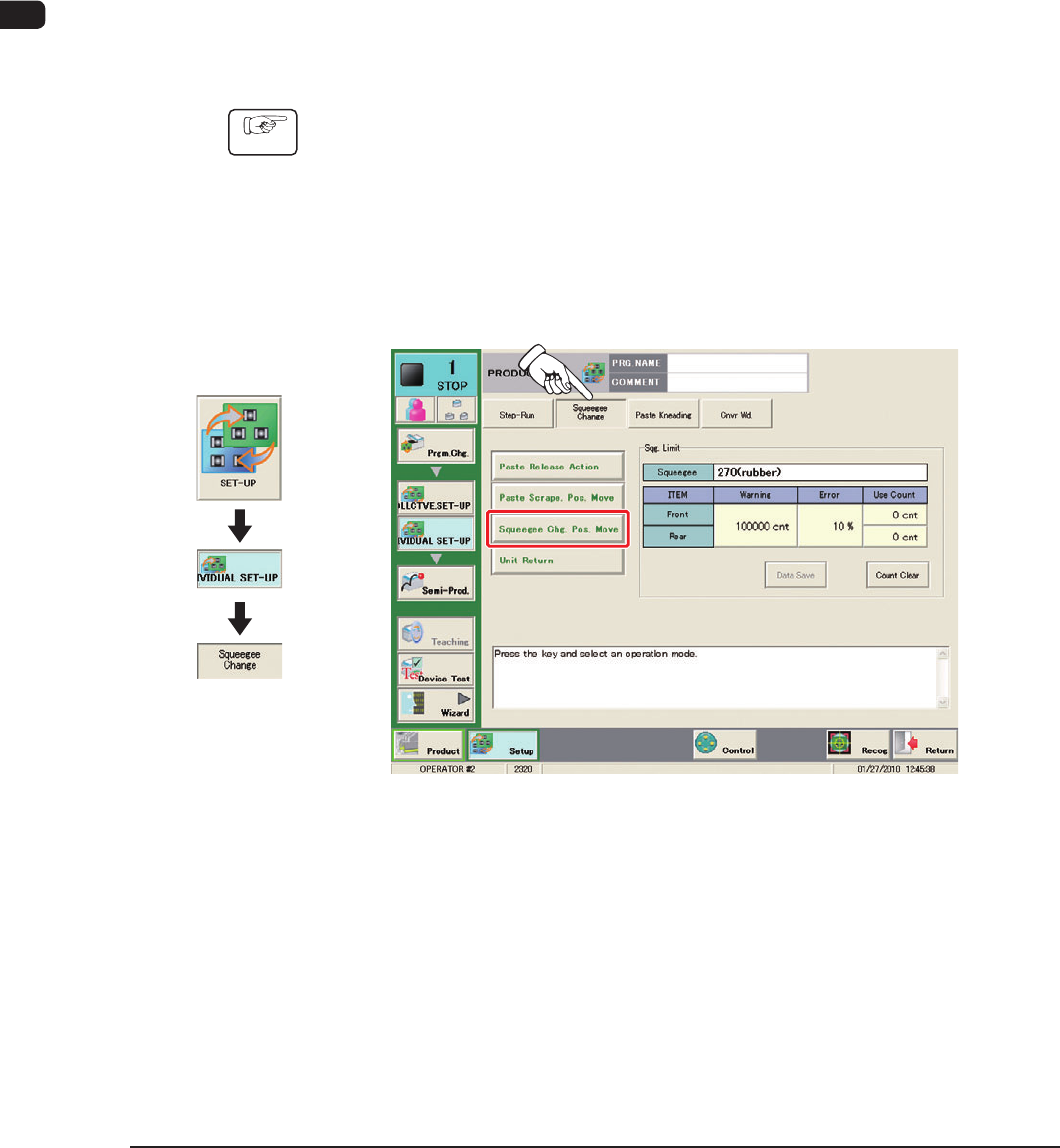
(3) Press the [Squeegee Change] tab.
(The following tab sheet will be displayed.)
F1C15
(4) Press the [Squeegee Chg. Pos. Move] button and press the [START] button
on the operation panel.
The squeegees are moved to the change position.
(5) Press the cover lock switch.
(6) Open the transparent cover on the machine front.
1002-003
Graphic
Development
1OM-1505
2. Squeegee Replacement and Solder Paste Replenishment : Chap.3
3-15
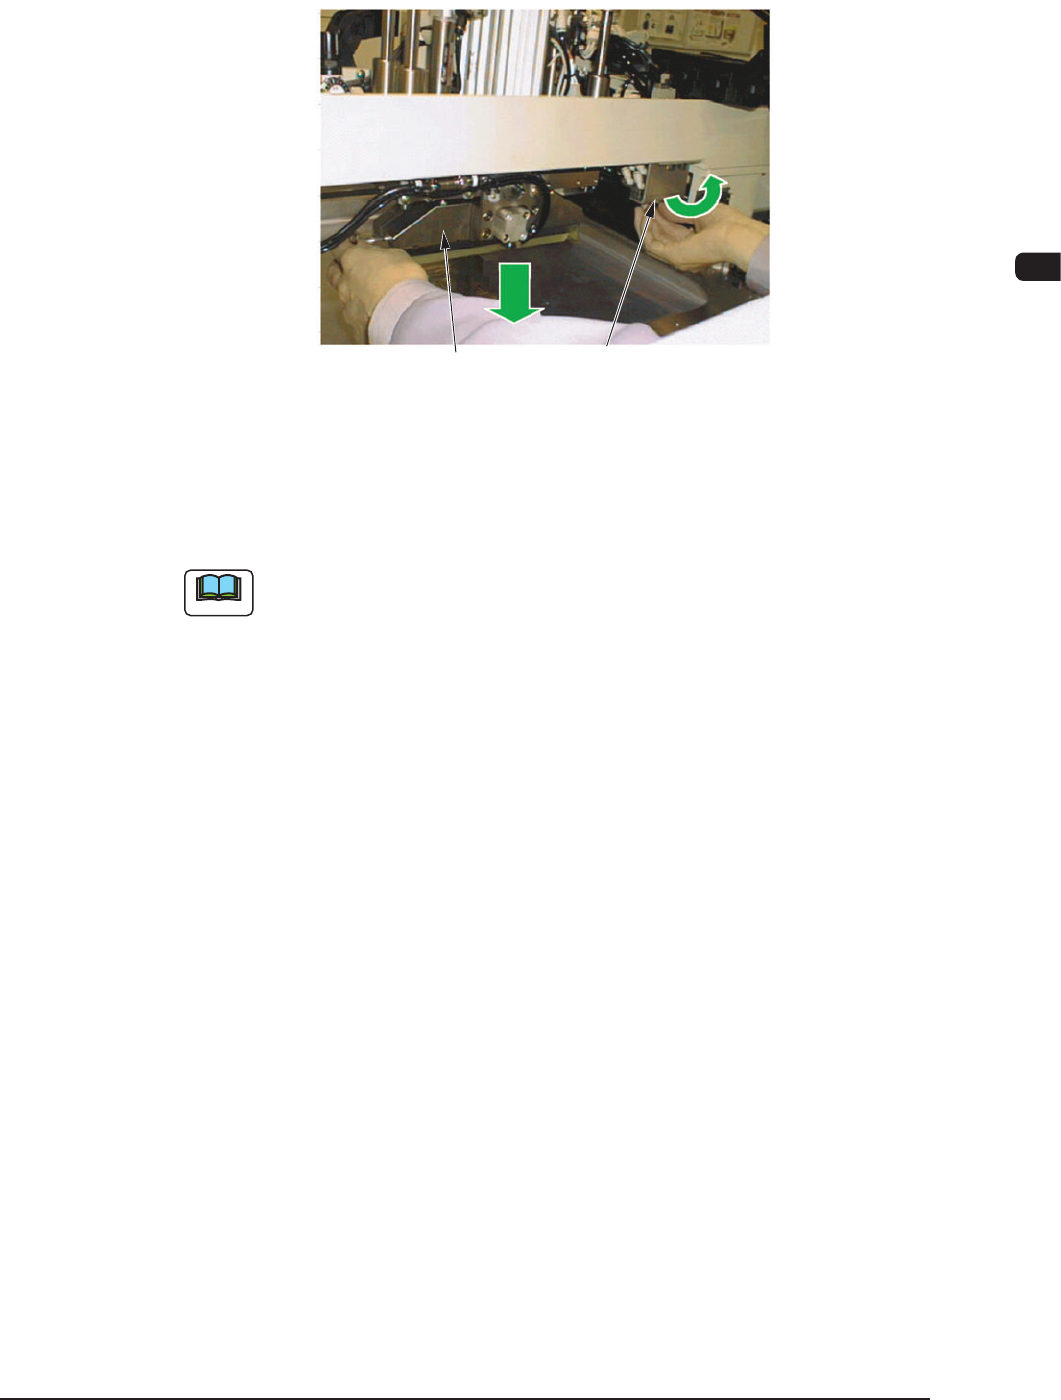
(7) Push down the mechanical valve switch (used to clamp the squeegee) to the
left side (unclamping) and pull down the squeegee from the squeegee holder
to detach.
Squeegee
Mechanical Valve Switch
(to clamp the squeegee)
F1C16
(8) Push down the mechanical valve switch to the right side to clamp the
squeegee.
Note
(a) Hold the squeegee securely and attach it. If the squeegee falls down on the
stencil, the stencil may be damaged.
It is recommended that a protective plate should be prepared by the user
and placed it on the stencil.
(b) The squeegee should be clamped from the rear side of the holder and then
from the front side.
1002-002
1OM-1505
3-16
2. Squeegee Replacement and Solder Paste Replenishment : Chap.3
2.2 Solder Paste Replenishment during the Automatic
Operation
Procedure
(1) Press the [STOP] button on the operation panel.
(The automatic operation is stopped temporarily.)
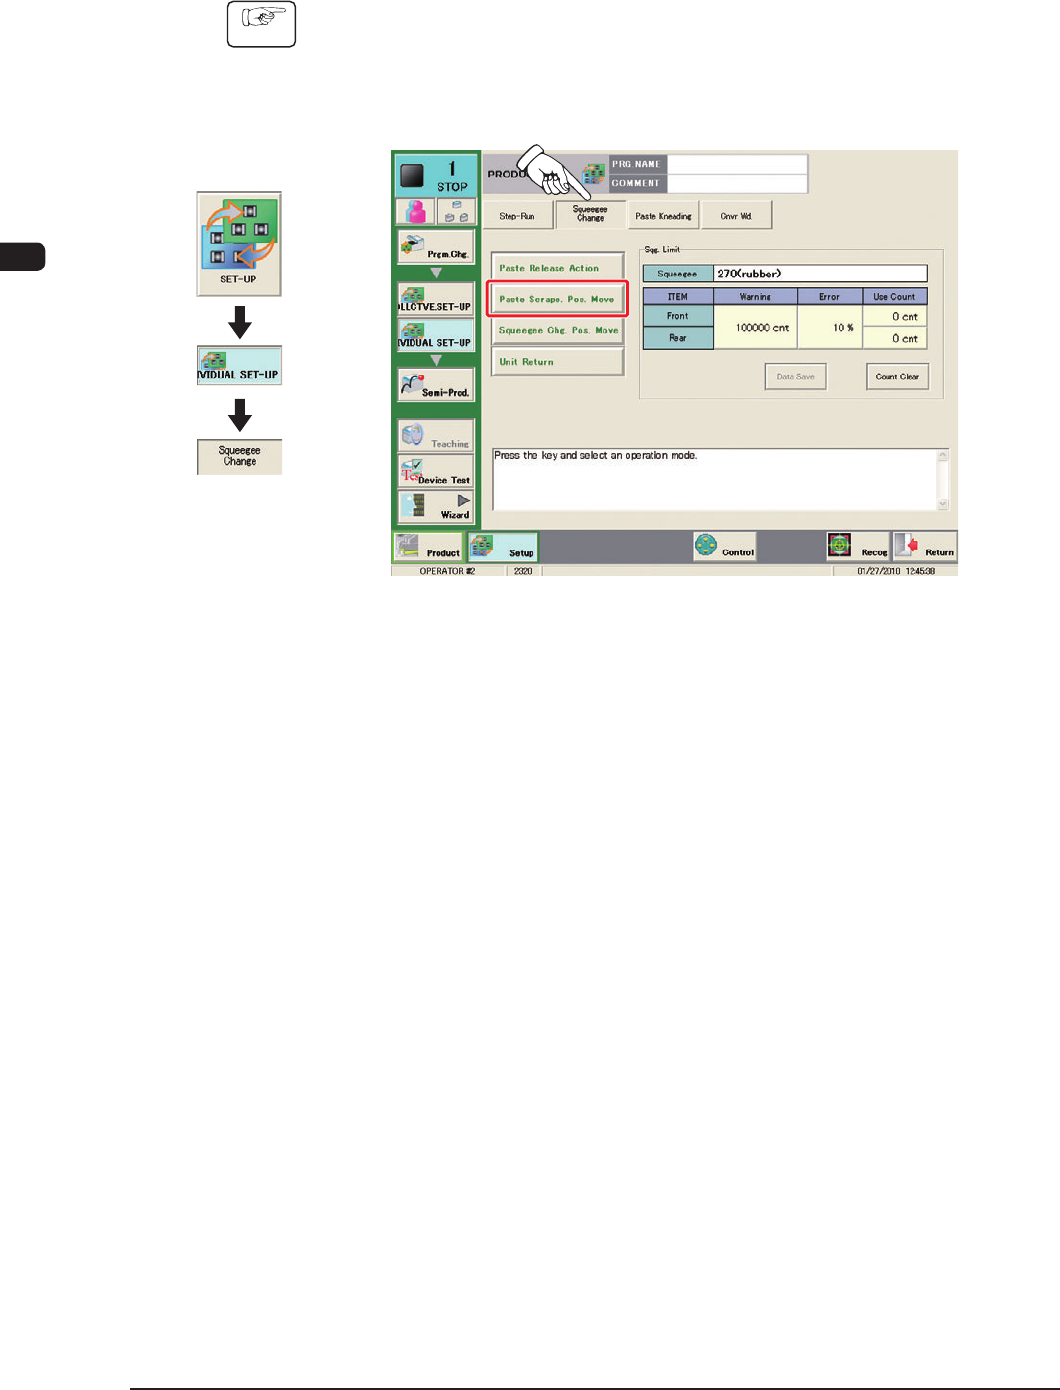
(2) Press the [Squeegee Change] tab to display the following tab sheet.
F1C17
(3) Select the [Paste Scrape. Pos. Move] button and press the [START] button on
the operation panel.
(The squeegees and stencil are moved to the paste scraping position.)
(4) Press the cover lock switch.
1002-003
Graphic
Development