1OM-1505-004_w.pdf - 第134页
1OM-1505 3. Program Change Operation: Chap.4 4-5 3.3 SET -UP Perform various setup operations using the "Setup" window. Reference Refer to "V olume 2, Chapter 3 Product Change Menu" for the operation …
1OM-1505
4-4
3. Program Change Operation: Chap.4
3.2 Selection of Production Model
Setup the product model.
Procedure
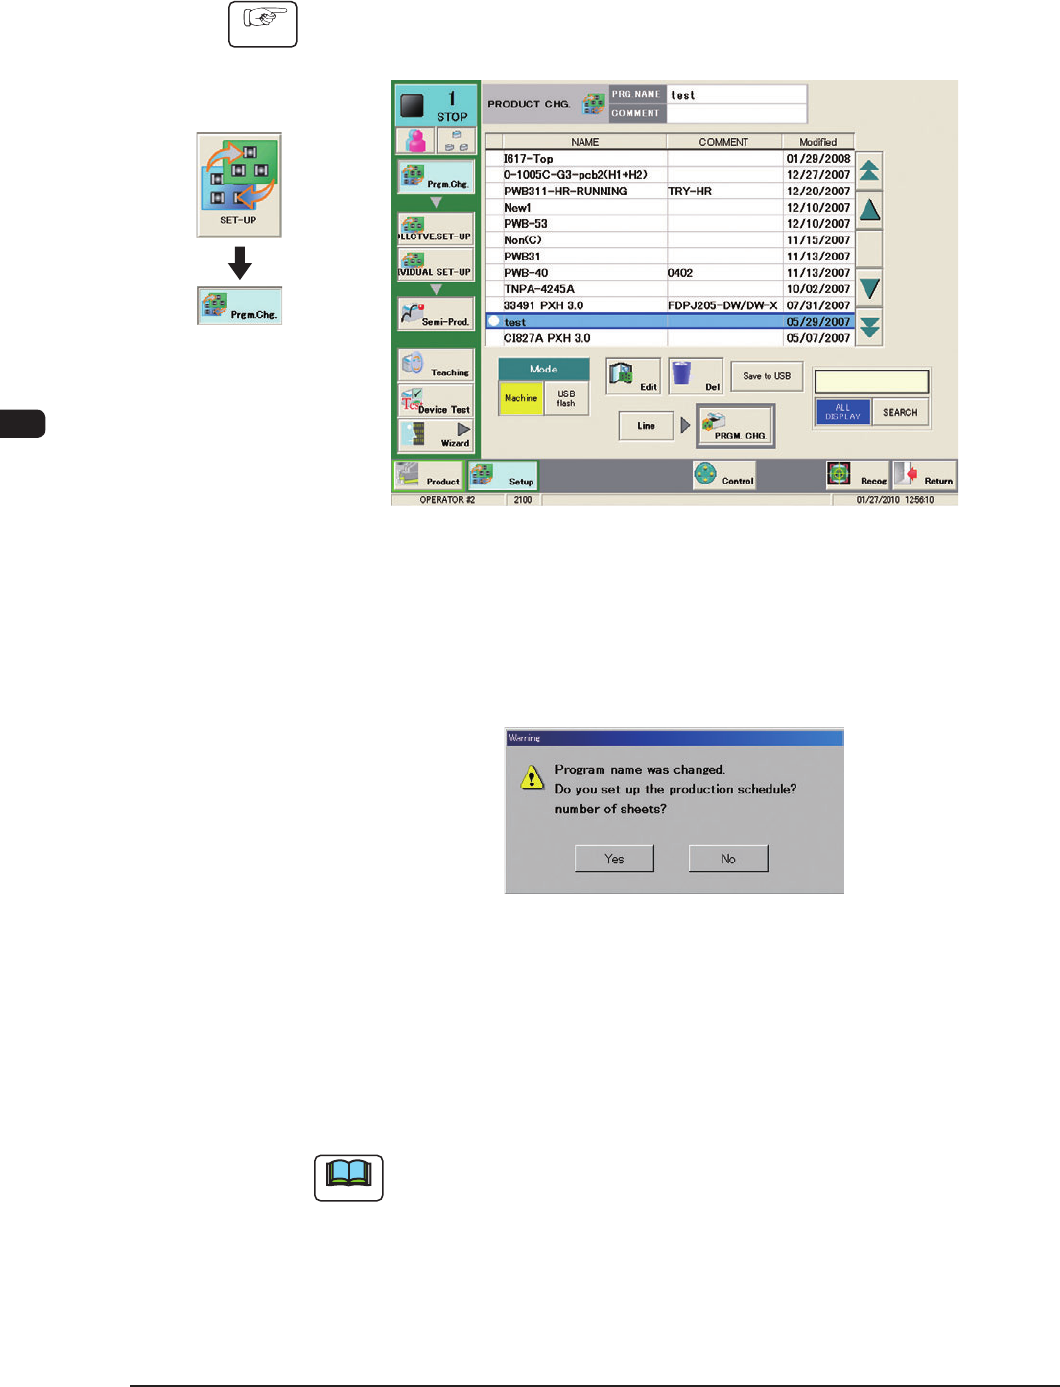
(1) Display the "PRODUCT CHG." window, following the procedures on the
developed graphics.
"PRGM. CHG" Window F1D2
(2) Select the program name to be specied as a current one (production model).
(3) Press the [PRGM. CHG.] button.
"Warning" window will be displayed.
F1D3
(4) Press the [Yes] or [No] button.
When the [Yes] button is pressed, the product model is changed and the
"Productions Schedule Number of PCB" setup window.
When the [No] button is pressed, the product model is changed and appears
and the background color turns blue.
Note
If an error is found in the pattern program, the program change operation is not
executed.
In this case, correct the pattern program and perform the program change
operation again.
1002-002
Graphic
Development

1OM-1505
3. Program Change Operation: Chap.4
4-5
3.3 SET-UP
Perform various setup operations using the "Setup" window.
Reference
Refer to "Volume 2, Chapter 3 Product Change Menu" for the operation
procedure.
1002-002
1OM-1505
4-6
3. Program Change Operation: Chap.4
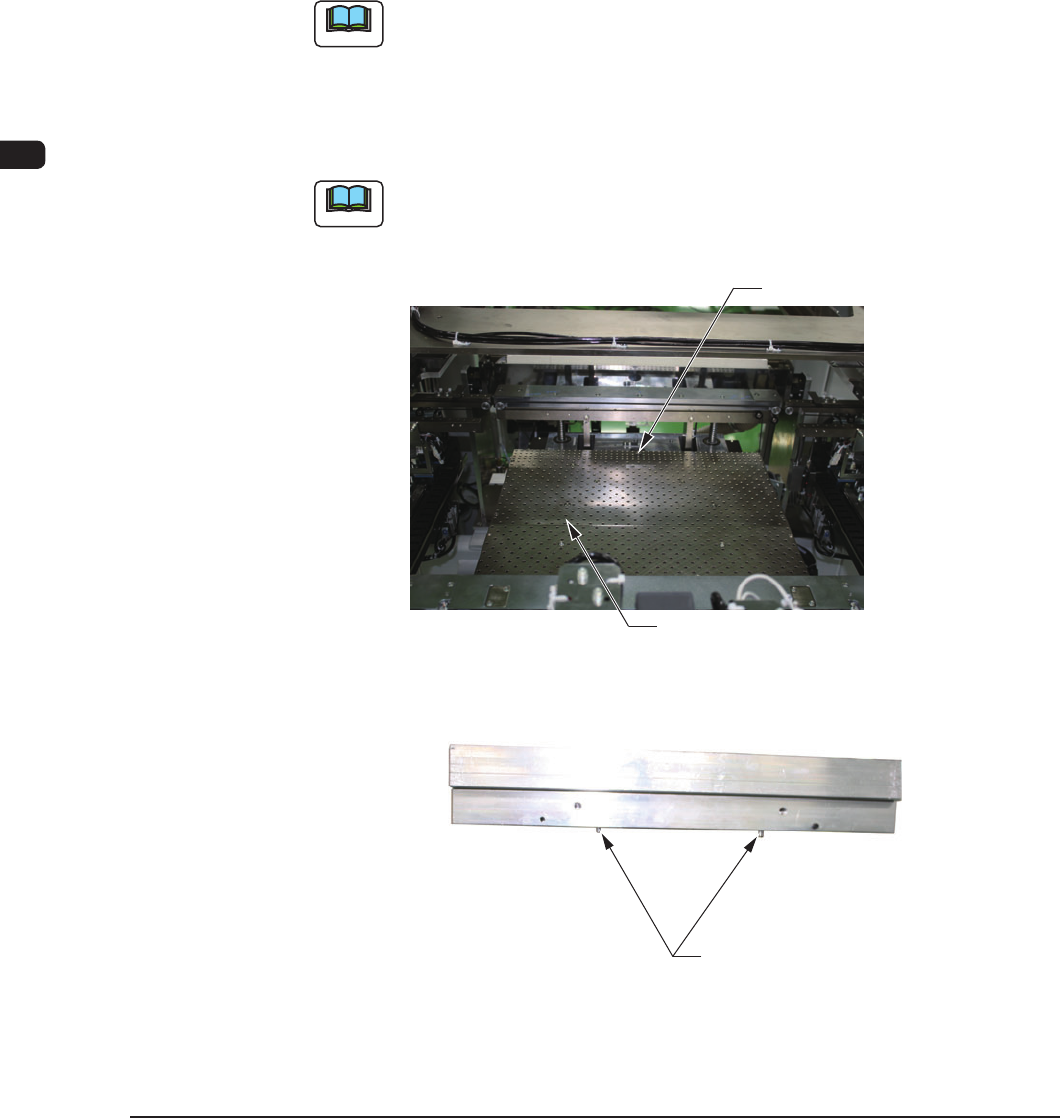
3.4 Backup Pin Adjustment and PCB Backup Jig or PCB
Vacuum Jig Installation
This section describes the backup pin installation position adjustment and the
installation of the PCB backup jig or PCB vacuum jig prepared for the product
model.
3.4.1 In the case that the Backup Pins are used:
Stand the backup pins on the well-balanced positions where these backup pins
can support the PCB securely in the printing operation and they do not hinder the
printing operation.
Note
When the backup pins are arranged on the positions out of the PCB or
unbalanced positions, the printing operation might not be available.
3.4.2 In the case that the PCB Backup Jig or PCB Vacuum Jig is used:
Set the PCB backup jig on the backup plate hole position and insert the pilot pins.
Note
When the PCB vacuum jig is used, remove the plug from the vacuum hole.
Front Side of Machine
Vacuum Hole
Backup Plate
F1D4
Backup Jig or Vacuum Jig
Pilot Pins
F1D4-1
1002-002