00196449-04_UM_FCCS_digital_DE_EN.pdf - 第80页
5 Camera Calibration at the Vision Teach Station VTS 5.3 Calibration Sequence in the SIPLACE Vision Teach Station V5.1.1 SW 80 Operating Manual / Bedienungsanleitung Camera Calibration FCCS digital Kamerakalibrierung FCC…
5 Camera Calibration at the Vision Teach Station VTS
5.3 Calibration Sequence in the SIPLACE Vision Teach Station V5.1.1 SW
Operating Manual / Bedienungsanleitung Camera Calibration FCCS digital Kamerakalibrierung FCCS digital 04/2020 79
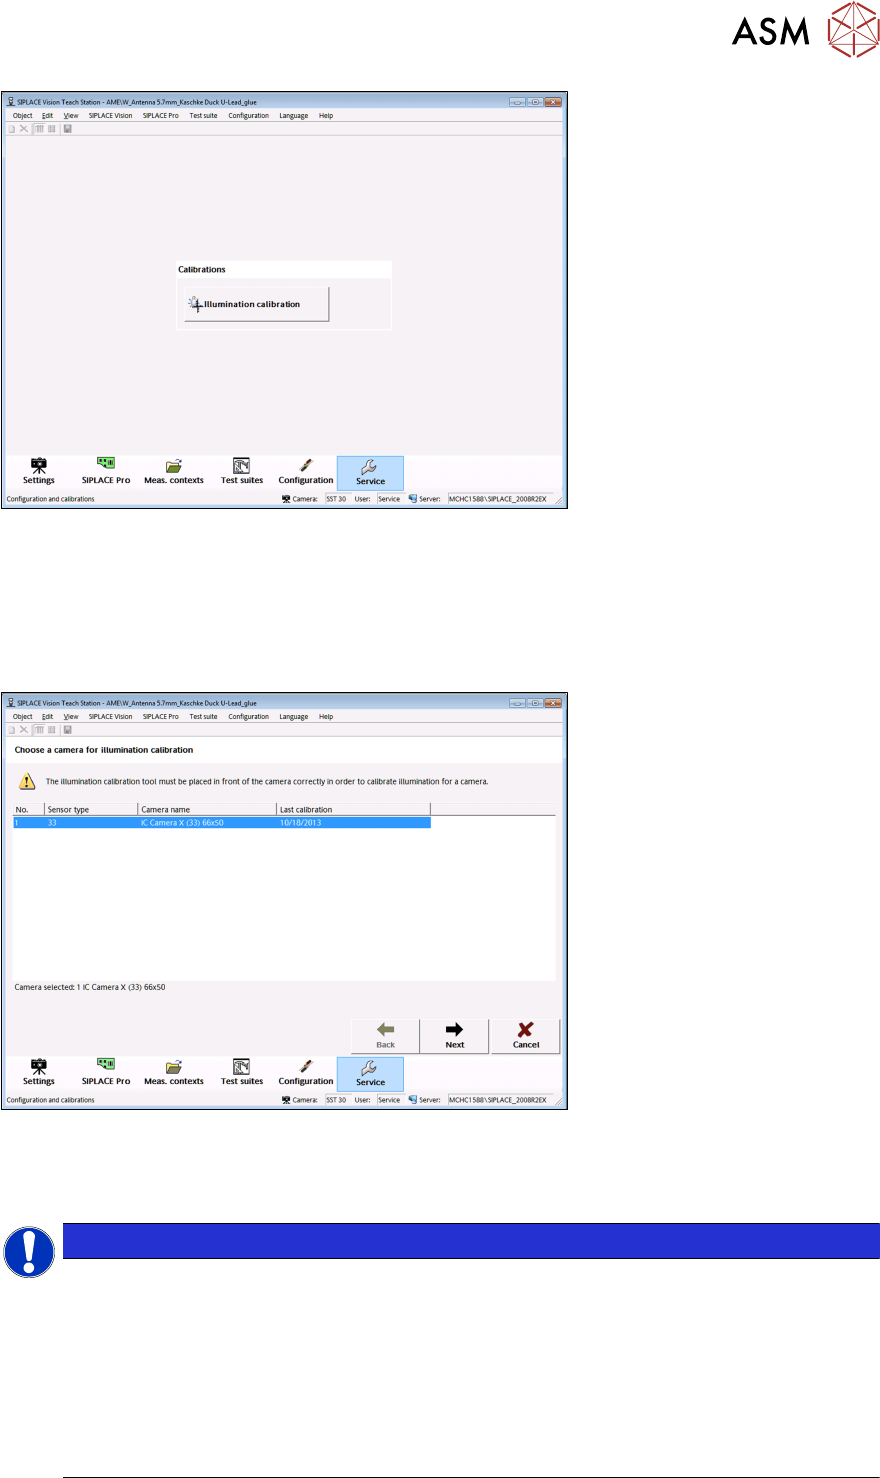
Fig.43: "Service" view
●
After start with the "Brightness calibration" button, a wizard with several steps is started.
In the first step of the brightness calibration wizard the user can select the camera to be calibrated.
Only one camera can be calibrated at the Teach Station.
A maximum of two cameras can be selected if the Teach Station is equipped with two columns on
which cameras can be mounted.
Fig.44: Selection of camera for calibration
●
After a camera has been selected, you move on to the next view with the "Next" button.
NOTICE
Software operation
The wizard can be exited at any time with the "Cancel" button.
Similar as on the 70X Station GUI, the wizard does not lock the other views. I.e., all buttons
in the lower button bar (as "Settings", "SIPLACE Pro" etc.) are enabled and it is possible to
switch to these views. The state in the "Service" view remains.
So, if you switch back to "Service", exactly that view (of the wizard) will be displayed in
which you exited the "Service" view.
5 Camera Calibration at the Vision Teach Station VTS
5.3 Calibration Sequence in the SIPLACE Vision Teach Station V5.1.1 SW
80 Operating Manual / Bedienungsanleitung Camera Calibration FCCS digital Kamerakalibrierung FCCS digital 04/2020
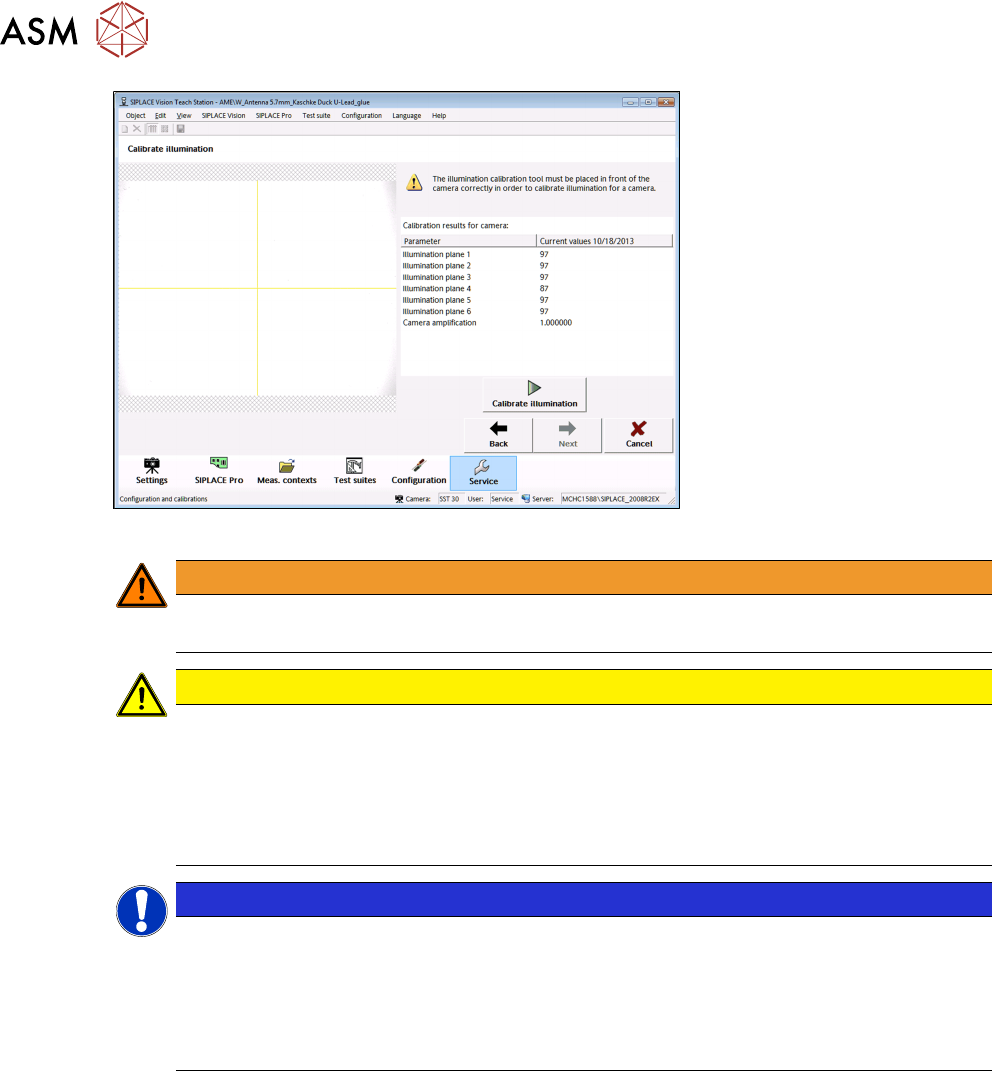
Fig.45: View before the brightness calibration
WARNING
Positioning the calibration tool
Observe the notice above the "Start FCCS" button before clicking on the button!
CAUTION
The brightness calibration tool has to be correctly placed in front of the camera in or-
der to calibrate the camera brightness.
► Put the correspondent white standard on the appropriate adapter and put the adapter
on the positioning table of the VTS.
► Now, move the adapter with the white standard towards the camera by using the avail-
able positioning options of the positioning table.
NOTICE
Leading up the white standard
► Lead up the adapter with the white standard as close as possible towards the camera
so that no external light can enter the camera.
The image shows live pictures of the camera.
Thus, you can check that the calibration tool is correctly positioned.
The results of the last successful calibration are read from the EEPROM of the camera and dis-
played in a list. Similar as on the 70X Station GUI, the calibration factors for each camera illumina-
tion level and the camera amplification factor are displayed.
●
You start the calibration with the "Start FCCS" button. The number of read-in images is coun-
ted in a progress bar during the calibration.
5 Camera Calibration at the Vision Teach Station VTS
5.3 Calibration Sequence in the SIPLACE Vision Teach Station V5.1.1 SW
Operating Manual / Bedienungsanleitung Camera Calibration FCCS digital Kamerakalibrierung FCCS digital 04/2020 81
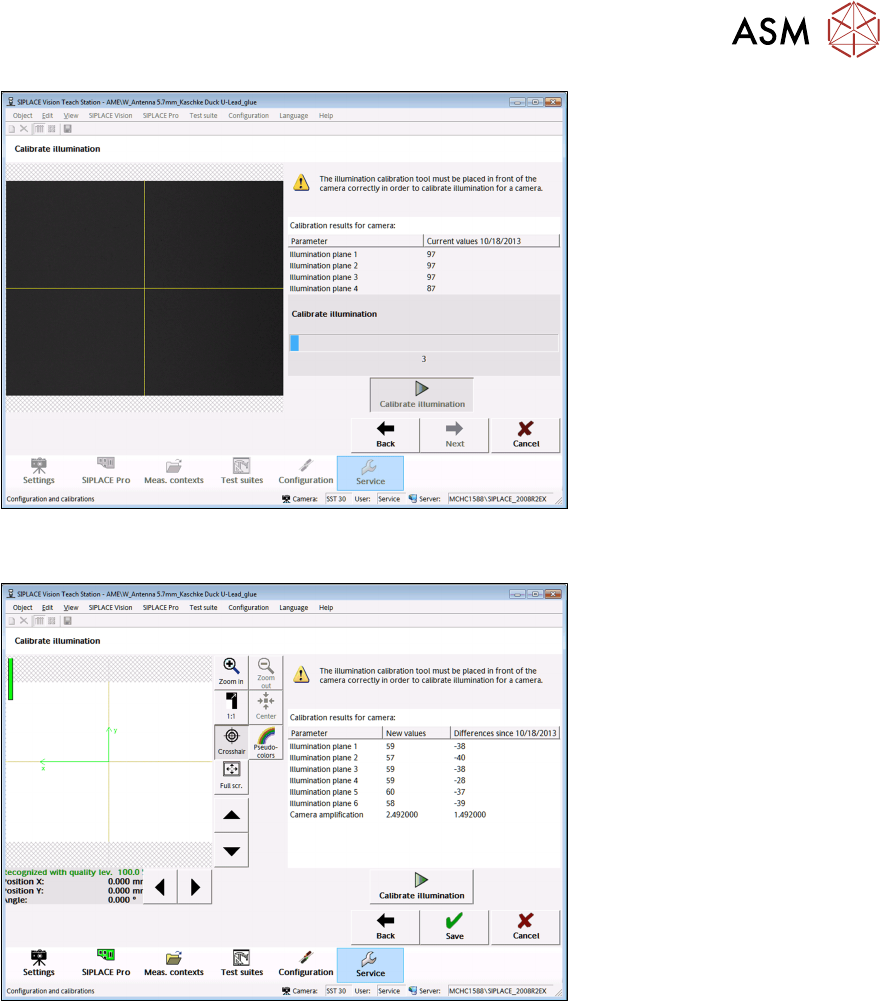
Fig.46: View during the calibration
Fig.47: View after successful calibration
After a successful calibration, the new calibration factors and the differences since the last suc-
cessful calibration are displayed (as on the 70X Station GUI).
Click on the "Save" button to save the new calibration factors in the camera EEPROM. After sav-
ing, the wizard switches automatically to the next wizard view.
If the calibration fails, a corresponding error message is displayed below the image and in the res-
ult list. The values cannot be saved.