46230809.pdf - 第17页
Page 17 TECHNICAL PUBLICATIONS Dual Rotary Positioning Assembly - BHS T46230809 Rev .C This Document Supports Assembly 46230809 Rotary Disk Alignment Purpose: The rotary disk alignment proceduret aligns the rotary disk t…
Page 16
TECHNICAL PUBLICATIONS
T46230809 Rev. C Dual Rotary Positioning Assembly - BHS
This Document Supports Assembly 46230809
Functional Description
The dual X-Y positioning system contains the X and Y positioning tables
which are actuated by the servo drive motors. When the motors receive a
signal they move the positioning system to predetermined coordinates con-
tained in the pattern program. Rotary encoders monitor the positioning sys-
tem location to ensure the positional accuracy. The X and Y tables mount on
the base and position the dual rotary tables.
Maintenance Concept
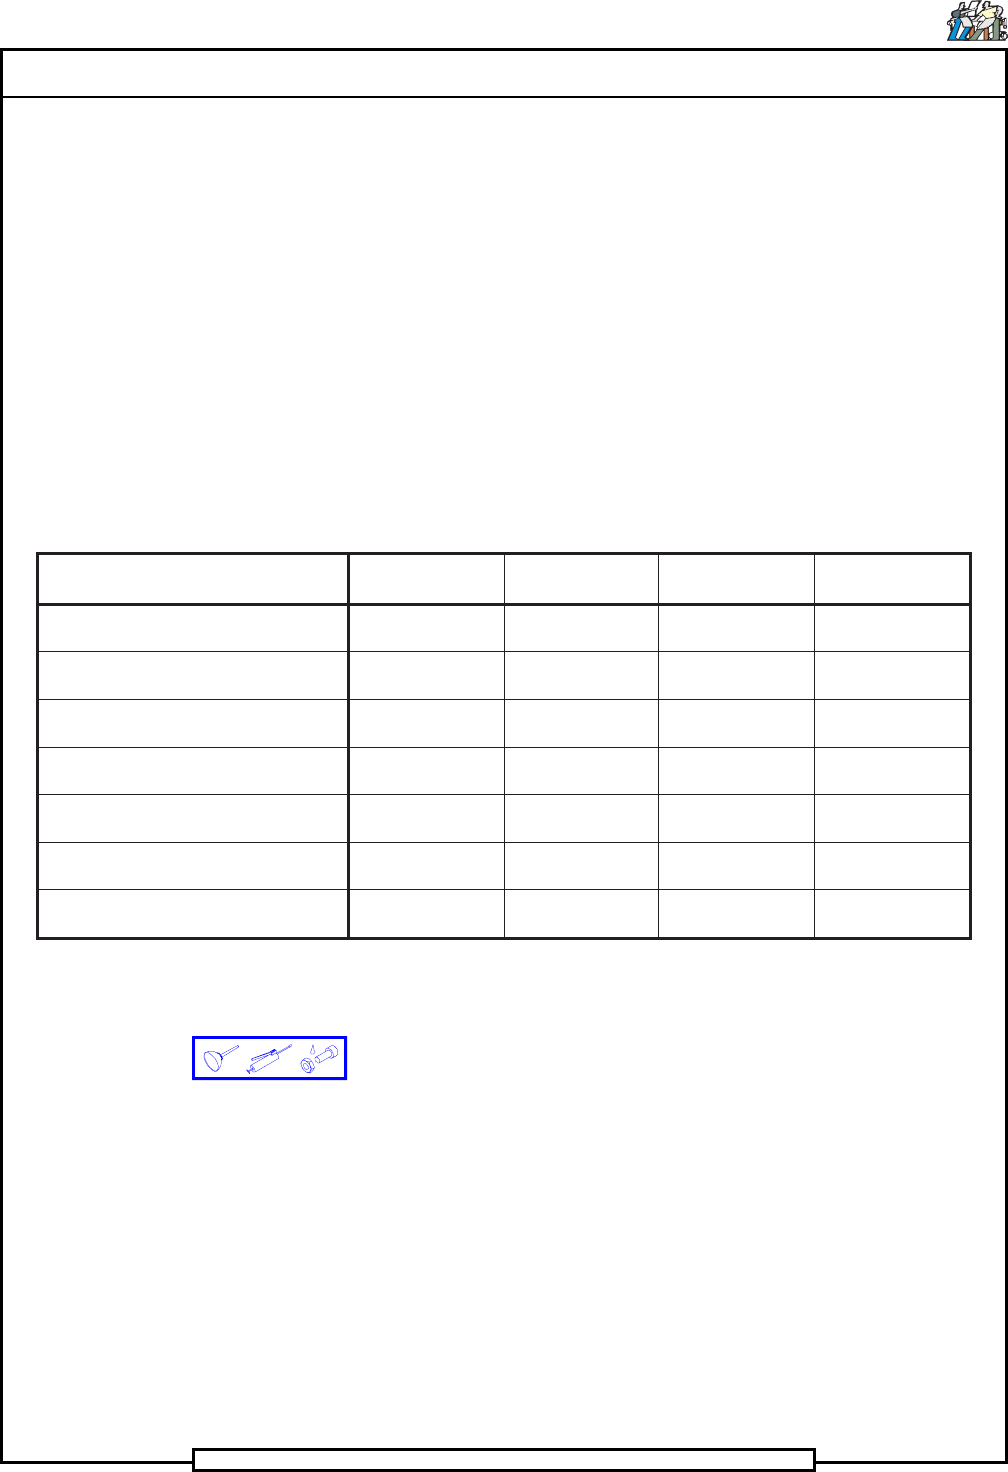
The following table defines the recommended Maintenance Concept for this
assembly. For a more detailed explanation of the Maintenance Concept and
its structure refer to the Prerequisite Information/Introduction module and the
periodic preventive maintenance as presented on page 49 of this document.
erudecorPecnanetniaM
dednemmoceR
ycneuqerF
llikSmuminiM
tnemeriuqeR
tiKserapS
d'qeR
d'qeRtiKlooT
ssenerauqSelbaTyratoRkcehCylkeeW
ecnanetniaM
naicinhceT
oNseY
evirDrotoMriAelbaTyratoRkcehC
leehW
ylkeeW
ecnanetniaM
naicinhceT
oNoN
kcoLelbaTyratoRetacirbuL
ylbmessA
ylkeeW
ecnanetniaM
naicinhceT
oNoN
rotautcAetacirbuLylkeeW
ecnanetniaM
naicinhceT
oNoN
sgnihsuBllaBYXetacirbuLdnahsulFylhtnoM
ecnanetniaM
naicinhceT
oNoN
ehtetacirbuLdnanaelC,elbmessasiD
ylbmessAkcoLelbaTyratoR
yllaunnaimeS
ecnanetniaM
naicinhceT
oNoN
wercSdaeLllaBYXetacirbuLyllaunnaimeS
ecnanetniaM
naicinhceT
oNoN
Prerequisite Information
• See the Prerequisite Information/Introduction document for Adhesive
and Lubricant icon information and definitions.
Page 17
TECHNICAL PUBLICATIONS
Dual Rotary Positioning Assembly - BHS T46230809 Rev.C
This Document Supports Assembly 46230809
Rotary Disk Alignment
Purpose:
The rotary disk alignment proceduret aligns the rotary disk to the X axis
table.
Several associated assemblies rely on one another. If one assembly is ad-
justed, the rest are affected. It may be necessary to alternate between one
step of the procedure and another several times until the rotary disk is
aligned.
Read the entire rotary disk alignment procedure before attempting the
adjustment.
Rotary disk alignment is correct when, with the rotary disk locked in the
FRONT position, the dowel pins can be inserted and removed by hand
through the rotary disk and into the X axis table.
Due to the tolerance build up, interference may be felt when inserting
and removing the pins. This is normal and in no way means the table is
not properly aligned. If the pins can not be inserted into the holes with
force, the disk is not properly aligned.
After the rotary disk is aligned, the two locator pin assemblies drop into
their corresponding locator holes. The additional pressure exerted by
the lock assembly may cause the rotary disk to shift. This shift prevents
the insertion or extraction of the guide pins and additional adjustment of
the lock assembly is required.
If the locator pins slide into the holes after the lock and drive
assemblies are in position, alignment is correct. Proceed to the X-Y
axes encoder adjustments.
Machines with Board Handling System have two low profile guide
wheels which require a special wrench and procedures. These
differences are noted as applies in the following procedure.
Page 18
TECHNICAL PUBLICATIONS
T46230809 Rev. C Dual Rotary Positioning Assembly - BHS
This Document Supports Assembly 46230809
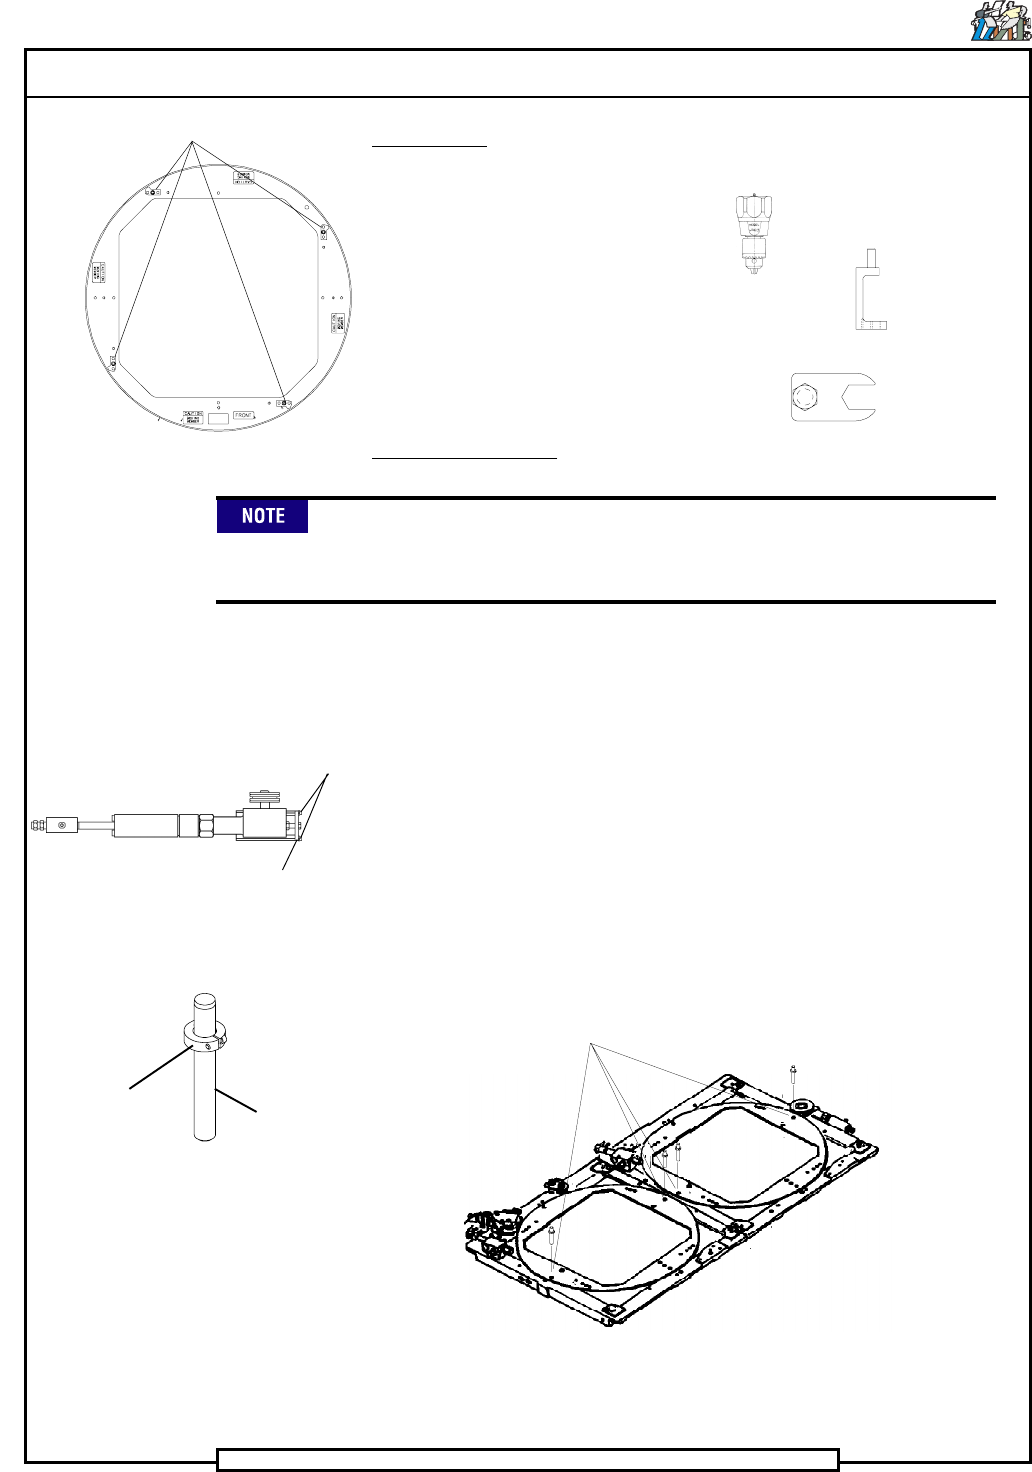
Special Tools:
Torque Wrench (in./lbs.)
Torque Gage (in./oz.) (46808001)
(Waters Mfg. model 651C-30)
Torque Adapter (45081601) (High profile guide wheels)
Dowel pins (1/4 x 2) (80010109) with collars (18333000)
Wrench (46758401) (Low profile guide wheels)
Adjustment Procedure:
Depending on the machine configuration, covers and/or assembly
components will have to be removed to allow access to the guide
wheels and drive assembly.
1. Remove the four stop blocks from the rotary disk
2. Remove the two socket head cap screws from the stop plate on the
drive assembly.
3. Remove the stop plate from the drive assembly to remove the drive
wheel pressure on the rotary disk.
4. Assemble the locator pin assemblies using dowel pins and collar
clamps.
5. Insert the locator pin assemblies through the locator holes in the rotary
table and into the locator holes in the X axis table as shown.
Rotary Disk Assembly
STOP BLOCKS
Rotary Disk Drive Assembly
SOCKET HEAD
CAP SCREWS
STOP
PLATE
Locator Pin Assembly
DOWEL PIN
COLLAR
CLAMP
LOCATOR
HOLES