222085 Issue 1 - Horizon APiX Appendix Manual.pdf - 第156页
TECHNICAL REFERENCE APPENDIX PREVENTIVE MAINTENANCE Chapter Issue 1 June 15 Appendix to Micron Technical Manuals 3.119 External Solvent T ank NOTE Disposal of Waste Materials: All waste materials including fluids a nd co…
TECHNICAL REFERENCE APPENDIX
PREVENTIVE MAINTENANCE
3.118 Appendix to Micron Technical Manuals Chapter Issue 1 June 15
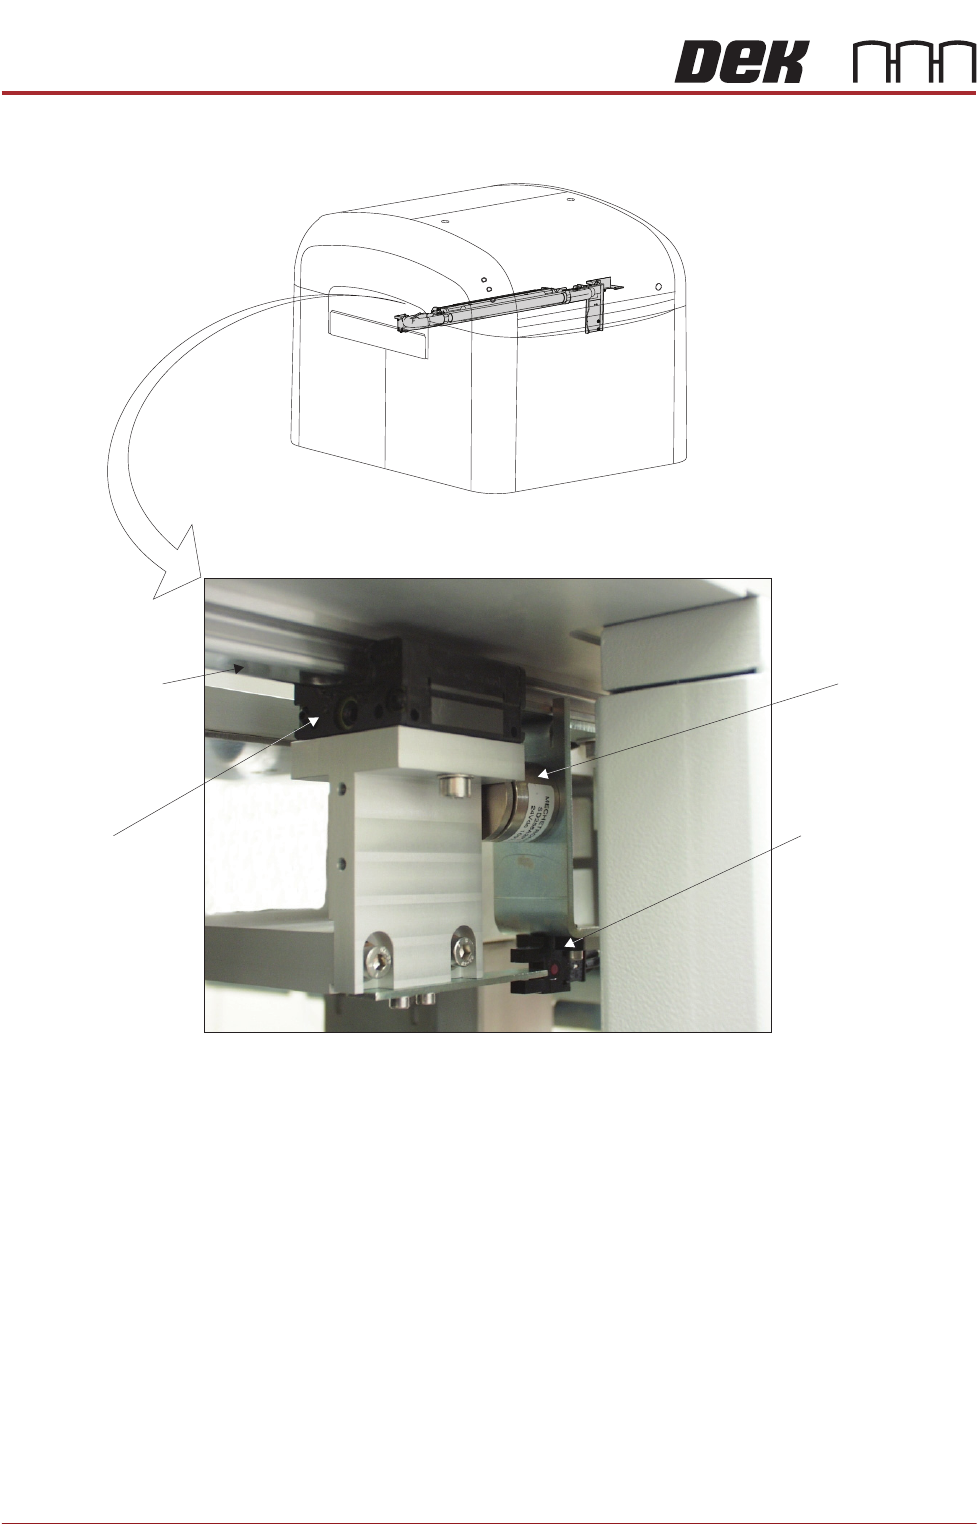
Figure 3-15 Underscreen Cleaner
View from Left Side of Machine
Camera Y Linear
Bearing Guide Rail
(in 2 positions)
USC Linear
Bearing Block
(in 2 positions)
USC Magnet
(in 2 positions)
USC Home Sensor
TECHNICAL REFERENCE APPENDIX
PREVENTIVE MAINTENANCE
Chapter Issue 1 June 15 Appendix to Micron Technical Manuals 3.119
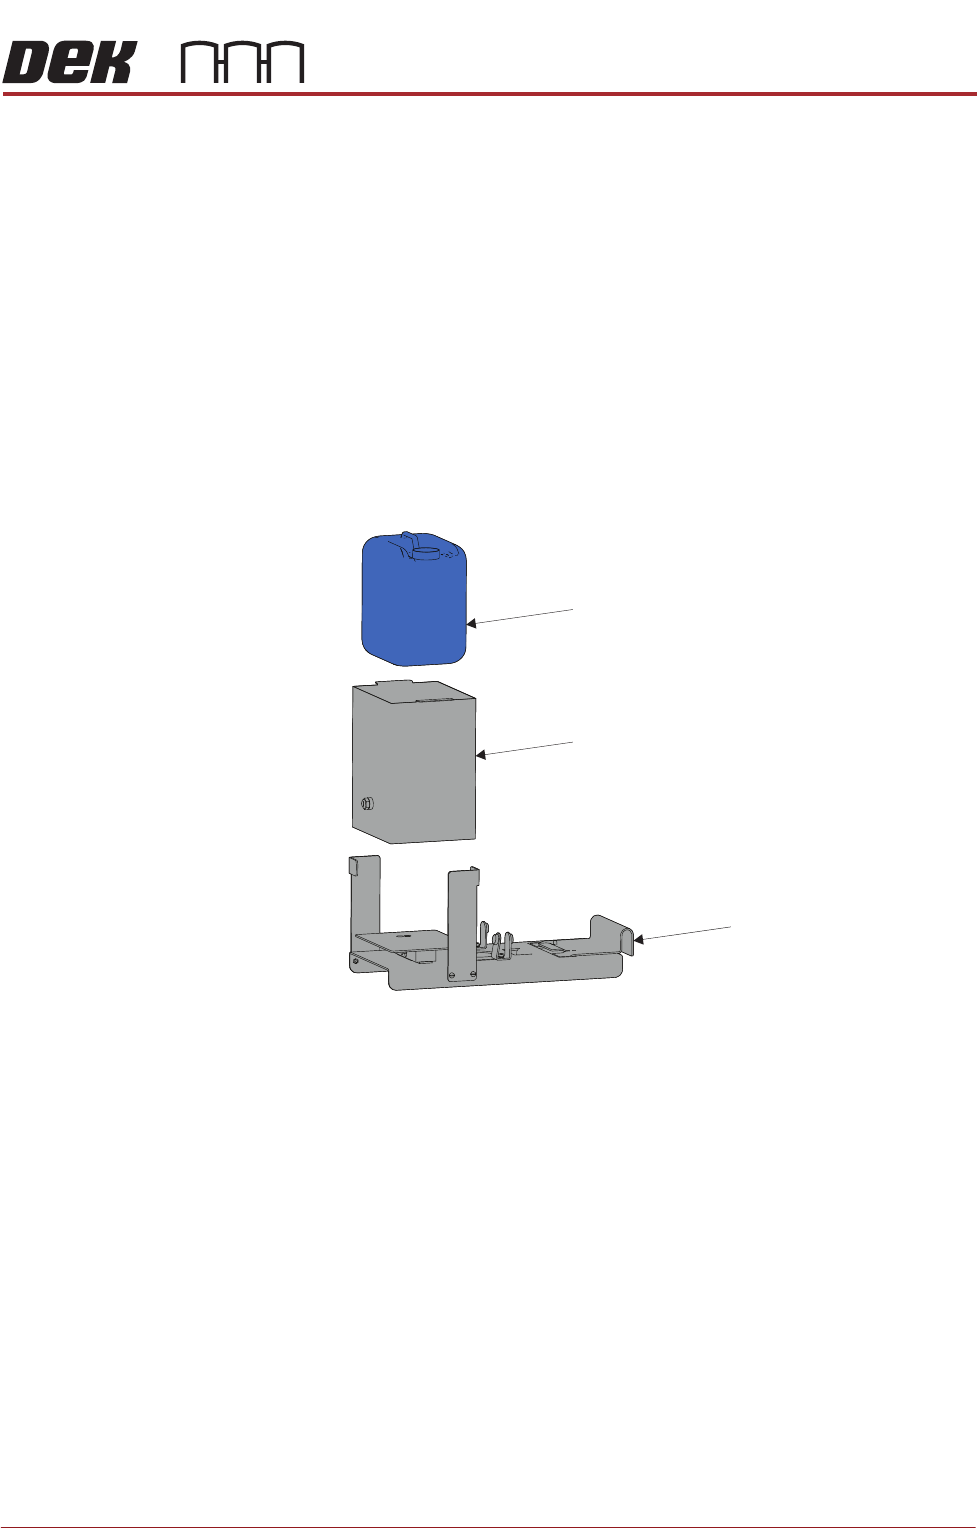
External Solvent
Tank
NOTE
Disposal of Waste Materials: All waste materials including fluids and contami-
nated materials must be disposed of in accordance with national, federal or local
legislation.
In the event of the solvent container leaking solvent, carry out the following.
NOTE
In the event of the solvent container leaking, the volume of the solvent container
housing (8.329 ltr) is sufficient to hold the contents of the 5 ltr solvent container.
1. Carefully remove the solvent container avoiding contact with the solvent.
2. Dispose of the solvent container.
3. Remove the solvent container housing and dispose of the contaminated
solvent in accordance with national, federal or local legislation.
4. Decontaminate the solvent container housing.
5. Relocate the solvent container housing within the external solvent tank
assembly.
6. Place a full solvent container into the solvent container housing.
7. Carry out the External Solvent Tank, Machine Assembly within the installa-
tion chapter refers.
Solvent Container
Solvent Container Housing
External Solvent Tank
TECHNICAL REFERENCE APPENDIX
PREVENTIVE MAINTENANCE
3.120 Appendix to Micron Technical Manuals Chapter Issue 1 June 15
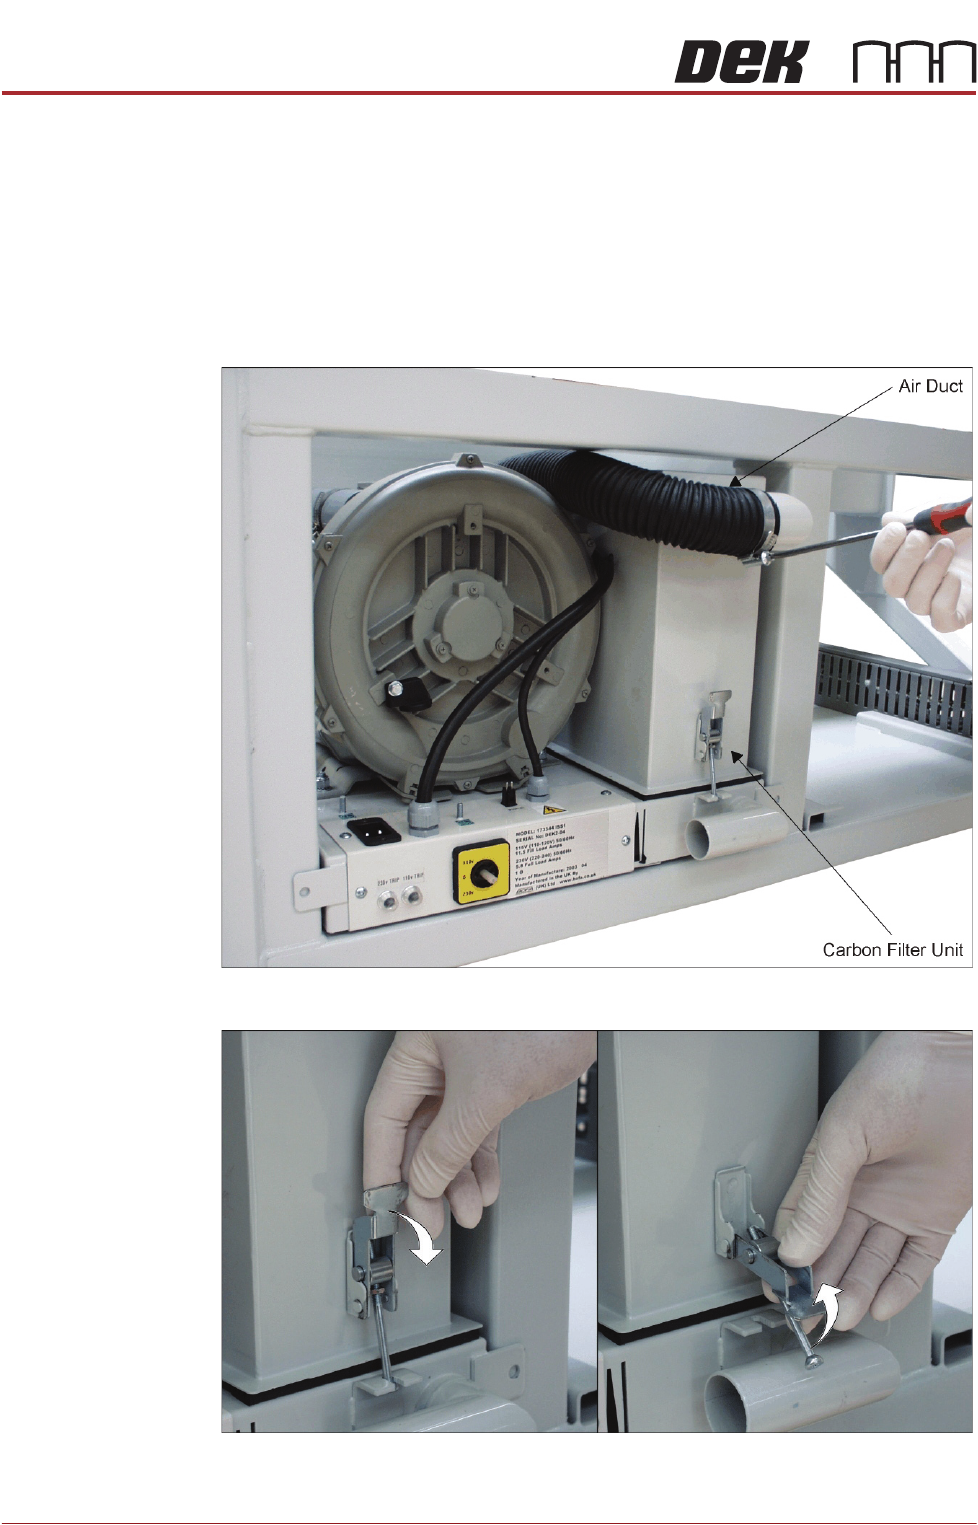
VF35i Vacuum
Filtration Unit
To replace any of the filters in the Vacuum Filtration Unit, carry out the following:
1. Ensure both machines are switched OFF.
2. Move the machine carefully out of line.
3. Remove the loom from the lower rear panel socket.
4. Remove the machine rear panel.
5. Remove the air duct from the carbon filter unit using a screwdriver or box
spanner to release the securing clip.
6. Release the filter retaining clip to detach the filters from the base unit.