00197402-01 AI X-Feeder Upgrade Package.pdf - 第34页
X-Feeder Upgrade Install Installing the rocker on the foil co ntainer 34 AI X-Feeder Upgrade Package AI X-Feeder Upgrade Packa ge 3.9 3 . 9 I n s t a llin g t h e r o c k e r o n t h e f o il c o n t a in e r Installing …
X-Feeder Upgrade Install
Cover foil disposal install
AI X-Feeder Upgrade Package AI X-Feeder Upgrade Package 33
3.8
3.8 Cover foil disposal install
Cover foil disposal install
Tools required:
▪ Phillips screwdriver
▪ TORX screwdriver size T8
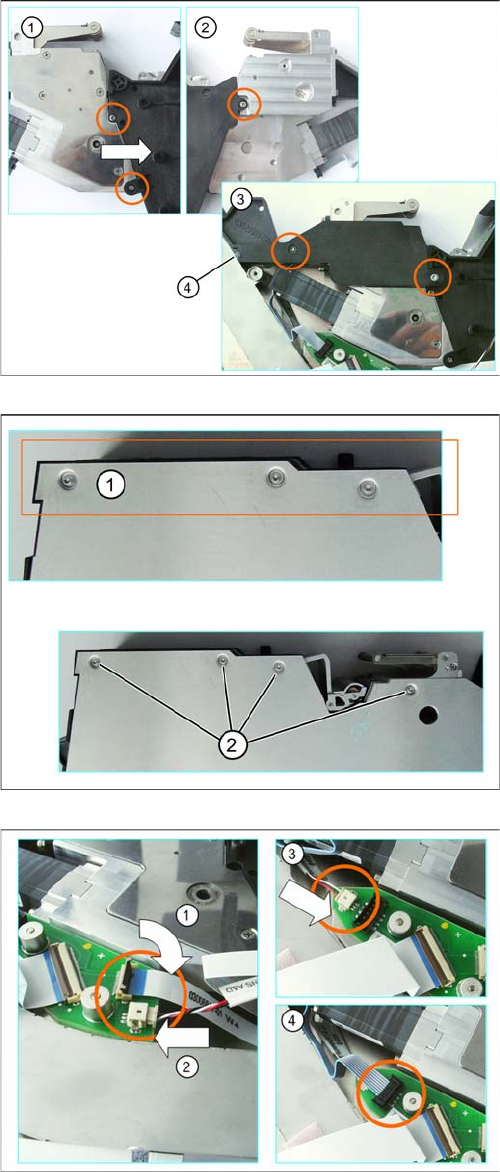
► (1) Press the foil disposal drive in the direction of the
arrow and into the foil container.
► Attach the film drive with the marked cylinder head
bolts. Be sure to insert the shims.
► (2) Fix the foil disposal drive into place with the cylin
-
der head screw marked in the diagram.
► (3) Turn the foil disposal to drive again and attach the
spacer to the marked in the figure Torx screws. Note
the correct position of the rubber seals (4).
► (1) Carefully place the feeder module down on its left
side. Position the foil container so that it is aligned
against the side cover.
► (2) Loosen the screws marked in the diagram.
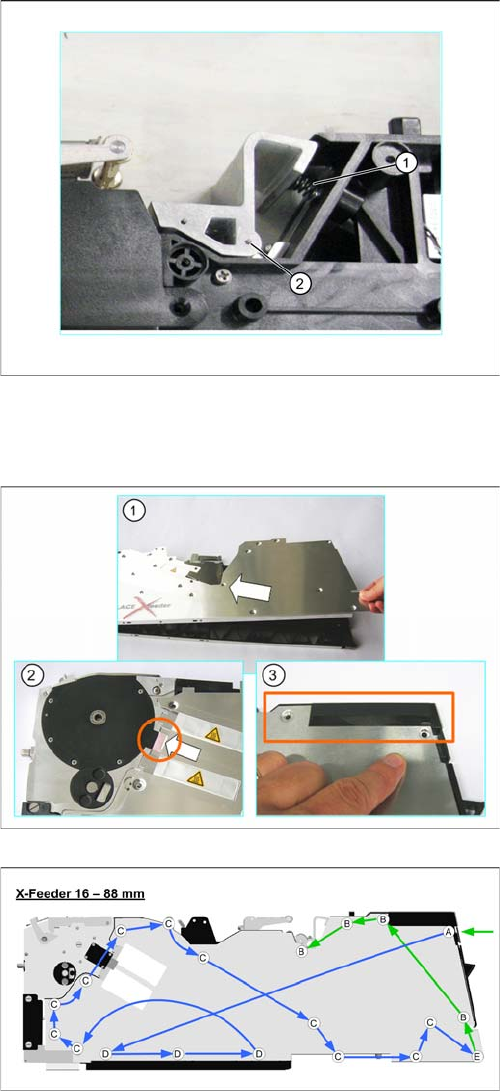
► (1) Insert the flat ribbon cable into the connection, as
far as the stop. Make sure that the blue surface at the
end of the cable is at the top and that the flat ribbon
cable lies straight in the connection. Swing the lock
down onto the flat ribbon cable.
► (2) and (3) Carefully insert the connector in the direc
-
tion of the arrow, as far as the stop, into the connec
-
tion shown.
► (4) Insert the other connector into the connection
marked in the diagram.
X-Feeder Upgrade Install
Installing the rocker on the foil container
34 AI X-Feeder Upgrade Package AI X-Feeder Upgrade Package
3.9
3.9 Installing the rocker on the foil container
Installing the rocker on the foil container
3.10
3.10 Fitting the Left Side Cover
Fitting the Left Side Cover
Tools required:
▪ Flat bladed (slotted) screwdriver
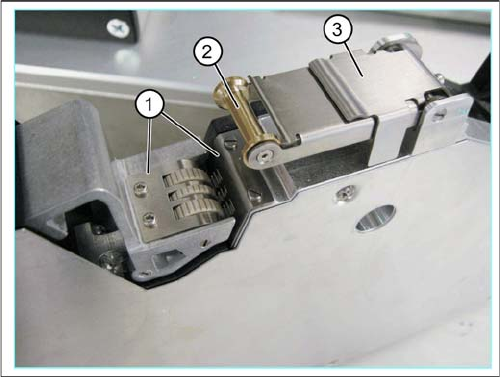
► (1) Insert the spring into the provided opening .
► Position the rocker with the recess onto the spring.
► (2) Position the rocker so that you can see the open
hole for the bearing shaft through the rocker.
► Press the rocker into the spring, to relieve the bearing
shaft thread during fitting.
► Set the bearing shaft into the hole provided and turn
to tighten.
Tools required:
▪ Phillips screwdriver
▪ TORX screwdriver size T8
► Carefully place the feeder module with the right-side
side down on a stable, level and clean surface.
► (1) Lift the side cover onto the feeder module at a
slant and from the right-hand side.
(2) Make sure that the lugs insert into the drive unit.
► (3) Make sure that the side cover is aligned with the
operating panel.
► Screw the side cover onto the feeder module, as
shown in the following diagrams. Start with screw (A)
on the right, under the operating panel.
Green arrows point to the screws for which you need a
TORX screwdriver with a torque of 0.6 Nm.
Blue arrows point to the screws for which you need a Phil
-
lips screwdriver with a torque of 0.9 Nm.
X-Feeder Upgrade Install
Fully installed upgrade package
AI X-Feeder Upgrade Package AI X-Feeder Upgrade Package 35
3.11
3.11 Fully installed upgrade package
Fully installed upgrade package
1. Revised with new rocker design stuffing gear
2. New folding roller
3. Use cover strip rocker