00197469-02_SM_Twin_Kunde_EN.pdf - 第44页
4 Pneumatic and pressure control valve (PRV) 4.6 Replacing the sleeve with ball fixing/seal 44 Service Manual SIPLACE TwinStar (Twin, Twin HF, Twin VHF) 07/2020 Fig.63: Unlocking the sleeve with ball fixing (example of …
4 Pneumatic and pressure control valve (PRV)
4.6 Replacing the sleeve with ball fixing/seal
Service Manual SIPLACE TwinStar (Twin, Twin HF, Twin VHF) 07/2020 43
4.6 Replacing the sleeve with ball fixing/seal
Parts
●
Sleeve with ball fixing P&P module [03020695‑xx] (suitable for all Twin types)
●
Seal for sleeve with ball fixing P&P module [03020698‑xx] (suitable for all Twin types)
Overview
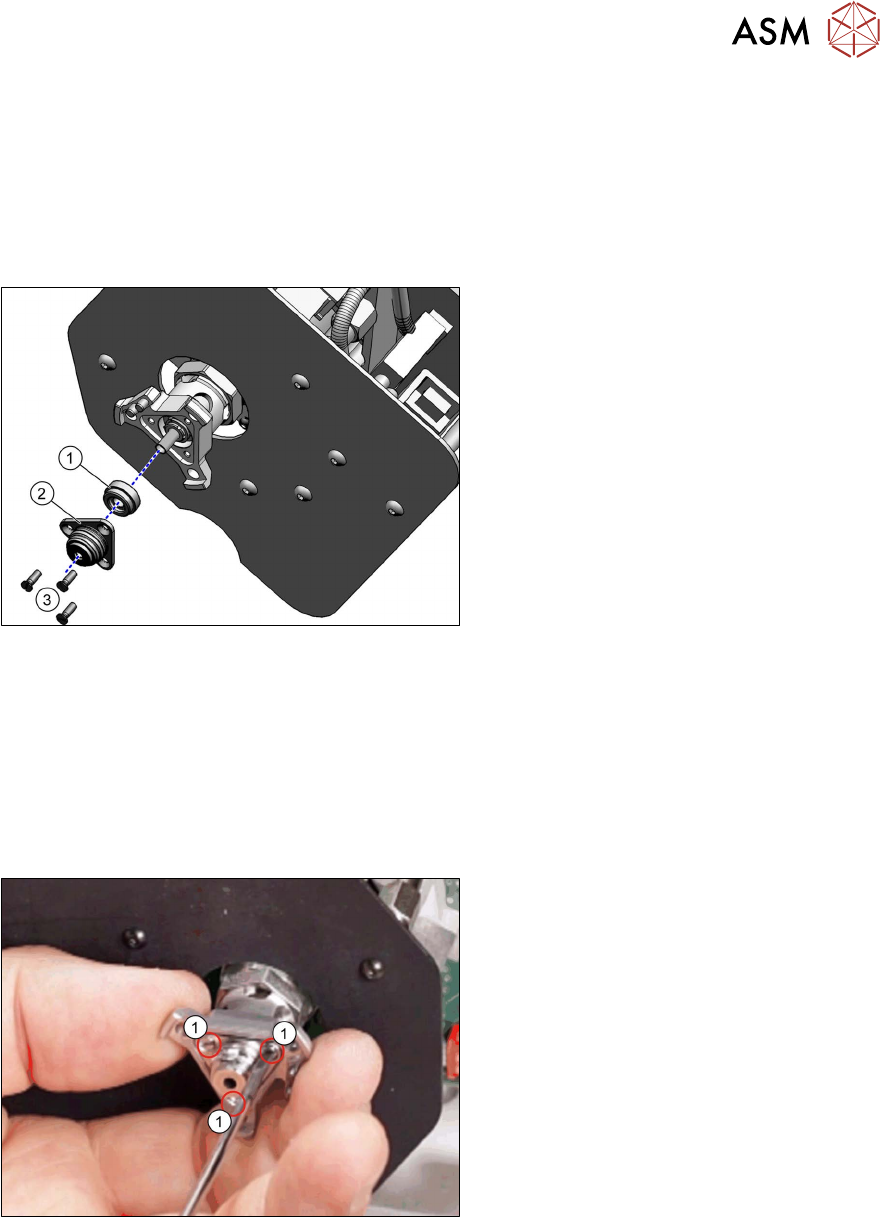
Fig.61: Sleeve with ball fixing and seal
1. Seal for sleeve with ball fixing, P&P
module [03020698‑xx]
2. Sleeve with ball fixing, P&P module
[03020695‑xx]
3. Three fastening screws [03022436‑xx]
for sleeve with ball fixing (slotted coun-
tersunk screws ISO2009-M1.6x5-
A2-50)
Preparation
► Remove the head from the machine. For details about removing and fitting the placement
head, refer to the service manual for your machine.
Removal
► Dismantle the buffer.
3.1 "Replacing the return unit buffer" [}17]
Fig.62: Removing the fastening screws (example of Twin /
Twin HF shown)
► Remove the three screws(1) fastening
the sleeve with ball fixing.
4 Pneumatic and pressure control valve (PRV)
4.6 Replacing the sleeve with ball fixing/seal
44 Service Manual SIPLACE TwinStar (Twin, Twin HF, Twin VHF) 07/2020
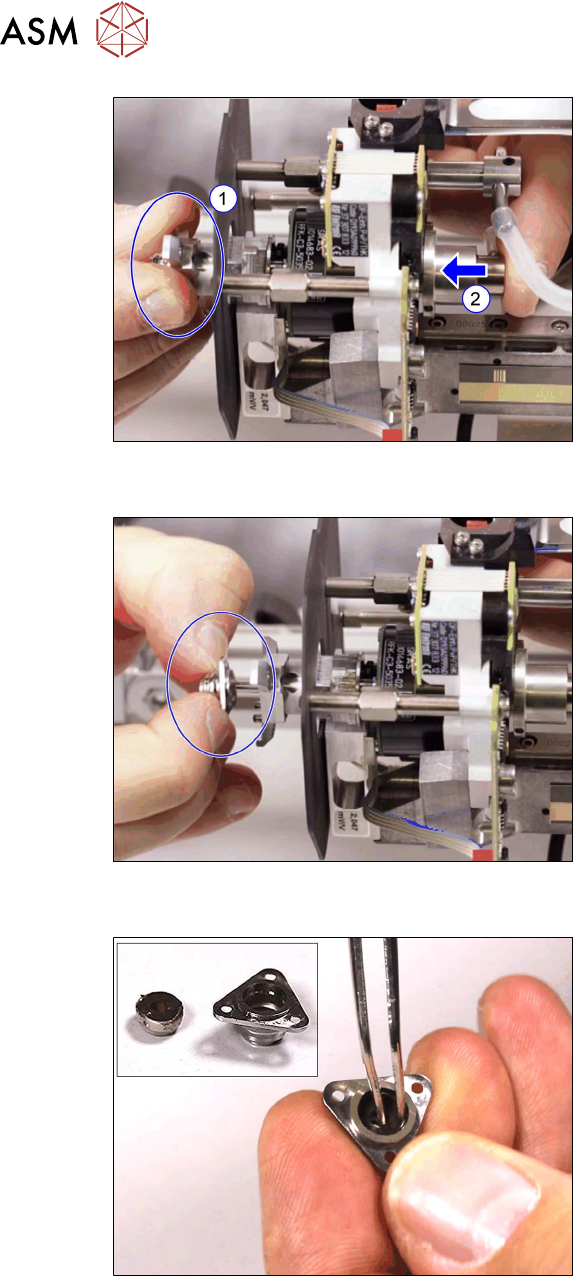
Fig.63: Unlocking the sleeve with ball fixing (example of
Twin / Twin HF shown)
To unlock the sleeve with ball fixing, pro-
ceed as follows:
► Hold the nozzle interface in position (1)
while pressing against the pneumatic
rotary supply (2)
.
Fig.64: Removing the sleeve with ball fixing (example of
Twin / Twin HF shown)
► Pull the sleeve with ball fixing off the
pipe of the pneumatic rotary supply.
Fig.65: Remove the seal
► Remove the seal from the sleeve with
ball fixing.
4 Pneumatic and pressure control valve (PRV)
4.6 Replacing the sleeve with ball fixing/seal
Service Manual SIPLACE TwinStar (Twin, Twin HF, Twin VHF) 07/2020 45
Installation
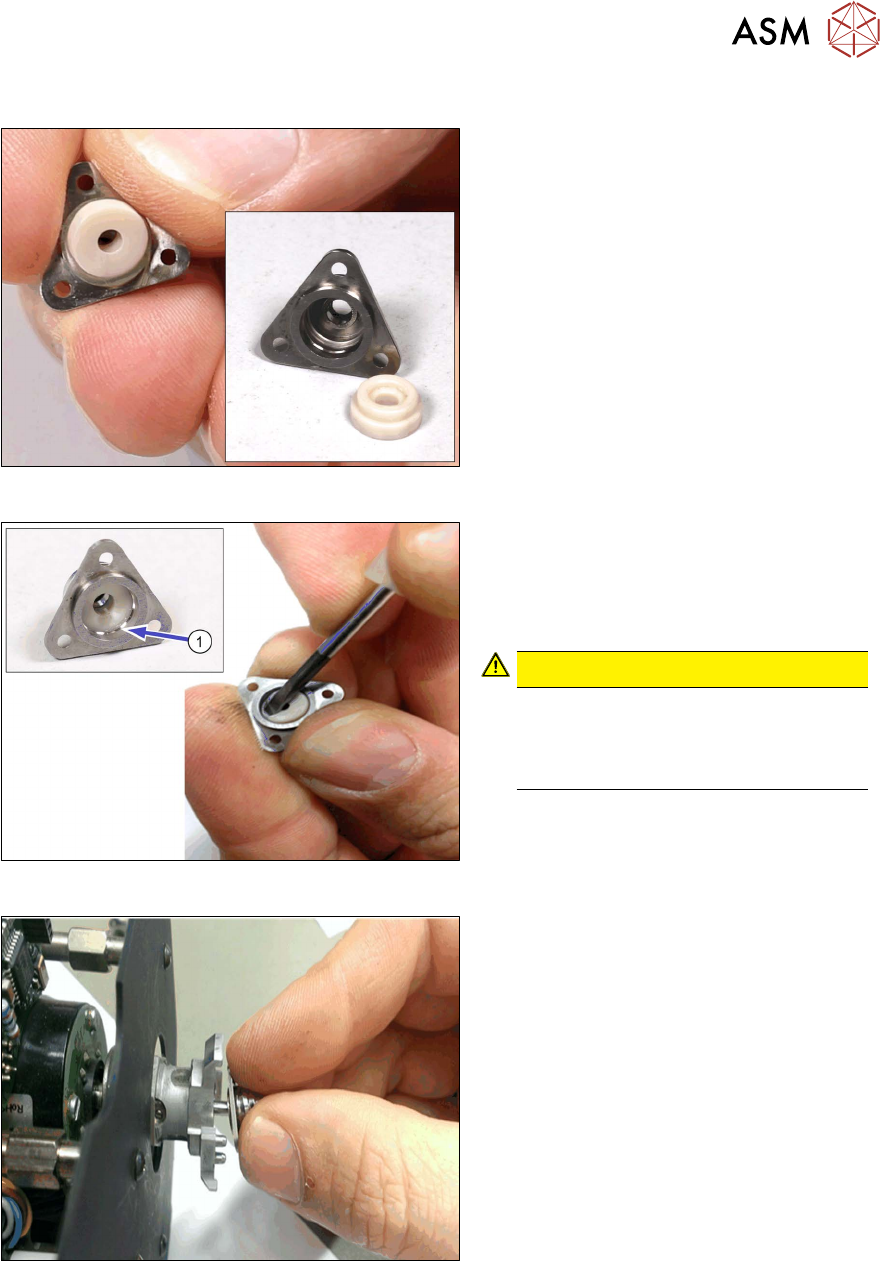
Fig.66: Inserting the seal
► Fit a new seal in the sleeve with ball fix-
ing. Make sure that the flat side is fa-
cing upwards.
Fig.67: Inserting the seal
► Press the seal into the sleeve with ball
fixing, until the groove(1)
on the inside
is visible.
Make sure that the flat side is facing
upwards.
CAUTION!
Seal
Take care not to damage the seal
while pressing it in! Do not use any
sharp-edged tools.
.
Fig.68: Fitting the sleeve with ball fixing (example of Twin /
Twin HF shown)
► Fit the sleeve with ball fixing onto the
pneumatic rotary supply pipe at a slight
angle, to avoid damaging the seal.