cp45头部故障判断.pdf - 第33页
1. Head Module Ver. Date CP45 CP45NEO 00 2004/11 O O 1-1 - After Checkin g Pr inted Old and New Dat a, Press Update Butt on to Update - Head Offset Specification is as Follows: Item Specific ation Remark X 30* (Head N) (…
1. Head Module
Ver. Date CP45
CP45NEO
00 2004/11 O O
1-1
1-16. Head Offset Setting
*Tools
a) Calibration Tool (Tool of ANC Pocket #1)
1) Prerequisite
- Calibration of Fix Camera Should be Completed
- There Should not be Nozzle at Head, and There Should be Caliobration Tool at ANC Pocket#1
- Sys Setup => Camera(F9) => No Real Motion of Tool(Right Menu) Should not be Selected
2) Proceed Head Offset of CP45FV or CP45FVNEO in the Following Direction
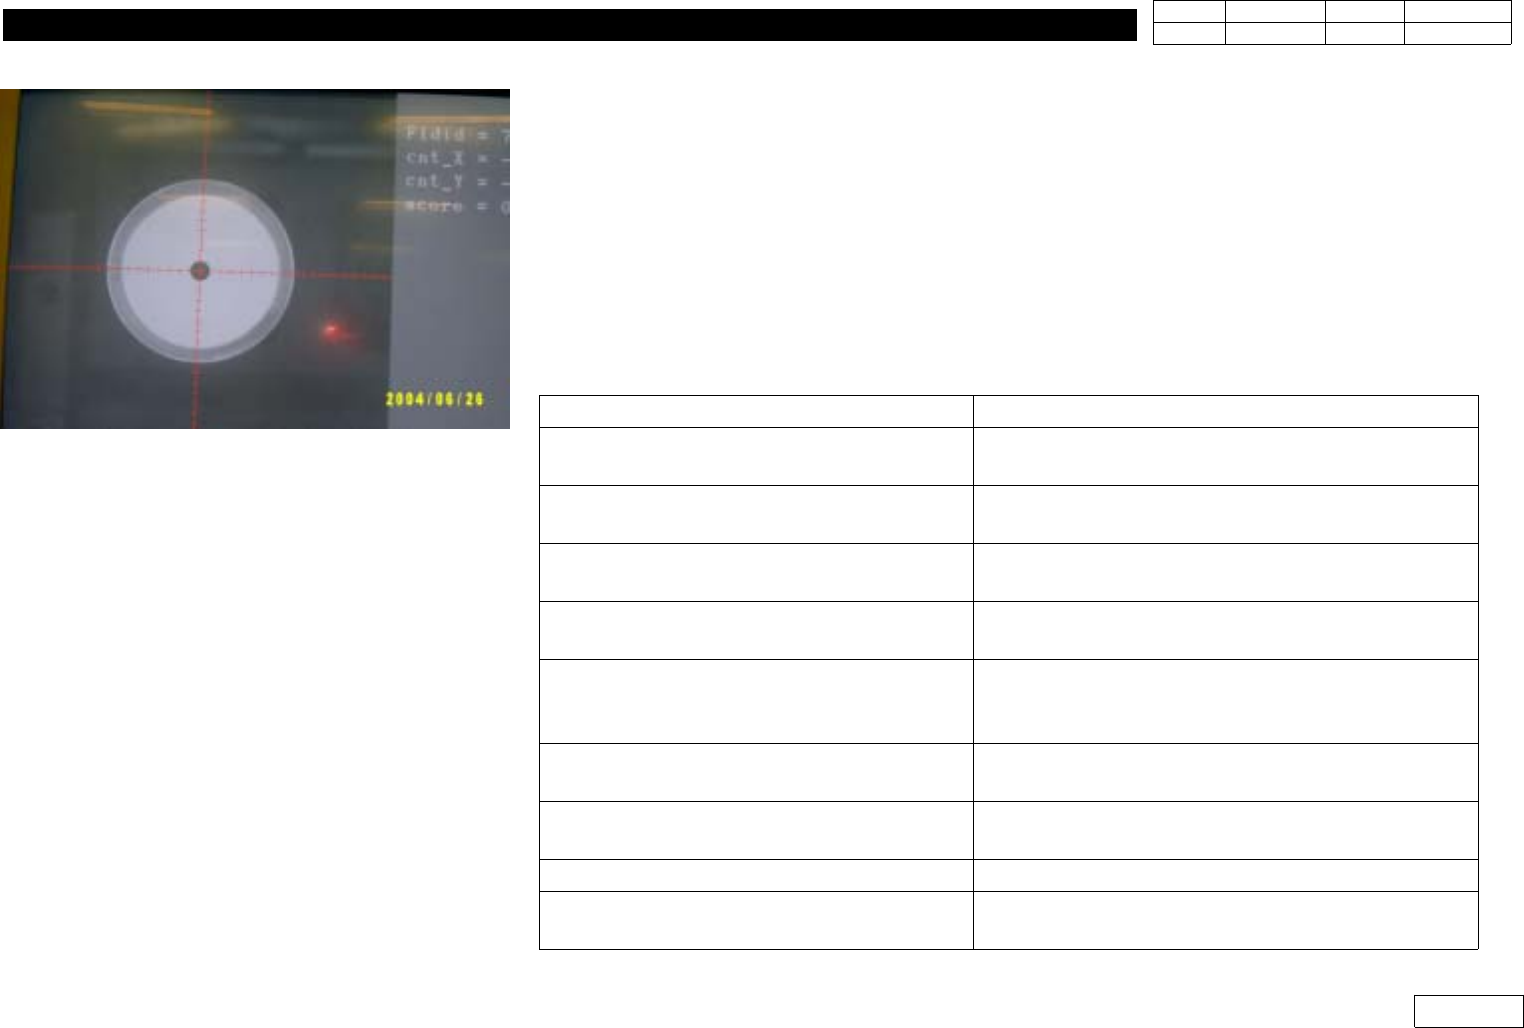
Select Sys Setup => Camera(F9) => Calibration => Head Offset
Message
Procedure
First, we must put all nozzles from heads
to ANC To put, Click[Next]
Head Advances Home, Z-axis Goes Down
=> Check if All the Nozzle are Removed
Get tool from ANC to head1
To get it, Click[Next]
Head1 Goes Down so that Tool is Put to Head1
=> Put Calibration Tool in Head1 Manually
Move to center position of [Fix1] camera
To move, Click[Next]
Moving now,
Please wait for a monent.
Head1 Moves to Fix Camera
Calibration ie prepared
To calibrate, click [Next]
Proceed Calibration
=> After Completion, Offset(X,Y) of Head1 is
Printed
Put tool from head1 to ANC
To put it, click[Next]
Head Returns Home, Head1 Goes Down
=> Pick Calibration Nozzle Manually
Get tool from ANC to Head2
To get it, click[Next]
Head2 Goes Down
=> Put Calibration Tool Maunally
...
Proceed Calibration from Head2 to Head6
Head offset calibrastion is finished
Calibration is Completed and Previous/Present
Values of Head Offset are Printed
Fig.1-16-1 Head offset calibration
1. Head Module
Ver. Date CP45
CP45NEO
00 2004/11 O O
1-1
- After Checking Printed Old and New Data, Press Update Button to Update
- Head Offset Specification is as Follows:
Item
Specification Remark
X
30* (Head N) (+,-)0.079mm
Head N = 1,2,3,4,5,6
Y (+,-) 0.079mm
If Head Offset Exceed Standard, Assembled Condition of Head Should be Re-checked
3) Head Offset of CP45F or CP45FNEO Setting Procedure
3-1) If Fixed Camera is Available, Install this and Proceed 2) above
3-2) If Upward Vision of CP40 is Available, Install this and Proceed 2) above
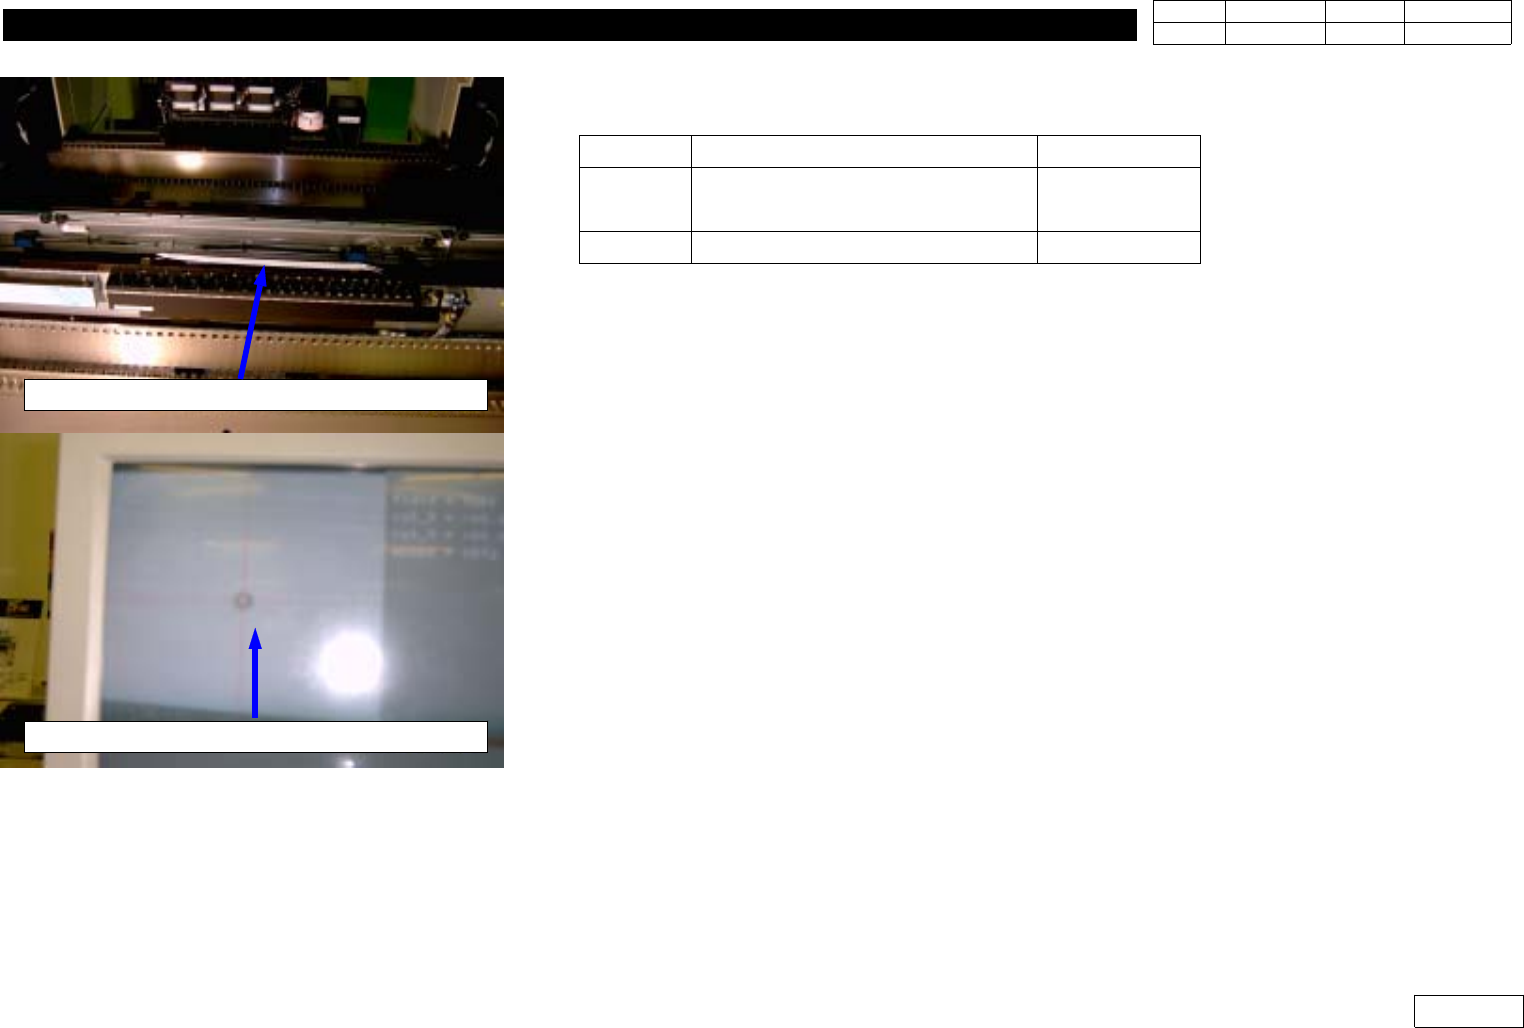
3-3) If Fixed Camera or Upward Vision is not Available(Fig 1-16-2)
- Install Nozzle of the Minimum Diameter(TN040 or CN040) at Head
- Attach Tape at the Center of Upper Conveyor Frame(Teflon Tape is Proper)
- Set the Position of Head1 at the Left End and Move Z-axis Down to Mark the Position
of Head1 on the Tape with Teaching Box
- At the Position, Mark the Positions of Head2~Head6 in the Same Way.
- Using Move Camera, Find the Center of Marked Position of Head1 and Set this
Position for Placement Origin(PBC edit=>Board Definition=>Placement Origin)
- Get the Position of Head1~Head6 at Step Program and Calculate Offset
Note that X-axis Position can be '+' or '-' Depending on Coordinate
If '-' Direction, Convert in '+' to Input(Y-axis is Unnecessary)
Attach tape on the middle of conveyor frame
Teach the center of Mark(Using Move camera)
Fig.1-16-2 Head offset Calibration
(without Fixed camera)

1. Head Module
Ver. Date CP45
CP45NEO
00 2004/11 O O
1-1
1-17. Move Camera Offset Setting
*Tools
a) Move Camera Calibration Tool
1) Proceed Move Camera Offset of CP45FV or CP45FVNEO as Follows.
Select Sys. Setup => Camera(F9) => Move Cam. Offset
Message
Procedure
Put a tool sheet on Upward(Fix) Camera1 and adjust tool
center
If finish, Click[Next]
Cover Calibration Plate on Upper Surface
of Fixed Camera and Make Camera
Center Coincide with Fixture Center.
Make Fix Camera Center Coincide with
Fixture Center with Target Camera
Move to center position of [Fix1] camera
To move, Click[Next]
Move Move Camera to Fixed Camera with
Teaching Box
Moving now
Please wait for a moment
1. First select move camera and adjust light
2. After then, select Fix camera and adjust light level
3. To calibrate, Click[Next]
Set Target Camera for Fixed Camera and
Move Camera Alternately to Check the
Hole of Screen is Distinguished
Black/White. Adjust Light if Necessary.
Calibration now
Please wait a moment
Result Window is Displayed after
Calibration. Apply the Result.