TX系列贴片机机台半年保养手册.pdf - 第28页
7 WF 3 TX-Series Maintenance Check and clean the magnetic surfaces of the X- and Y-Axis 4 min 2 / 2 C A U T I O N ! R e f e r t o s a f e t y i n s t r u c t i o n s i n u s e r m a n u a l b e f o r e c o m m e n c i …
7 WF 3 TX-Series Maintenance Check and clean the magnetic surfaces of the X- and Y-Axis 4 min 1 / 2
CAUTION! Refer to safety instructions in user manual before commencing Maintenance
Machine Status ON Conveyor Empty
NOTICE! ESD guidelines are to be followed Tool:
T3
Wear Part: Consumables:
C3
www.asm-smt.com
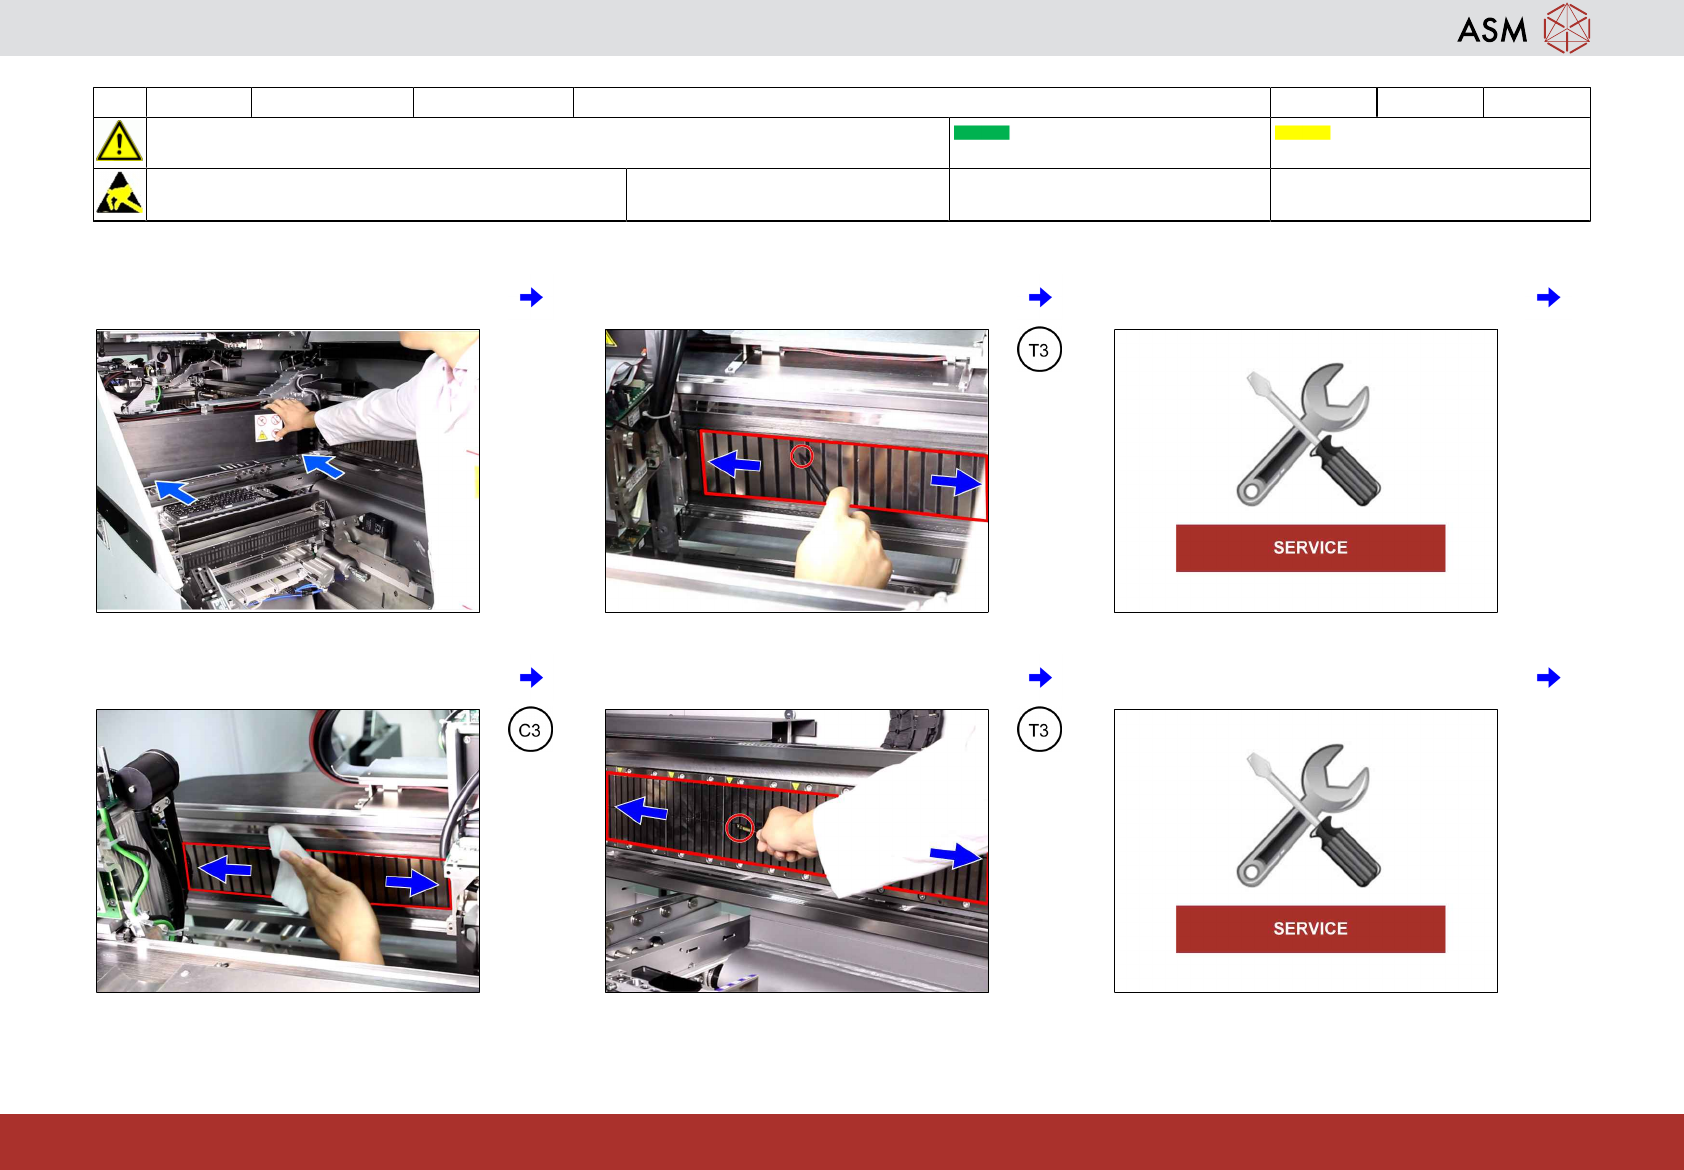
1 Move all gantries to the end limit at loca-
tion 1.
2 Check the X-Axis magnets for contamina-
tion and damage.
3 If you see any damage contact service.
4 If OK clean the X-Axis magnets. 5 Check the Y-Axis magnets for contamina-
tion and damage.
6 If you see any damage contact service.
7 WF 3 TX-Series Maintenance Check and clean the magnetic surfaces of the X- and Y-Axis 4 min 2 / 2
CAUTION! Refer to safety instructions in user manual before commencing Maintenance
Machine Status ON Conveyor Empty
NOTICE! ESD guidelines are to be followed Tool:
T3
Wear Part: Consumables:
C3
www.asm-smt.com
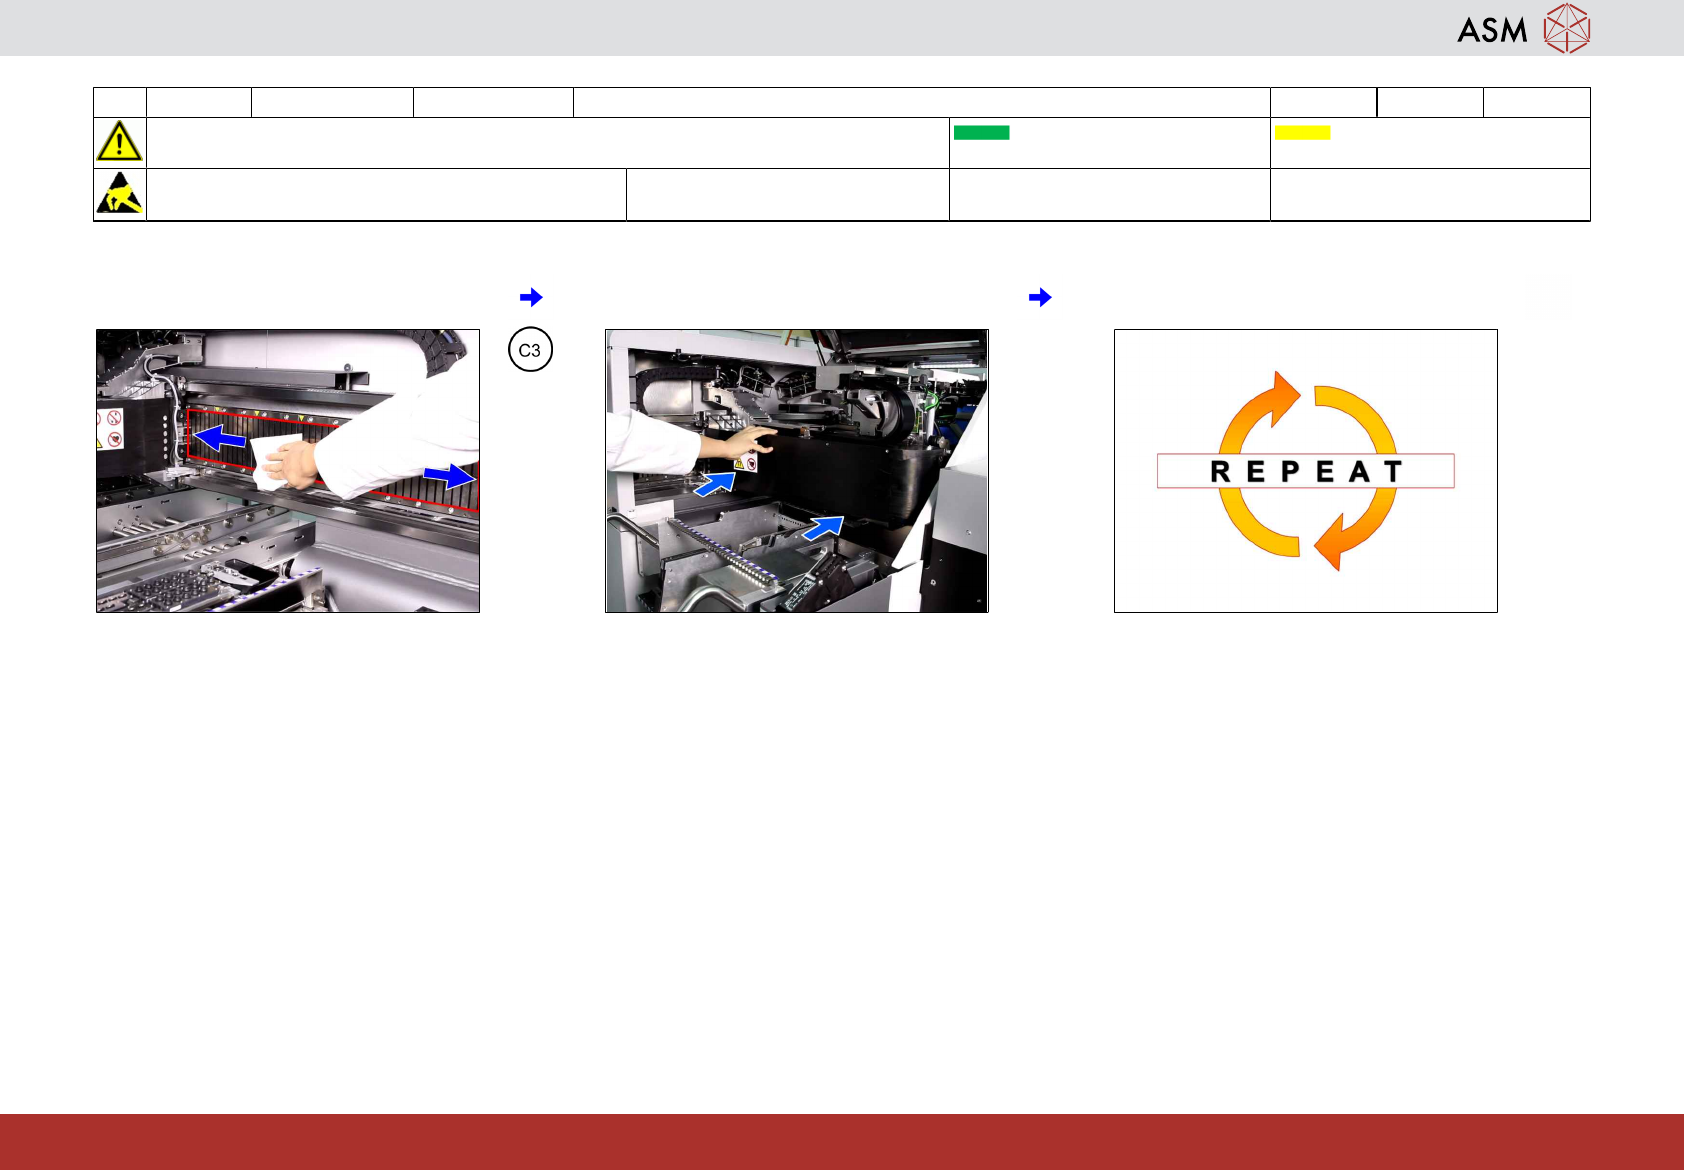
7 If OK clean the Y-Axis magnets. 8 Move all gantries to the end limit at loca-
tion 2.
9 Repeat steps 2 to 7 for the other gantry.
8 WF 3 TX-Series Maintenance Clean the conveyor, lifting tables and gantry cables 4 min 1 / 1
CAUTION! Refer to safety instructions in user manual before commencing Maintenance
Machine Status OFF Conveyor Empty
NOTICE! ESD guidelines are to be followed Tool:
T1
Wear Part: Consumables:
C3
www.asm-smt.com
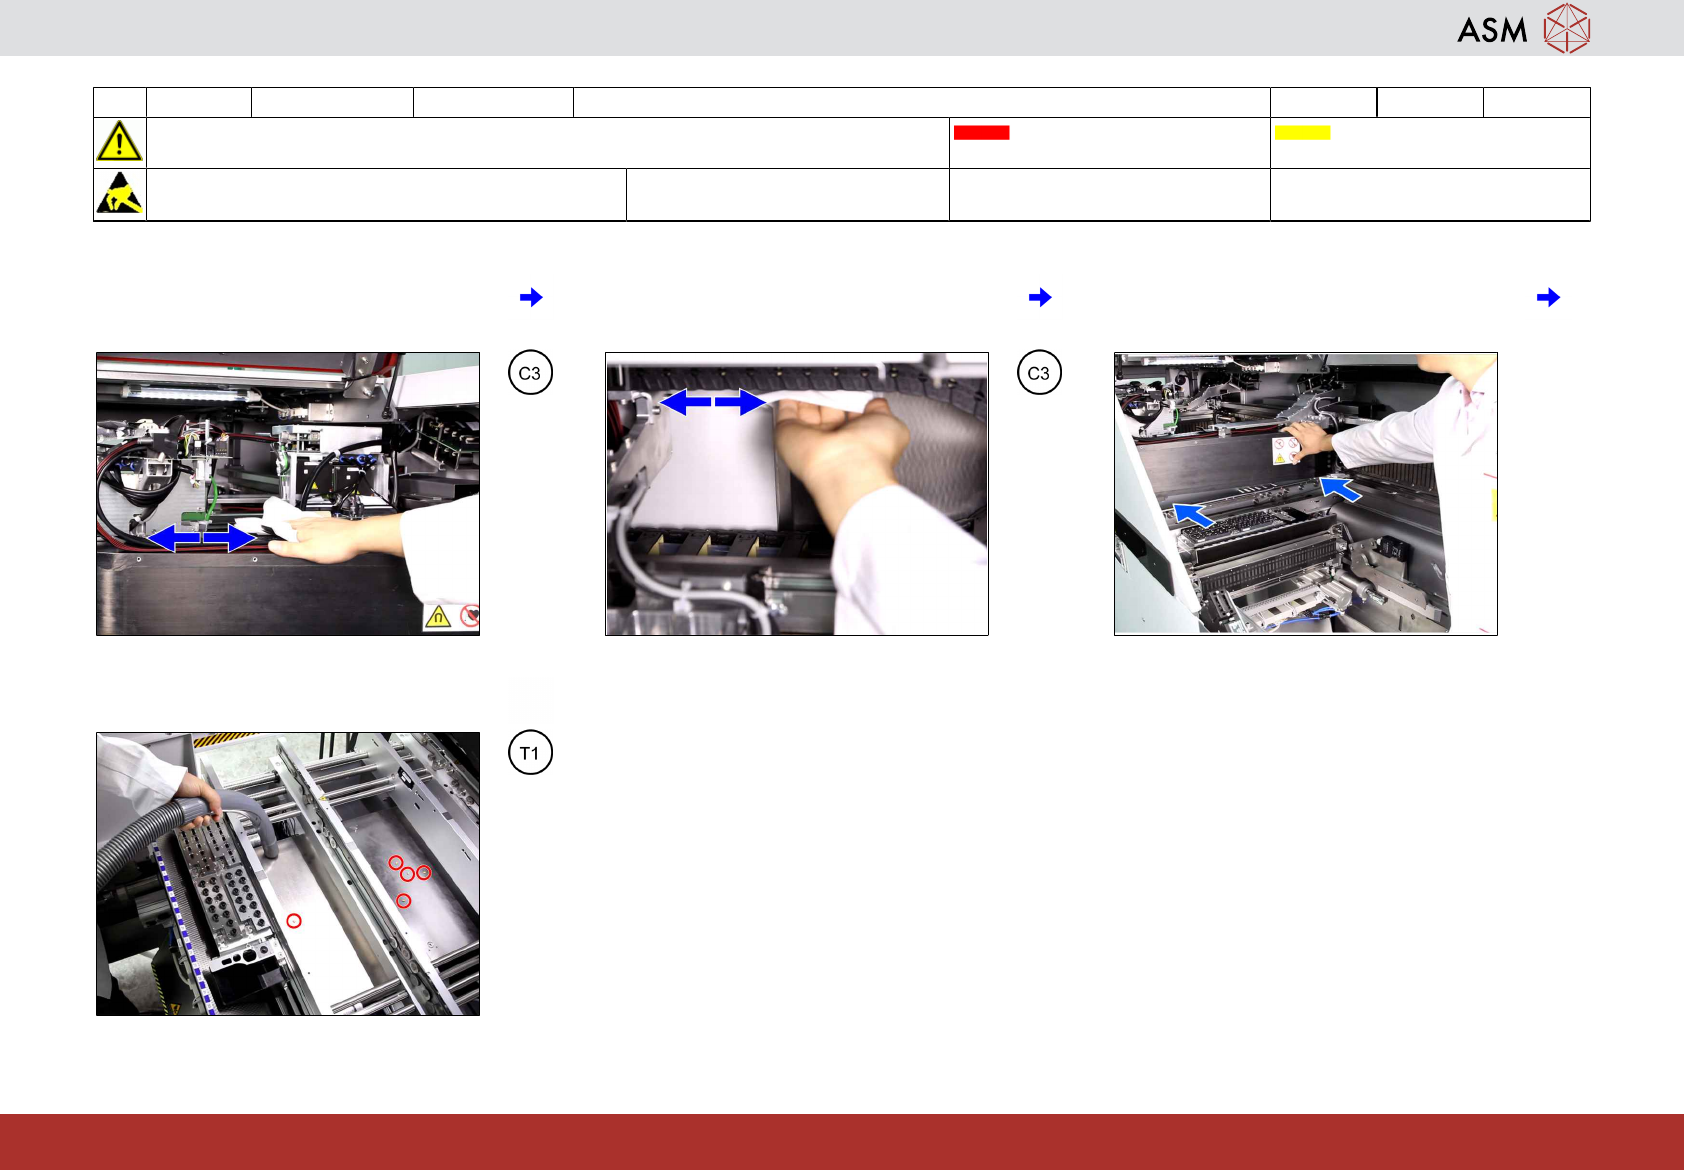
1 Clean the gantry cables of the X-Axis. 2 Clean the gantry cables of the Y-Axis. 3 Move all gantries to the end limit at loca-
tion 1 and repeat steps 1 to 2 for the other
gantry.
4 Vacuum all loose components on and
around the whole PCB conveyor.