00900085-04_IG_ASMProcessEngine_2.0-R18-1_EN.pdf - 第22页
4 Installation 4.3 Starting ASM ProcessEngine 22 Installation Guide ASM ProcessEngine 2.0 (Pre-Placement) (R18-1) 10/2018 4.3 Starting ASM ProcessEngine ► Click the ASM Studio desktop icon. ASM Studio opens and displays …
4 Installation
4.2 Installing ASM ProcessEngine
Installation Guide ASM ProcessEngine 2.0 (Pre-Placement) (R18-1) 10/2018 21
4.2.1 Restarting the Computer
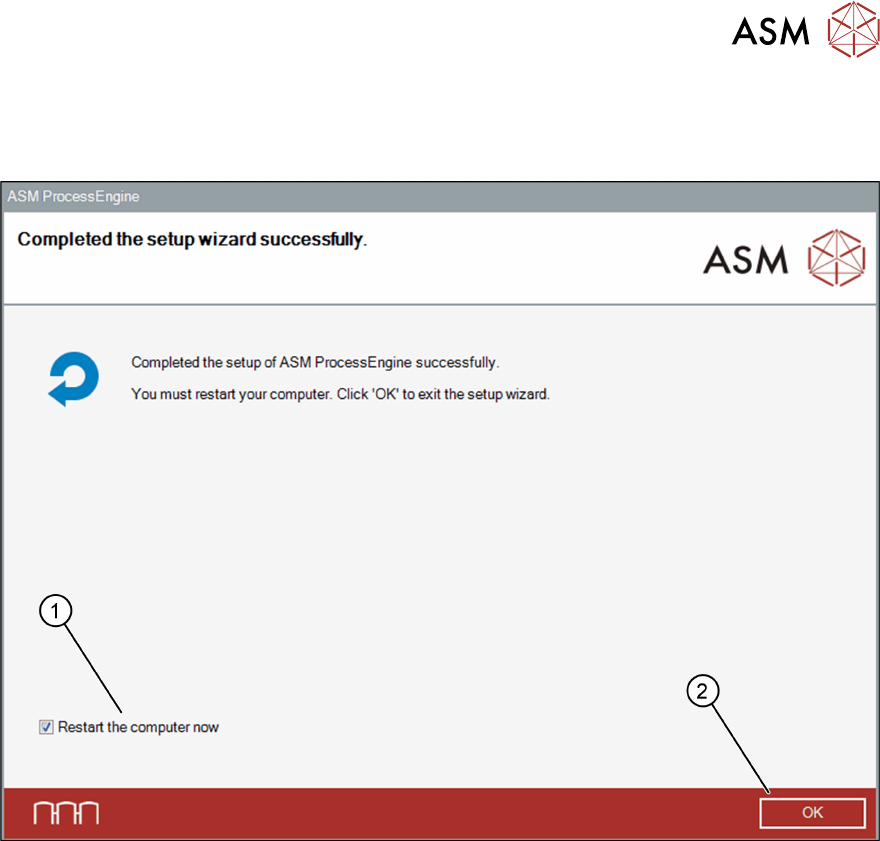
If a restart of the computer is required after the Setup Wizard has been completed, the following
dialog box opens.
The Restart the computer now checkbox (1) is selected by default.
► Click OK (2) to force a shutdown and automatically restart the computer.
Or
► Deselect the Restart the computer now checkbox (1) and click OK (2) to manually restart
the computer at a later point in time.
4 Installation
4.3 Starting ASM ProcessEngine
22 Installation Guide ASM ProcessEngine 2.0 (Pre-Placement) (R18-1) 10/2018
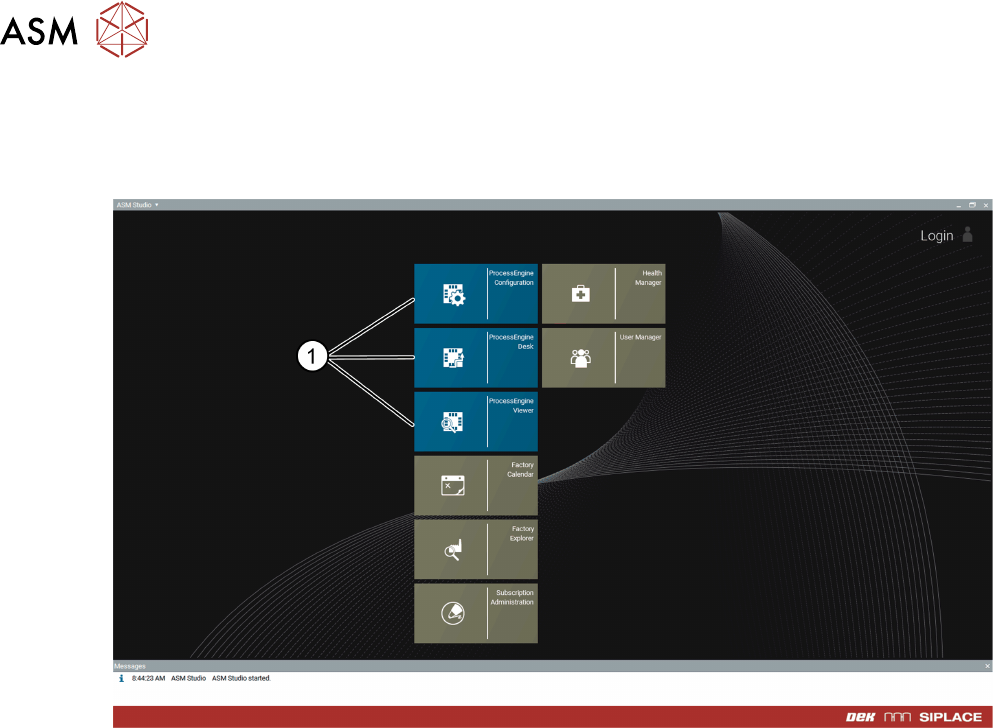
4.3 Starting ASM ProcessEngine
► Click the ASM Studio desktop icon.
ASM Studio opens and displays the installed ASM ProcessEngine modules (1).
5 Uninstallation
Installation Guide ASM ProcessEngine 2.0 (Pre-Placement) (R18-1) 10/2018 23
5 Uninstallation
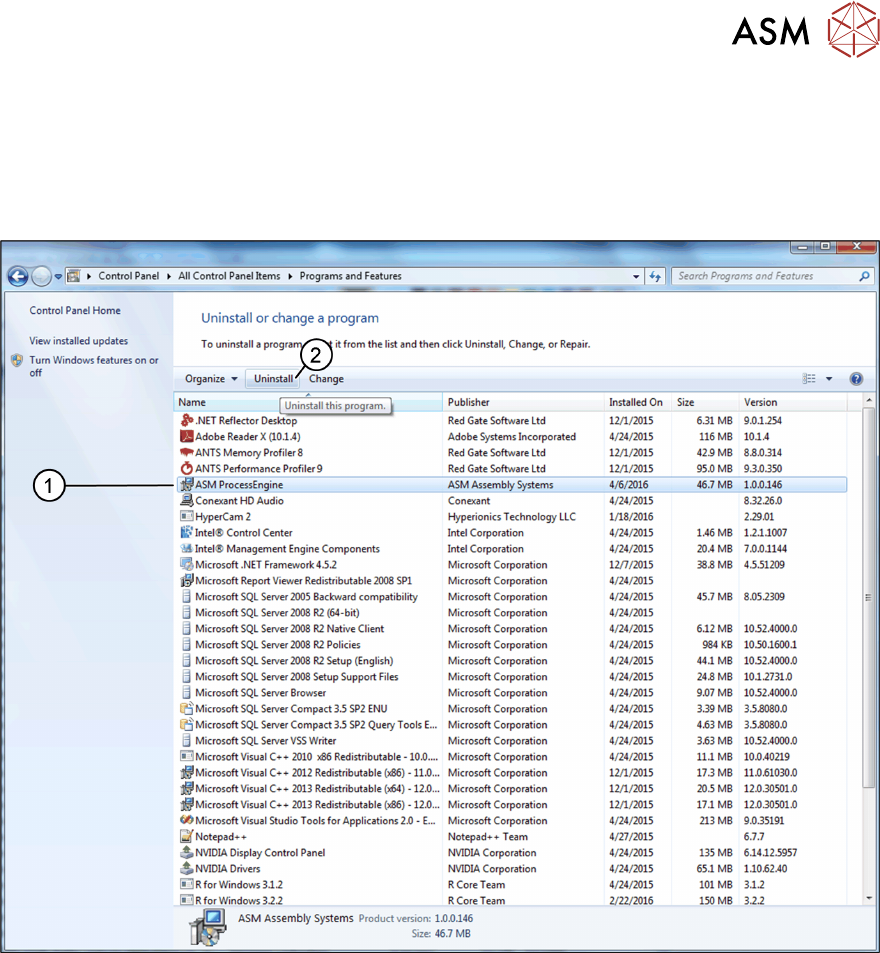
You can remove the ASM ProcessEngine installation with the Windows Uninstall application.
► From the Windows Start Menu, choose Control Panel → Programs and Features.
The Uninstall or change a program dialog box opens.
► From the list of installed programs, select ASM ProcessEngine (1).
► Click Uninstall (2).
The Ready to remove ASM ProcessEngine dialog box opens.