CP40 service manual.pdf - 第84页
1. Head Part (CP-40) 1-3-2. Align Replacement Wori Aligner J9059008A Flat-head Screwdriver CAP Hexagon Wrench Bolt M4 Hexagon Wrench 1) Disconnect Connector on the Top of Aligner (In Orders of Head 1, Head 2, H e a d3f r…
1. Head Part
(CP-40)
1-3-1. Align Board Replacement
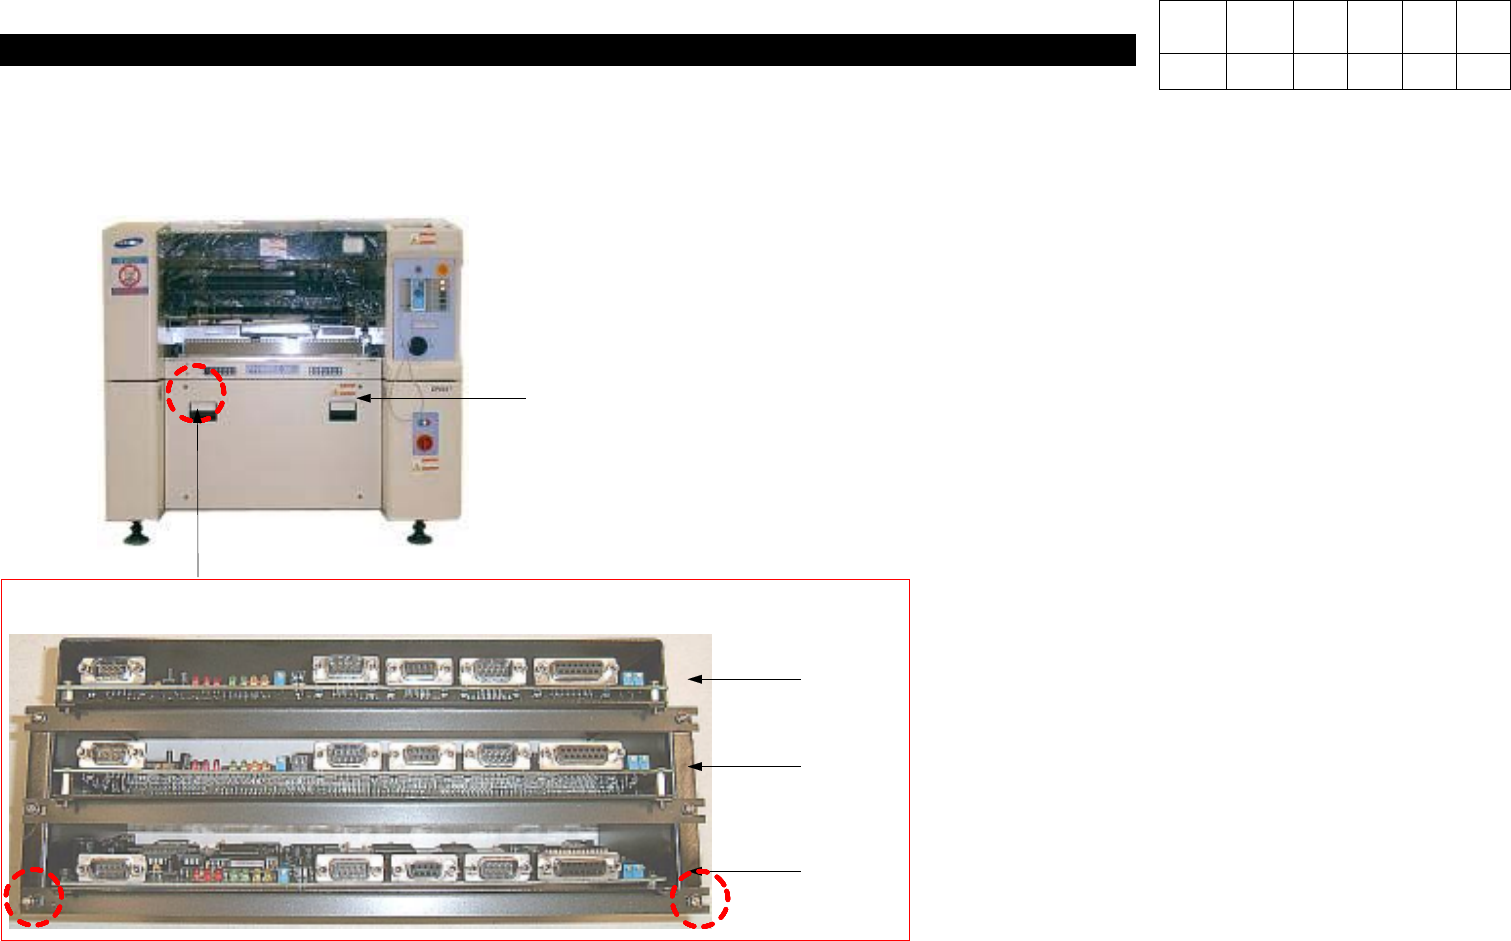
1) Using a Cross-head Screwdriver, Loosen 4
Toras Bolts on the Front Cover.
2) Loosen both the Left-hand and the
Right-hand M3*8 Spherical Head Bolts of
Bracket in the Left Upper.
3) While Grasping the Front End of Faulty
Align Board with Both Hands, Pull them.
# Since Head 1, Head 2 and Head 3 are
located in order from the Top, Disconnect
Only Faulty Align Board(For Assembly,
Perform Reverse Procedures of
Disassembly).
Toras Bolt*4ea
Align Board
Head 1
Head 2
Head 3
M3*8SphericalHead
Version Date WA QA CA Note
00 Nov04 O O O
1. Head Part
(CP-40)
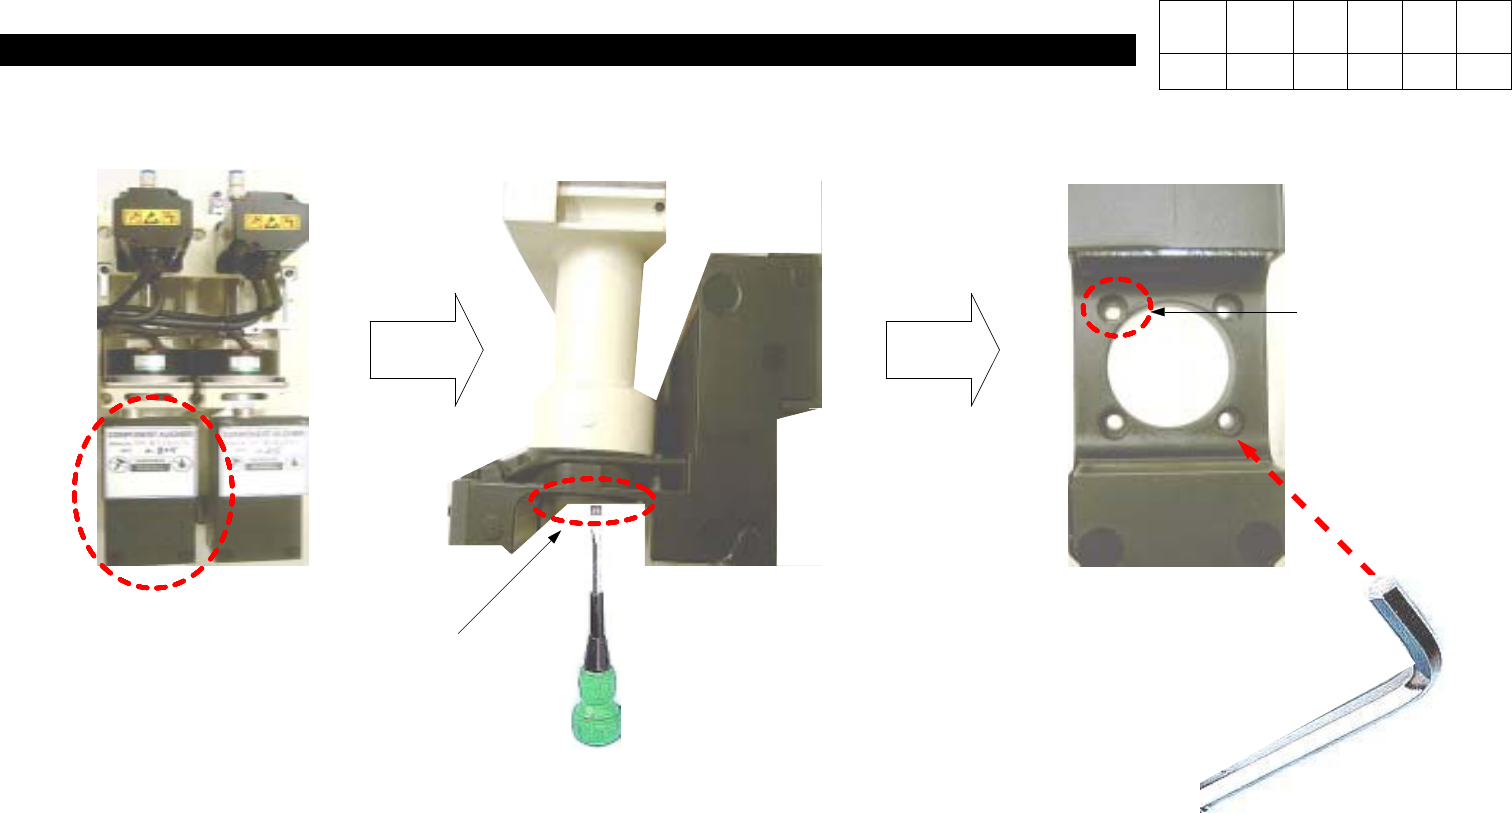
1-3-2. Align Replacement
Wori Aligner
J9059008A
Flat-head Screwdriver
CAP
Hexagon
Wrench Bolt
M4 Hexagon Wrench
1) Disconnect Connector on the Top of
Aligner (In Orders of Head 1, Head 2,
Head3fromLeft).
2) Using a Flat-head Screwdriver, Press
Left and Right Sides of Cap to
Remove Cap.
3) Using a M4 Hexagon Wrench, Loosen
4 Hexagon Wrench Bolts and Replace
Aligner.
Version Date WA QA CA Note
00 Nov04 O
1. Head Part
(CP-40)
200 SET
RESET
SET
Ripple Control
Control SW
Connecting Cable
0 SET
BOARD
SW2 VR3 SW1 VR2 VR1
No.1
No.2 No.3
(Fig. 1)
J1
1-3-3. Align Set_Up
Version Date WA QA CA Note
00 Nov04 O