manual-ams-stand-tweezers-0027180_ID-219236.pdf - 第6页
OK OK T OOL EAR THING FUSE AU X USE ONL Y WITH A 250 V FUSE OK OK T OOL EAR THING FUSE AU X USE ONL Y WITH A 250 V FUSE OK OK T OOL EAR THING FUSE AU X USE ONL Y WITH A 250 V FUSE 6 4. Rotational Car tridge Alignment Sli…
5
40 mm
50 mm
60 mm
80 mm
100 mm
130 mm
130 mm
para manuales - color gris
200 mm
300 mm
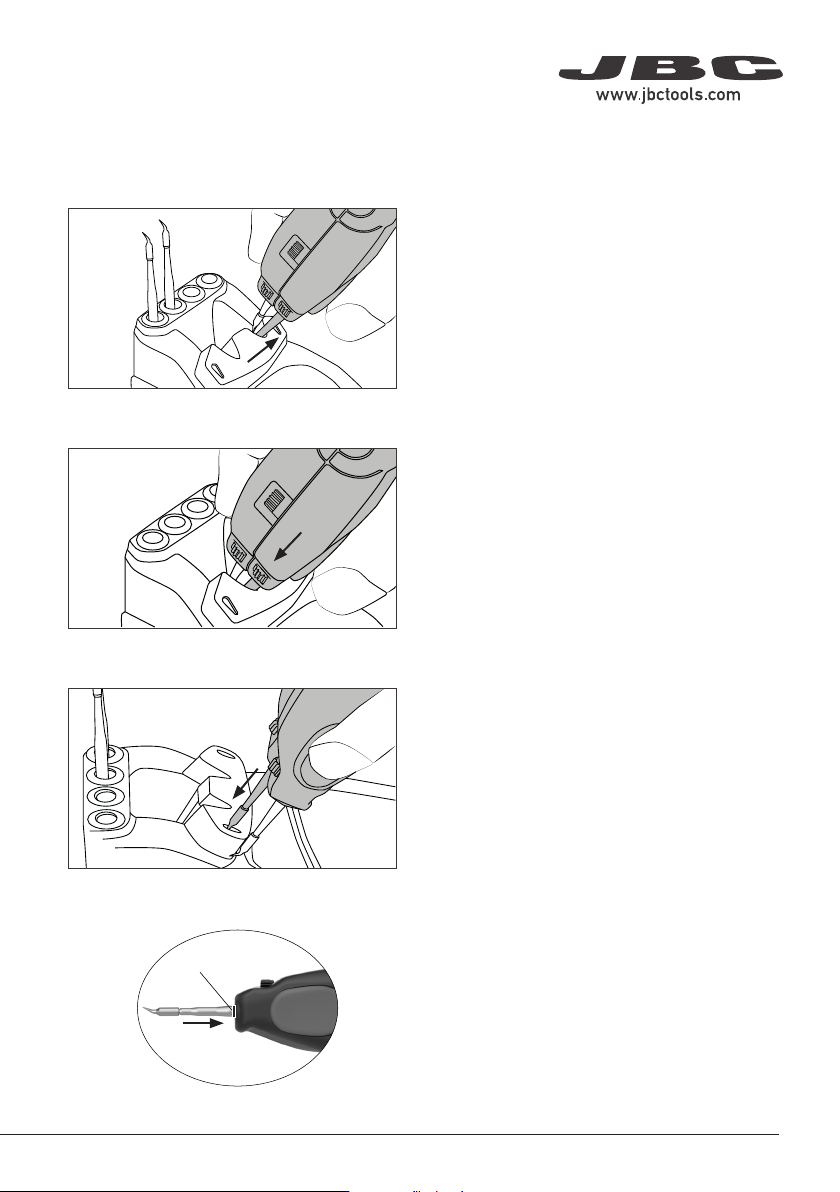
2. Positioning
1. Removing
Place the cartridges in the extractor and pull
the tweezers to remove them.
Place the tweezers on top of the new cartridge
and slightly press down.
3. Inserting
Use the grooves to insert the cartridges as far
as the mark*.
Mark
*Important
It is essential to insert the cartridges as far as
the mark for a proper connection.
Changing Cartridges - AM120 Tweezers
OK
OK
TOOL
EARTHING FUSE
AUX
USE ONLY WITH A 250 V FUSE
OK
OK
TOOL
EARTHING FUSE
AUX
USE ONLY WITH A 250 V FUSE
OK
OK
TOOL
EARTHING FUSE
AUX
USE ONLY WITH A 250 V FUSE
6
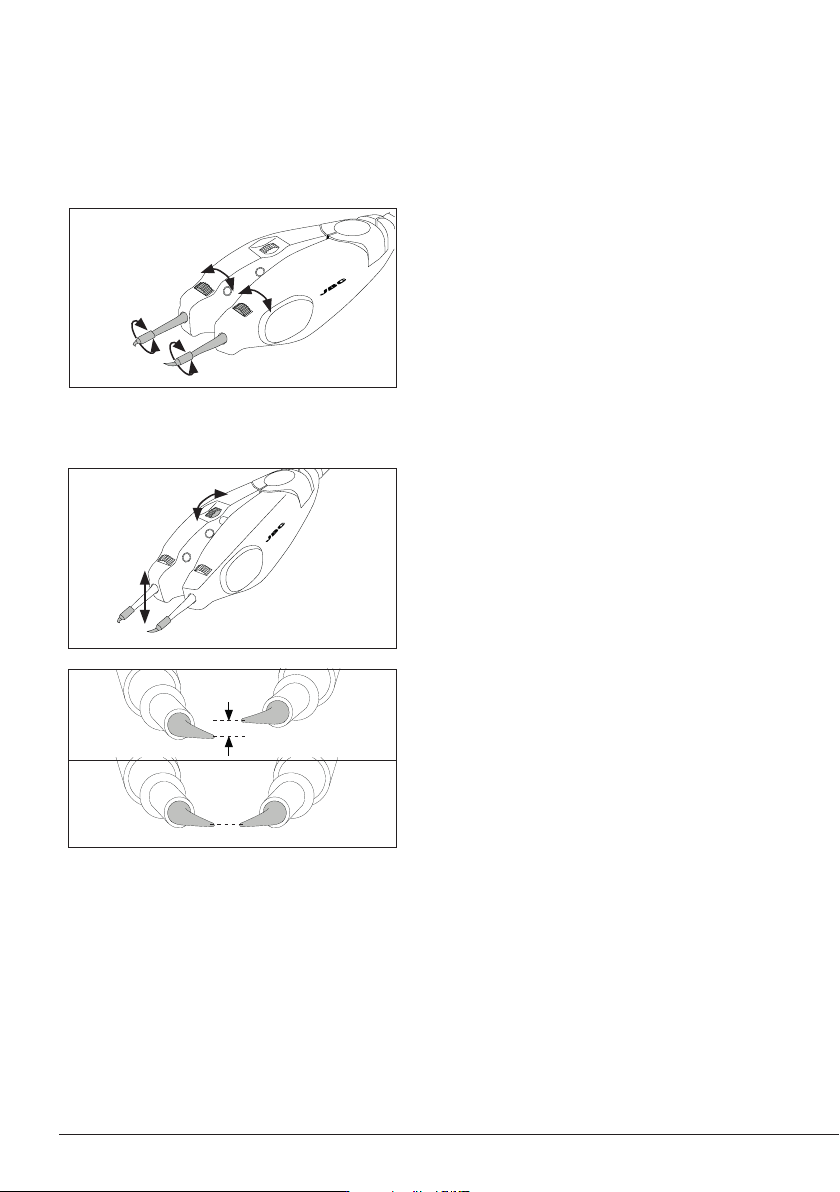
4. Rotational Cartridge Alignment
Slightly turn the wheels to align the cartridges
as required.
5. Vertical Cartridge Alignment
not aligned
aligned
Close the tweezers and the rear wheel allows
the cartridges to be equally aligned in a vertical
direction.
AM-SA
PA120-A
PA120-A
AM-SA
PA120-A
PA120-A
AM-SA
PA120-A
PA120-A
AM-SA
PA120-A
PA120-A
7
40 mm
50 mm
60 mm
80 mm
100 mm
130 mm
130 mm
para manuales - color gris
200 mm
300 mm
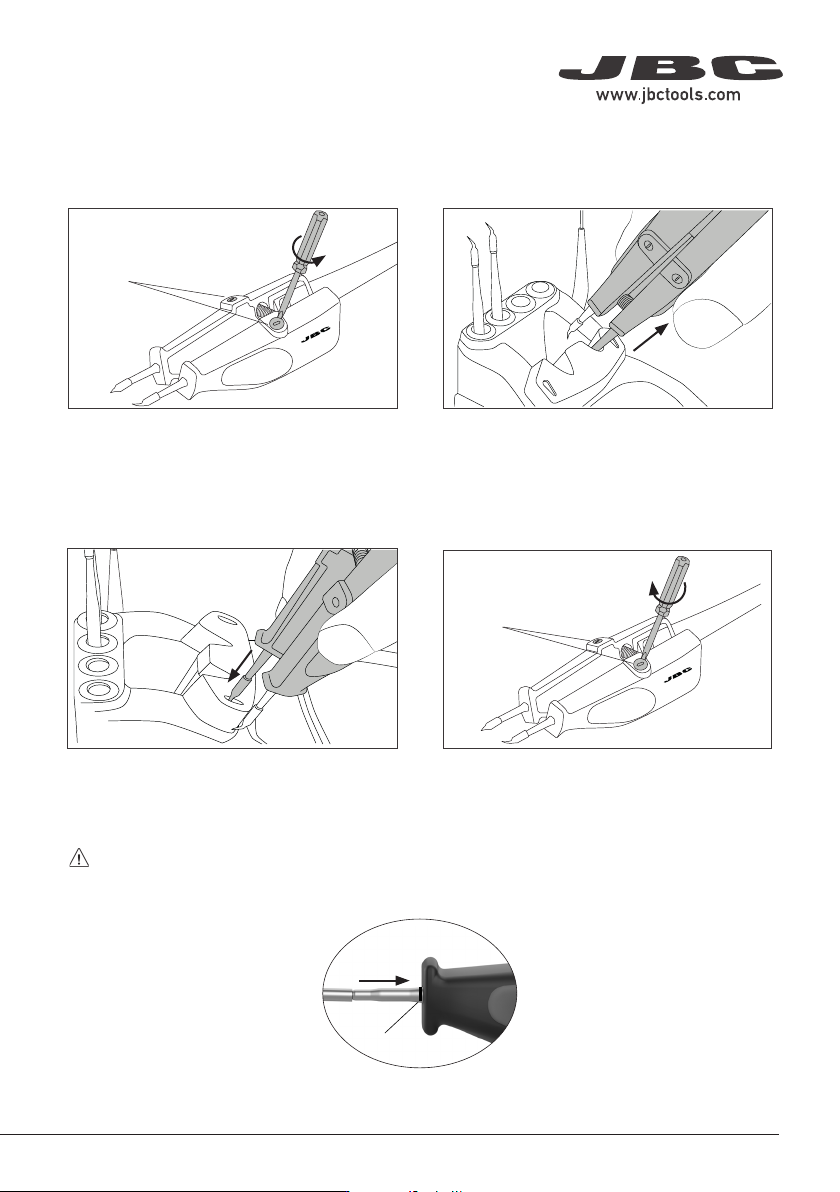
2. Removing1. Unlocking
Unlock the fixing screws. Place the cartridges in the extractor and pull
the tweezers to remove them.
Use the grooves to insert the cartridges as
far as the mark*.
3. Inserting
4. Locking
Lock the fixing screws.
Changing Cartridges - PA120 Tweezers
Mark
*Important
It is essential to insert the cartridges as far as the mark for a proper connection.
Screws
Screws