D1_ServiceManual_e.pdf - 第11页
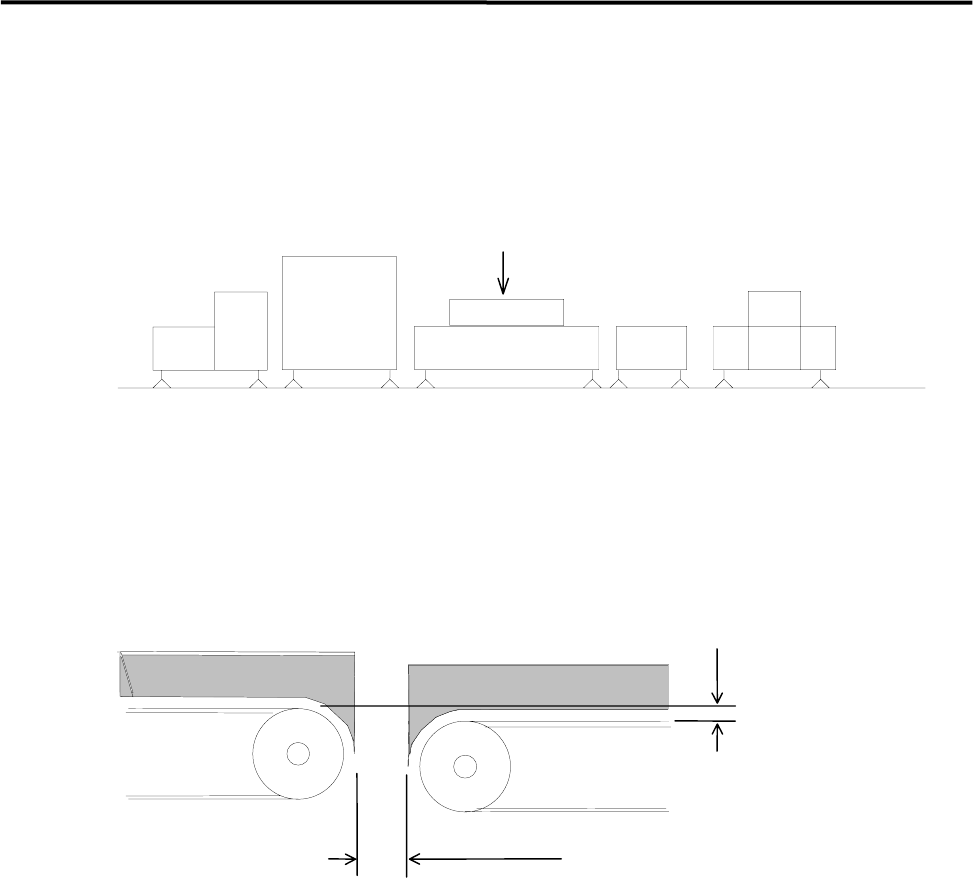
1 Installation 1-3 Production Line To align your assembly line, first in stall the heaviest unit. Th en install peripheral u nits using th e first unit as a reference. Reference L o a d e r D i s p e n s e r / M o u n t …

1 Installation
1-2
Installation of Machine
Environmental Requirements
Install the machine where the below conditions are met.
Do not do tasks, such as moving the machine or connecting the machine with the main switch ON to
prevent electric shock.
Warning
■ Ambient Temperature: Accuracy assurance 23 +/-2 degrees centigrade
Operation assurance 5 to 40 degrees centigrade
(The average over a period of 24 hours does not exceed 35 degrees C.)
■ Relative Humidity: 45 to 60 percent, non-condensing
■ Atmosphere: Dust and corrosive gas free
■ Floor: Floor must be flat and sturdy enough for freedom from vibration during
operation.
■ Power Requirements: 200 VAC +/- 10%, three phase, 50/60 Hz
* 208/220/230/240/380/400/415/440 VAC with optional power
transformer
Power consumption: 2 kW
Capacity: 4 kVA
Leakage current: 100mA or less
* Power and ground the machine independently of other machines which may be a
noise source, such as a compressor, welding machine, or reflow soldering machine
with magnetic contacts.
1 Installation
1-3
Production Line
To align your assembly line, first install the heaviest unit. Then install peripheral units using the first unit as
a reference.
Reference
Loader Dispenser/Mounter Reflow Oven Conveyor Unloader
To transfer the PCB (printed circuit board) smoothly, clearance between units are quite important. Be sure
that the clearance between units is approximately 5 mm as below figure shows. Adjust the height of the
downstream unit a little lower (0-0.5 mm) so that the PCB is transferred smoothly.
0 - 0.5mm
Approx. 5mm
DownstreamUpstream
側
1 Installation
1-4
Installing the Machine
Do not touch terminals of electric components when the power is on to prevent electric shock and machine
damage.
Warning
Make sure to ground the machine to prevent electric shock.
Warning
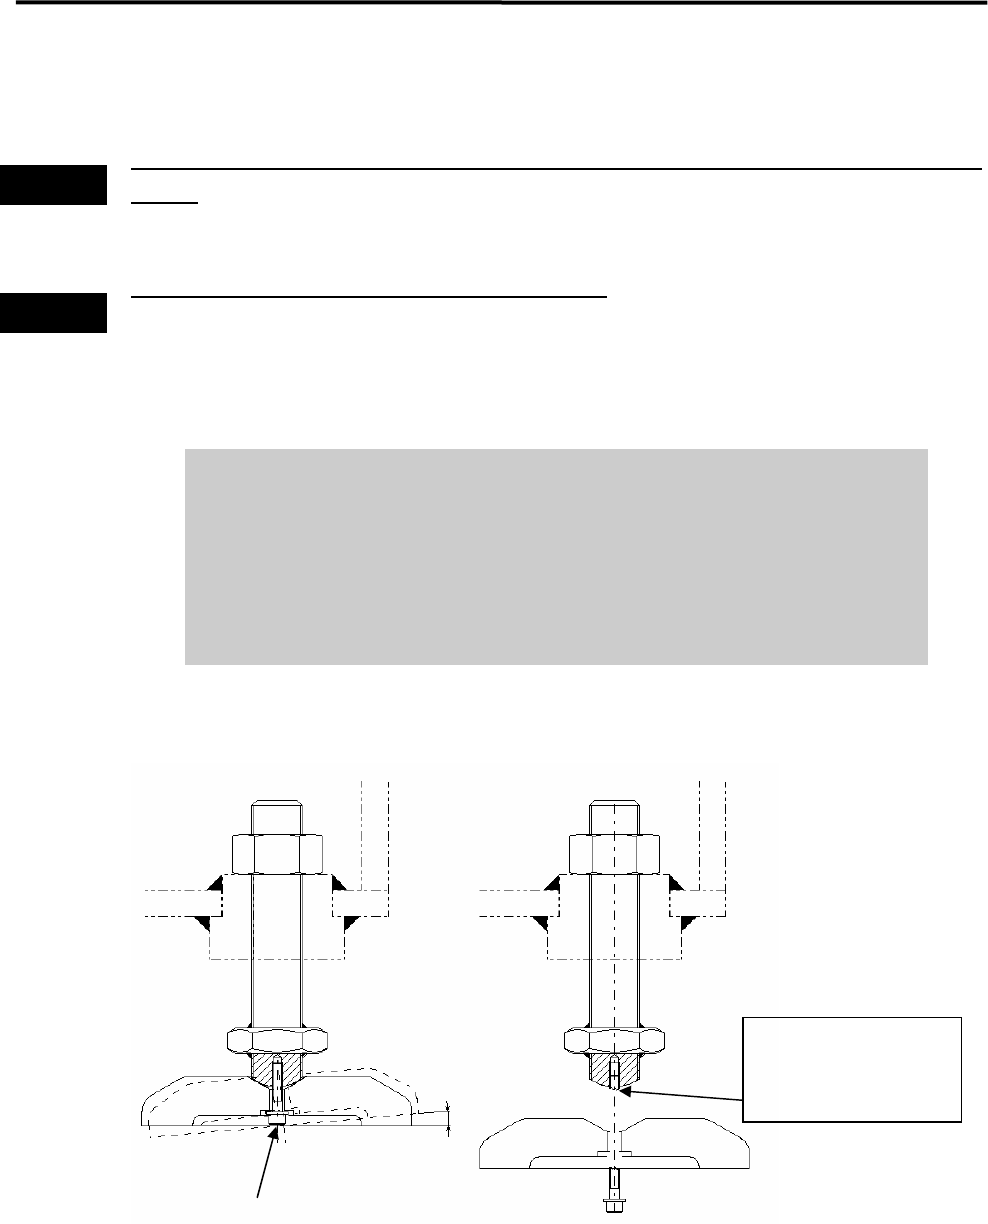
Note on Installation
It is normal that the adjust foot can be slightly inclined (within 2-degree range).
Do not tighten the bolt forcedly trying to fix the foot.
When you move and/or install the machine, be careful not to apply excessive
force on the adjust foot. This may cause the screw of the adjust foot to break.
When placing the machine on the floor, be sure that the machine is kept
horizontal.
2°
Mounting Screw
If excessive force is
applied, the screw may
break at this point.