AP250-A_MANUAL.pdf - 第4页
Al ign th e tip of the c ar tri dge w ith the f eed er noz zle. Us e a pli ers fo r a cor rect t ip ali gnm ent. Changing ca r tridge For a s afe ca rt rid ge cha nge, u nplu g the too l or tur n the st ation of f b efor…
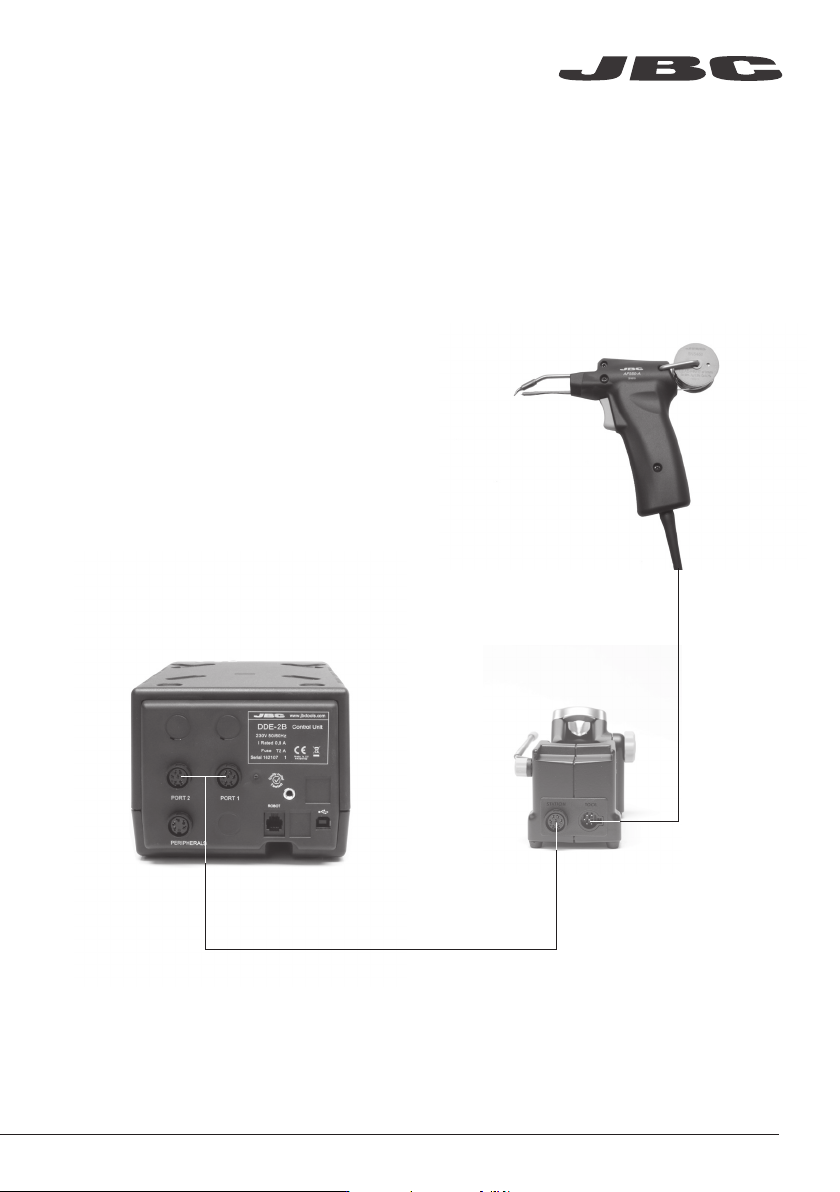
Features
Solder Feed Iron
Ref. AP250-A
Solder Feed Stand
Ref. AP-SD
Control Unit
The AP250-A Solder Feed Iron is fully compatible with any JBC station within the Modular Line and
with the CF Solder Feed station within the Compact Line.
www.jbctools.com
3
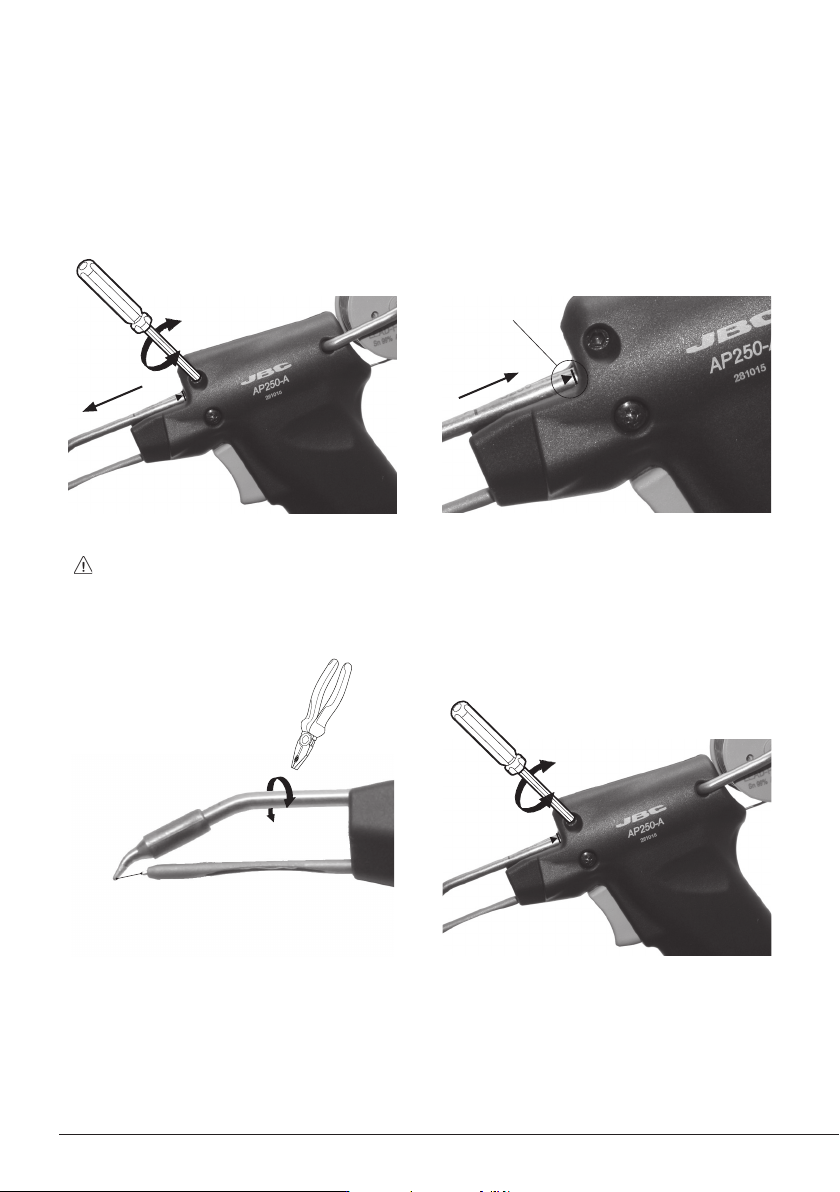
Align the tip of the cartridge with the feeder
nozzle. Use a pliers for a correct tip alignment.
Changing cartridge
For a safe cartridge change, unplug the tool or turn the station off before following these guidelines:
Loosen the screw and remove the cartridge.
Use a flat pliers to remove it if still hot.
1. Removing
Alignment
Important: Tighten the screw again. This is
necessary for the tool to function.
3. Aligning
2. Inserting
4. Fixing
Mark
Important: Insert the cartridge as far as
the mark for a correct connection.
4
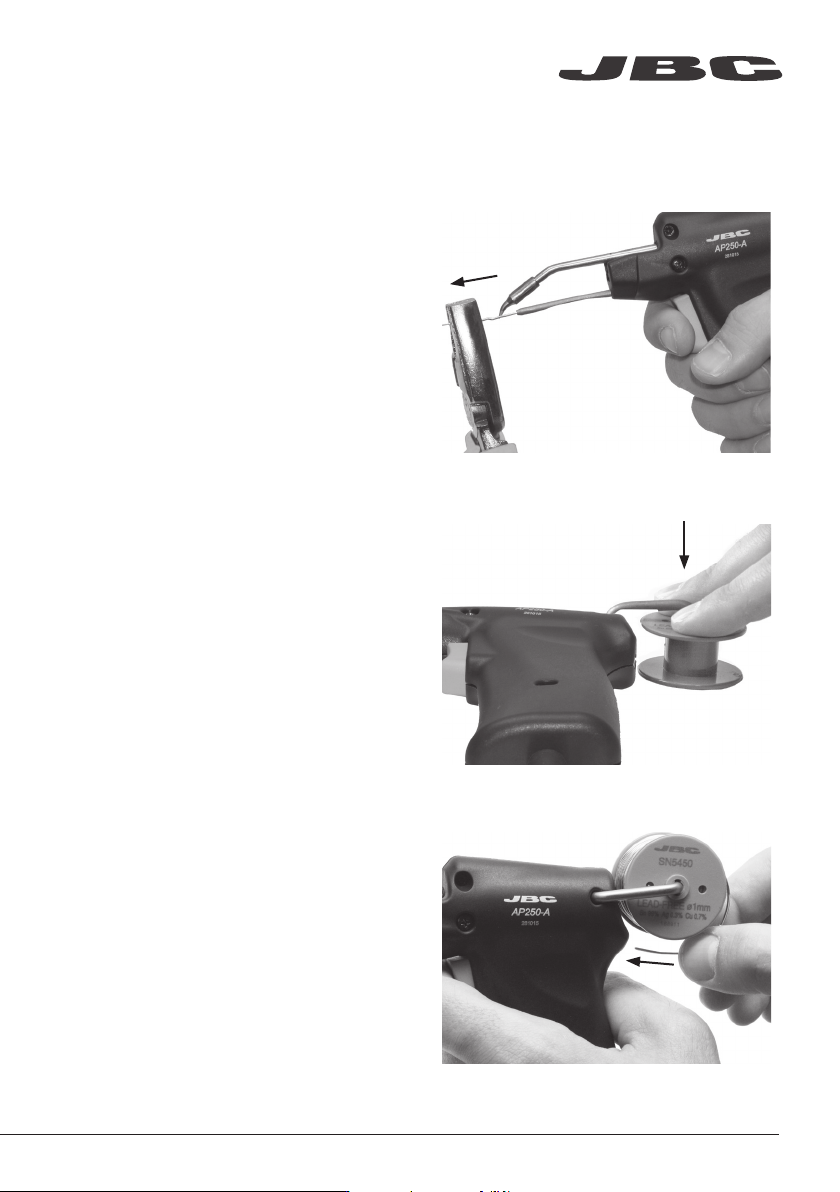
Pull out the remaining solder from inside
the feeder nozzle. Use a pliers if necessary.
Note: Use 0.8 - 1.0 mm diameter solder wire.
Use 1.0 - 1.5 mm diameter solder wire with the 0019211 Feeder Nozzle.
Insert the solder wire while pushing the
trigger repeatedly until the solder wire
appears at the nozzle.
Replacing solder wire
2. Replace the solder reel
Remove the empty reel as shown and fit
the new one.
1. Remove the remaining solder wire
3. Insert the new solder wire
www.jbctools.com
5