AP250-A_MANUAL.pdf - 第6页
Changing the Feeder Nozzle Feeder No z zle 1. T ake out th e scre w from b ehi nd to remove t he ree l and t he sol der w ire fr om the n ozzl e. Nex t, rem ove the t wo screw s from th e othe r side a nd li f t the cove…
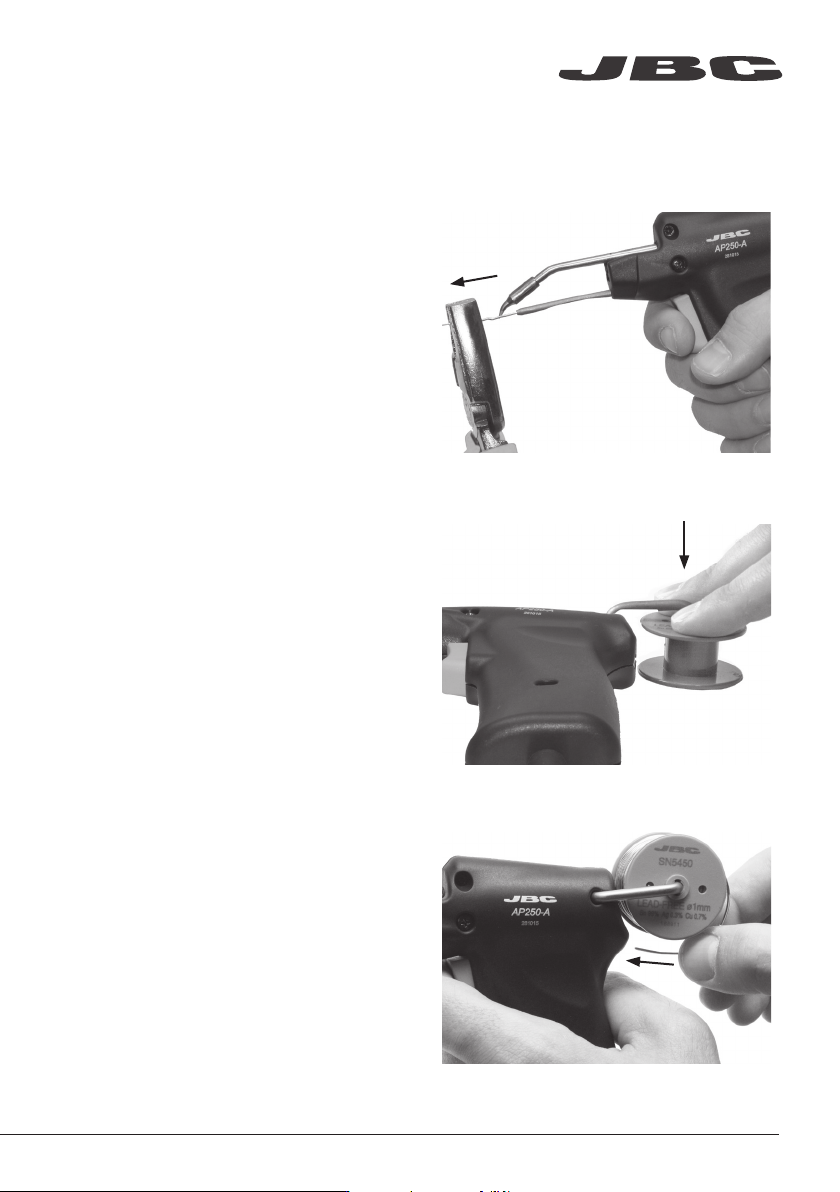
Pull out the remaining solder from inside
the feeder nozzle. Use a pliers if necessary.
Note: Use 0.8 - 1.0 mm diameter solder wire.
Use 1.0 - 1.5 mm diameter solder wire with the 0019211 Feeder Nozzle.
Insert the solder wire while pushing the
trigger repeatedly until the solder wire
appears at the nozzle.
Replacing solder wire
2. Replace the solder reel
Remove the empty reel as shown and fit
the new one.
1. Remove the remaining solder wire
3. Insert the new solder wire
www.jbctools.com
5
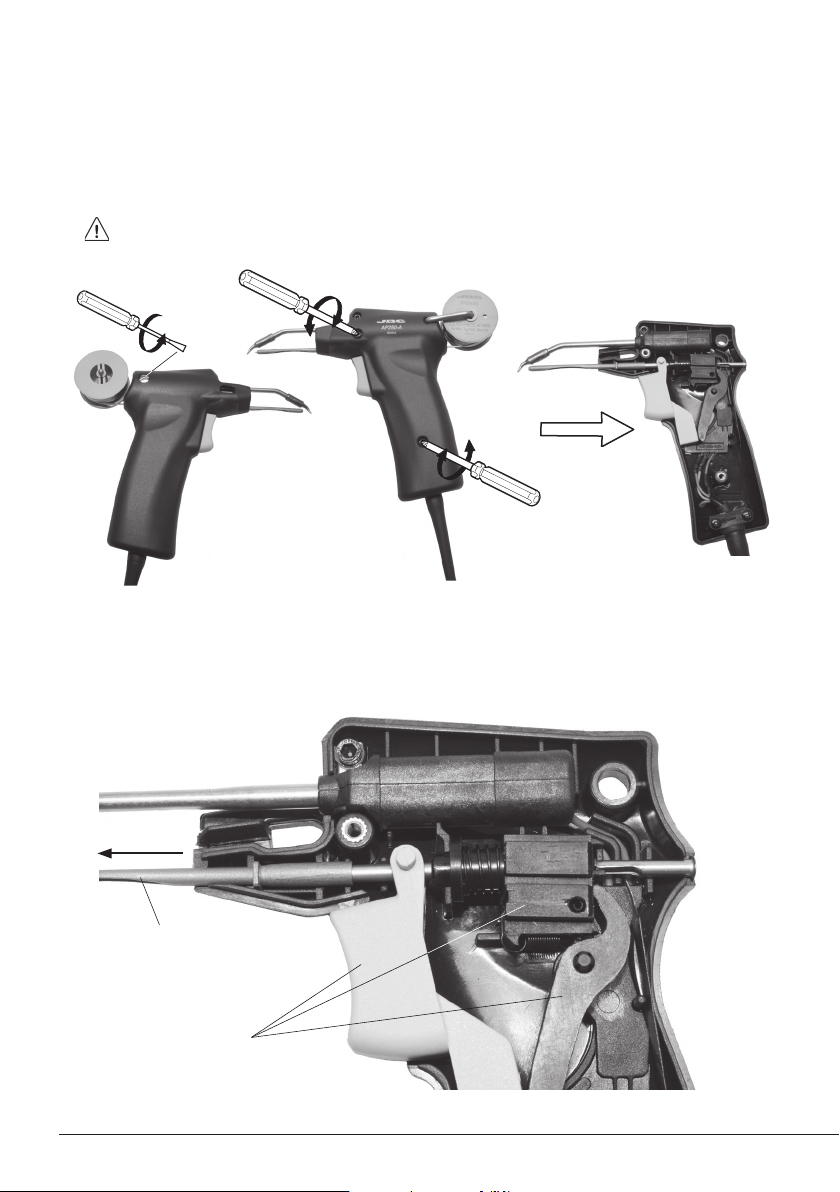
Changing the Feeder Nozzle
Feeder Nozzle
1. Take out the screw from behind to remove the reel and the solder wire from the nozzle.
Next, remove the two screws from the other side and lift the cover off.
Make sure the tool is unplugged.
2. Take out the nozzle and replace it with the new one while holding the following 3 components
inplace. Reassemble the handpiece and tighten the 3 screws.
The 3 components
6
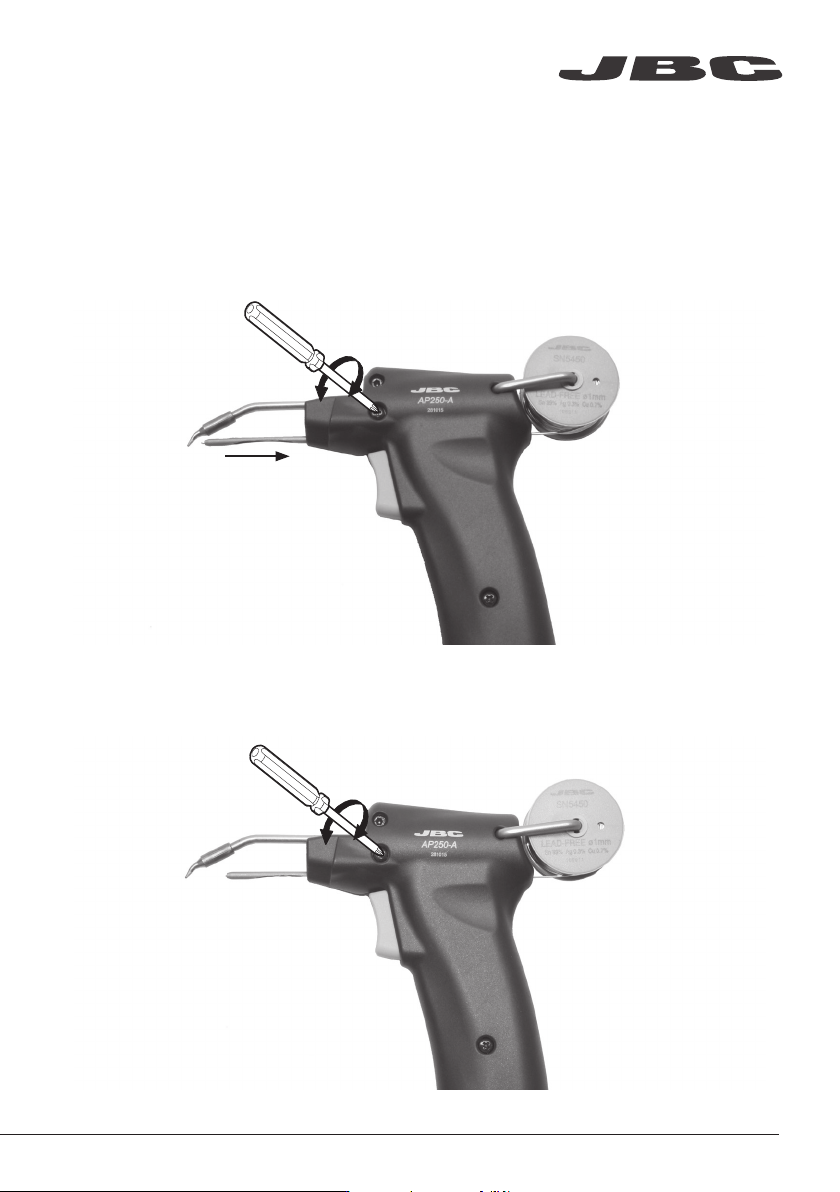
Regulating the Feeder Nozzle
Depending on the component you are soldering or the cartridge being used, you can either shor-
ten or lengthen the feeder nozzle by (a max) 10 mm.
1. Loosen the screw to change the length of the nozzle.
2. Adjust it to the required length and tighten the screw.
www.jbctools.com
7