AP250-A_MANUAL.pdf - 第5页
Pul l out th e rema ini ng sol der f rom in sid e the fe ed er noz zle. Us e a pli ers i f nec ess ar y . Note: Us e 0.8 - 1 . 0 m m dia meter s olde r wir e. Use 1. 0 - 1 .5 mm d iam eter so lder w ire w ith th e 001 92…
Align the tip of the cartridge with the feeder
nozzle. Use a pliers for a correct tip alignment.
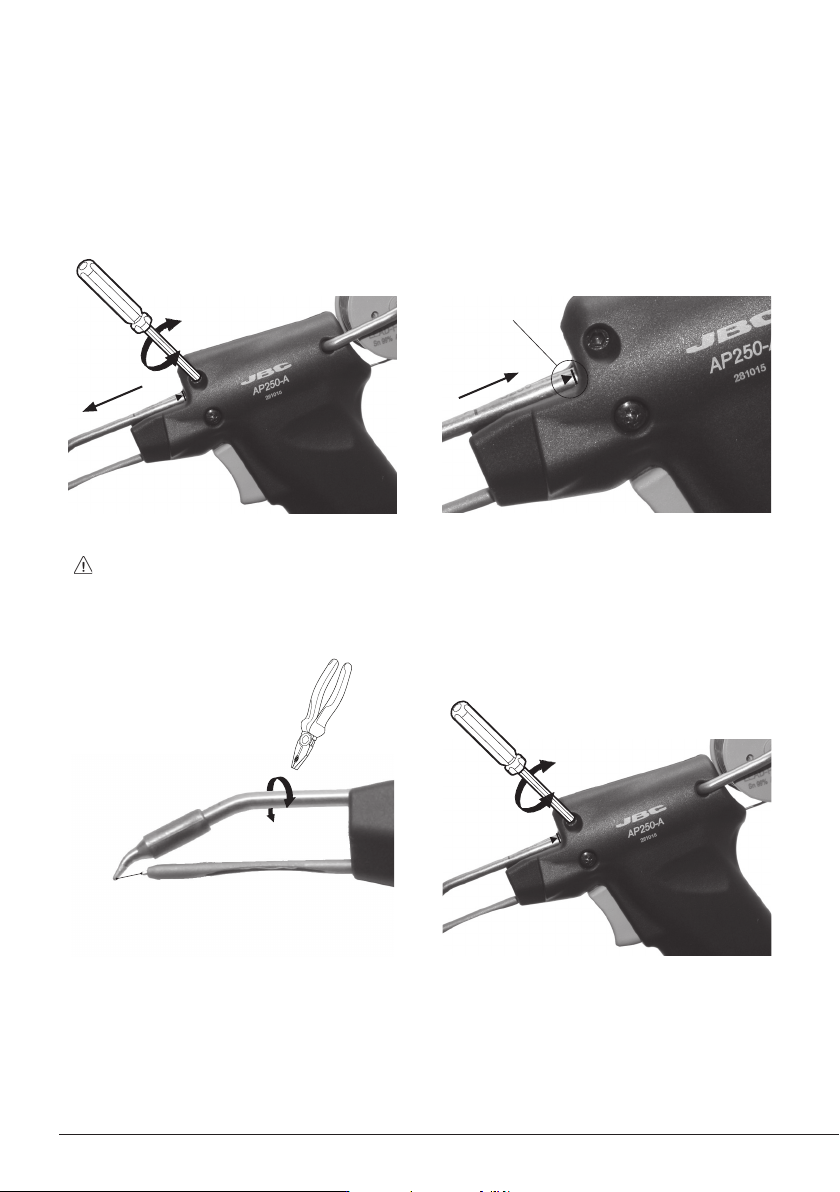
Changing cartridge
For a safe cartridge change, unplug the tool or turn the station off before following these guidelines:
Loosen the screw and remove the cartridge.
Use a flat pliers to remove it if still hot.
1. Removing
Alignment
Important: Tighten the screw again. This is
necessary for the tool to function.
3. Aligning
2. Inserting
4. Fixing
Mark
Important: Insert the cartridge as far as
the mark for a correct connection.
4
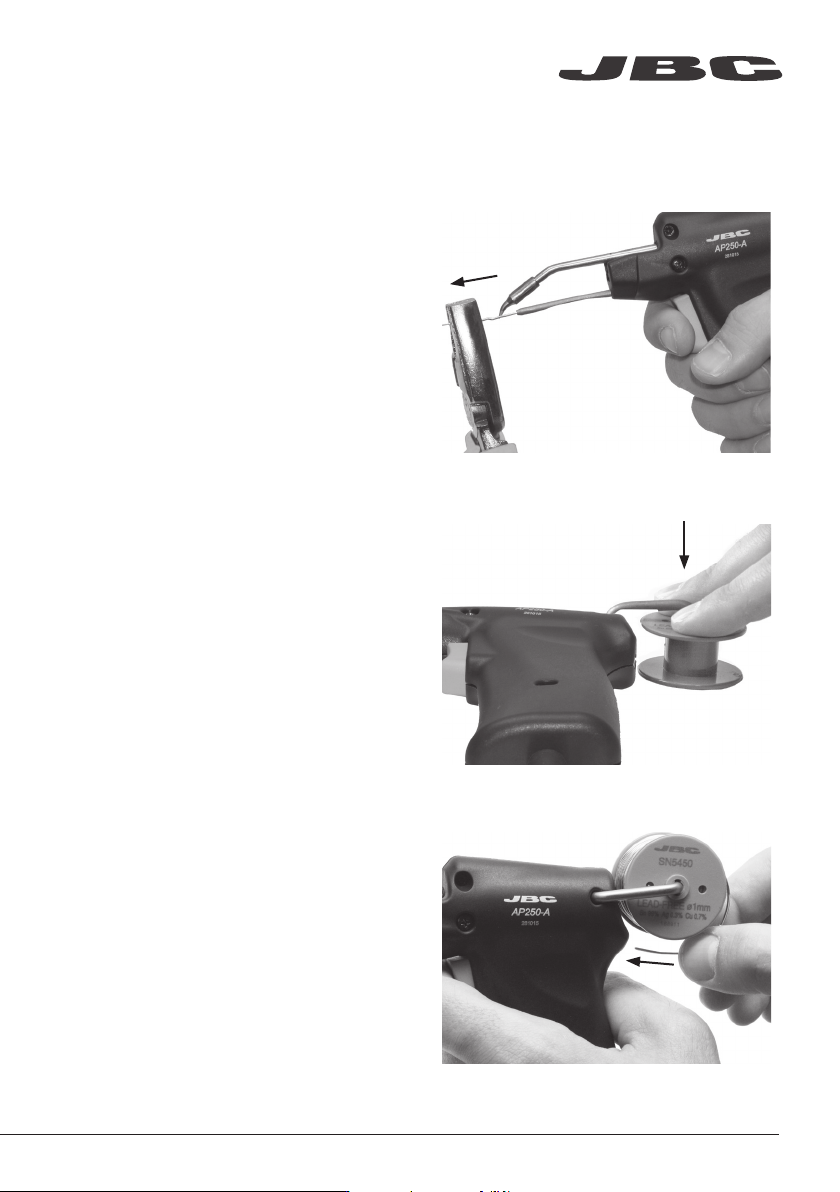
Pull out the remaining solder from inside
the feeder nozzle. Use a pliers if necessary.
Note: Use 0.8 - 1.0 mm diameter solder wire.
Use 1.0 - 1.5 mm diameter solder wire with the 0019211 Feeder Nozzle.
Insert the solder wire while pushing the
trigger repeatedly until the solder wire
appears at the nozzle.
Replacing solder wire
2. Replace the solder reel
Remove the empty reel as shown and fit
the new one.
1. Remove the remaining solder wire
3. Insert the new solder wire
www.jbctools.com
5
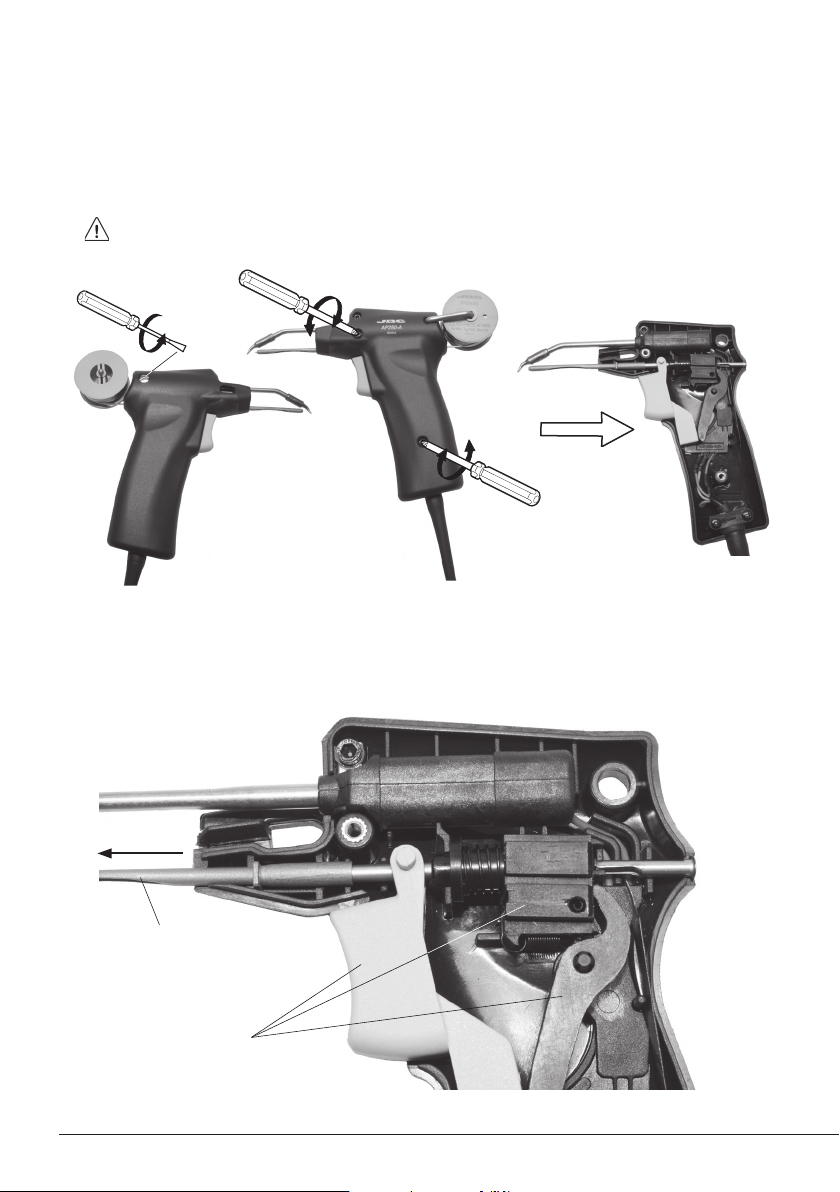
Changing the Feeder Nozzle
Feeder Nozzle
1. Take out the screw from behind to remove the reel and the solder wire from the nozzle.
Next, remove the two screws from the other side and lift the cover off.
Make sure the tool is unplugged.
2. Take out the nozzle and replace it with the new one while holding the following 3 components
inplace. Reassemble the handpiece and tighten the 3 screws.
The 3 components
6