YG100R_Ope_E.pdf - 第83页
2-30 2 Basic operation 4 I n s e r t t h e f e e d e r i n t o t h e k n o c k- p i n h o l e s i n t h e f e e d e r p l a t e . H o l d t h e e d g e o f t h e f e e d e r a n d t h e c l a m p i n g l e v e r l o c k …
2-29
2
Basic operation
3. Installing the feeder on the mounter
Follow the instructions below to attach the feeder on the surface mounter.
1
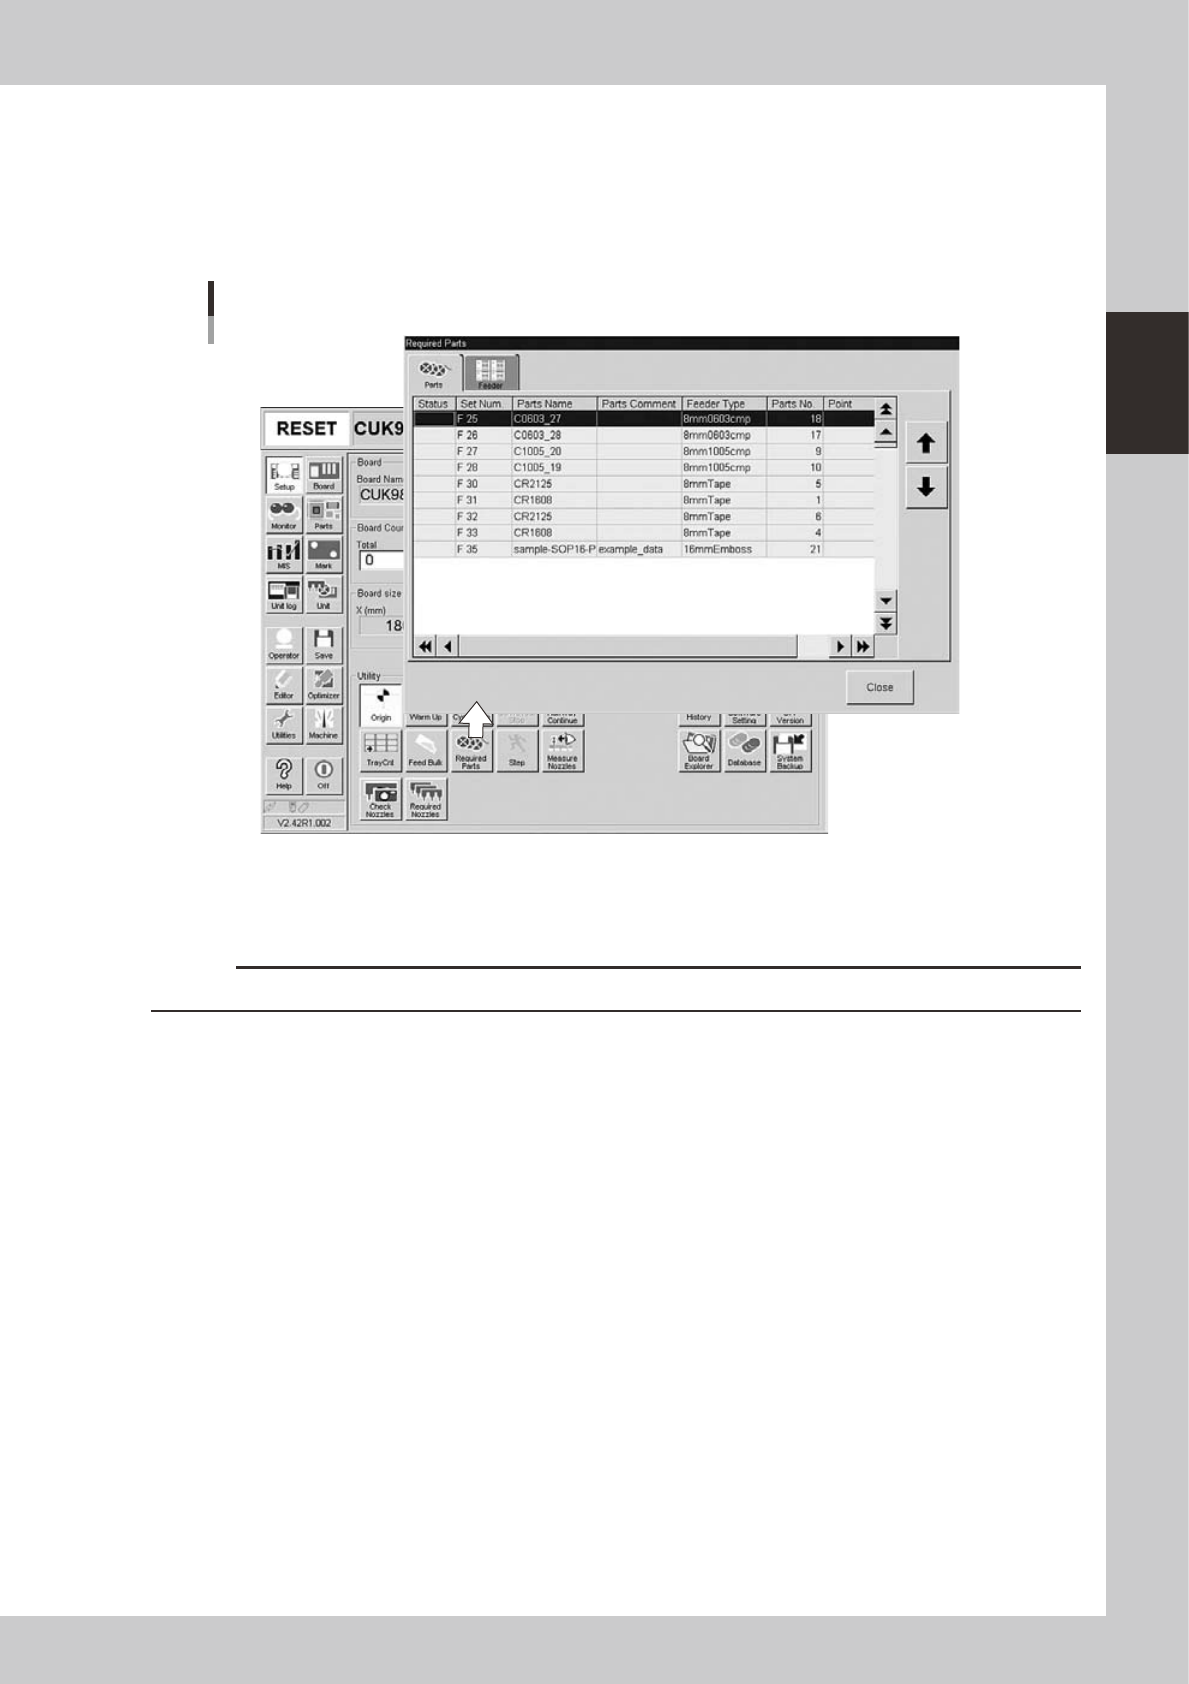
Check the feeder setup position.
On the [Setup] screen, press the [Required Parts] button to open the "Required Parts" screen and check
the feeder setup position.
"Required Parts" screen
24213-M0-00
e
2
Press the emergency stop button.
Press the emergency stop button on the mounter to stop mounter operation.
c
CAUTION
Installing a feeder unit without stopping the mounter might cause items to be entangled in machine.
3
Clean the surface of the feeder plate.
Chips or debris caught between the feeder and feeder plate will tilt the feeder, causing unstable
pickup.
2-30
2
Basic operation
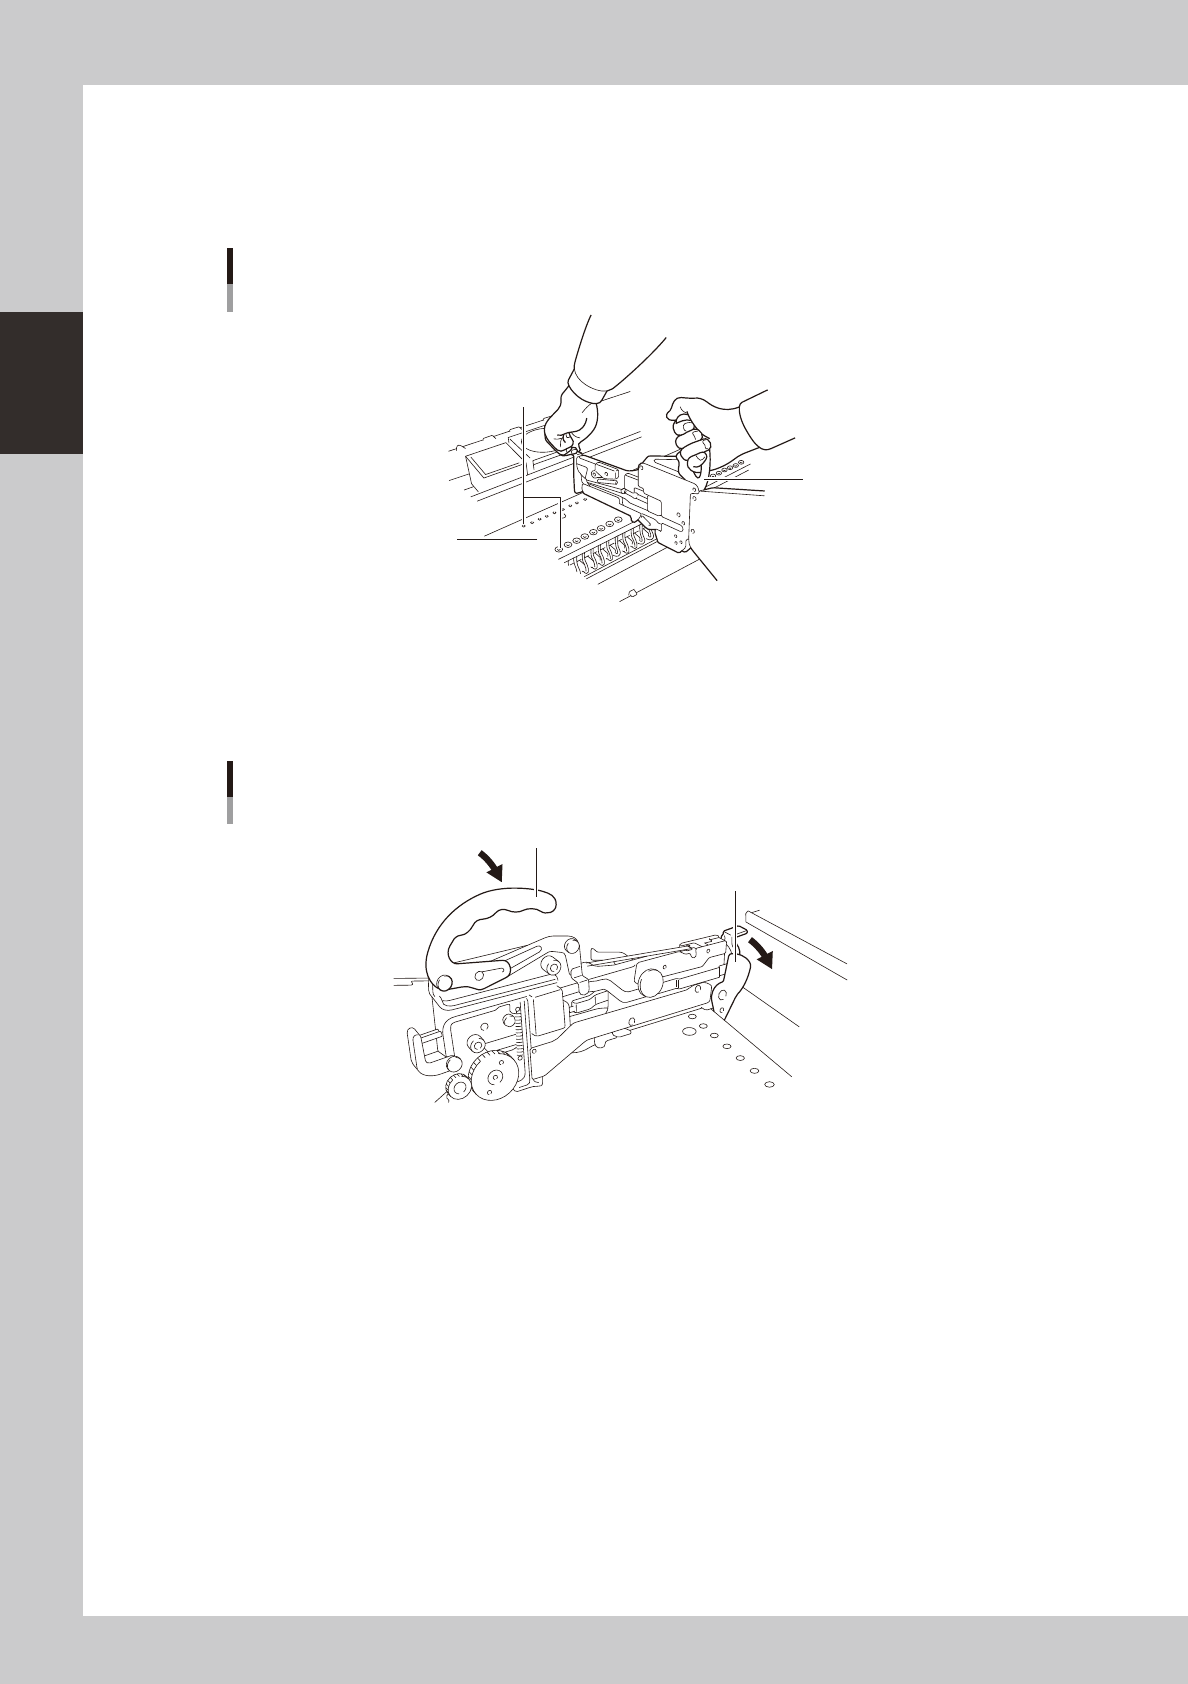
4
Insert the feeder into the knock-pin holes in the feeder plate.
Hold the edge of the feeder and the clamping lever lock handle while the handle is in the lifted
position. Then lower the feeder from directly above the feeder plate while keeping the feeder
horizontal. The feeder plate has knock-pin holes. Insert the front and rear knock pins on the feeder into
the knock-pin holes securely.
30
18
19
20
21
22
23
24
25
26
27
28
29
35
32
33
34
38
36
37
23
24
25
26
27
28
29
46
47
48
44
45
Attaching the feeder
Handle
Feeder plate
Knock-pin holes
23221-M0-00
5
Push down the clamping lever.
Lower the clamping lever lock handle. Then push down the clamping lever so that it is securely set on
the feeder plate. If the lever is not properly set, the feeder may come off during component mounting
or operation.
1
2
3
4
5
6
7
8
Clamping Lever
Clamping lever lock handle
Clamping lever
23222-M0-00
2-31
2
Basic operation
3.5.2 Tray changer
1. Precautions when handling pallets and magazines
Observe the following points when handling pallets and magazines.
• Store pallets and magazines in a clean environment where dust, grime and oil will not adhere.
• Take care not to drop pallets and magazines or apply excessive force or impacts. If a pallet or magazine is warped or
deformed by, for example, dropping, do not use it.
• Avoid hurting yourself on the edges of the pallets or magazines.
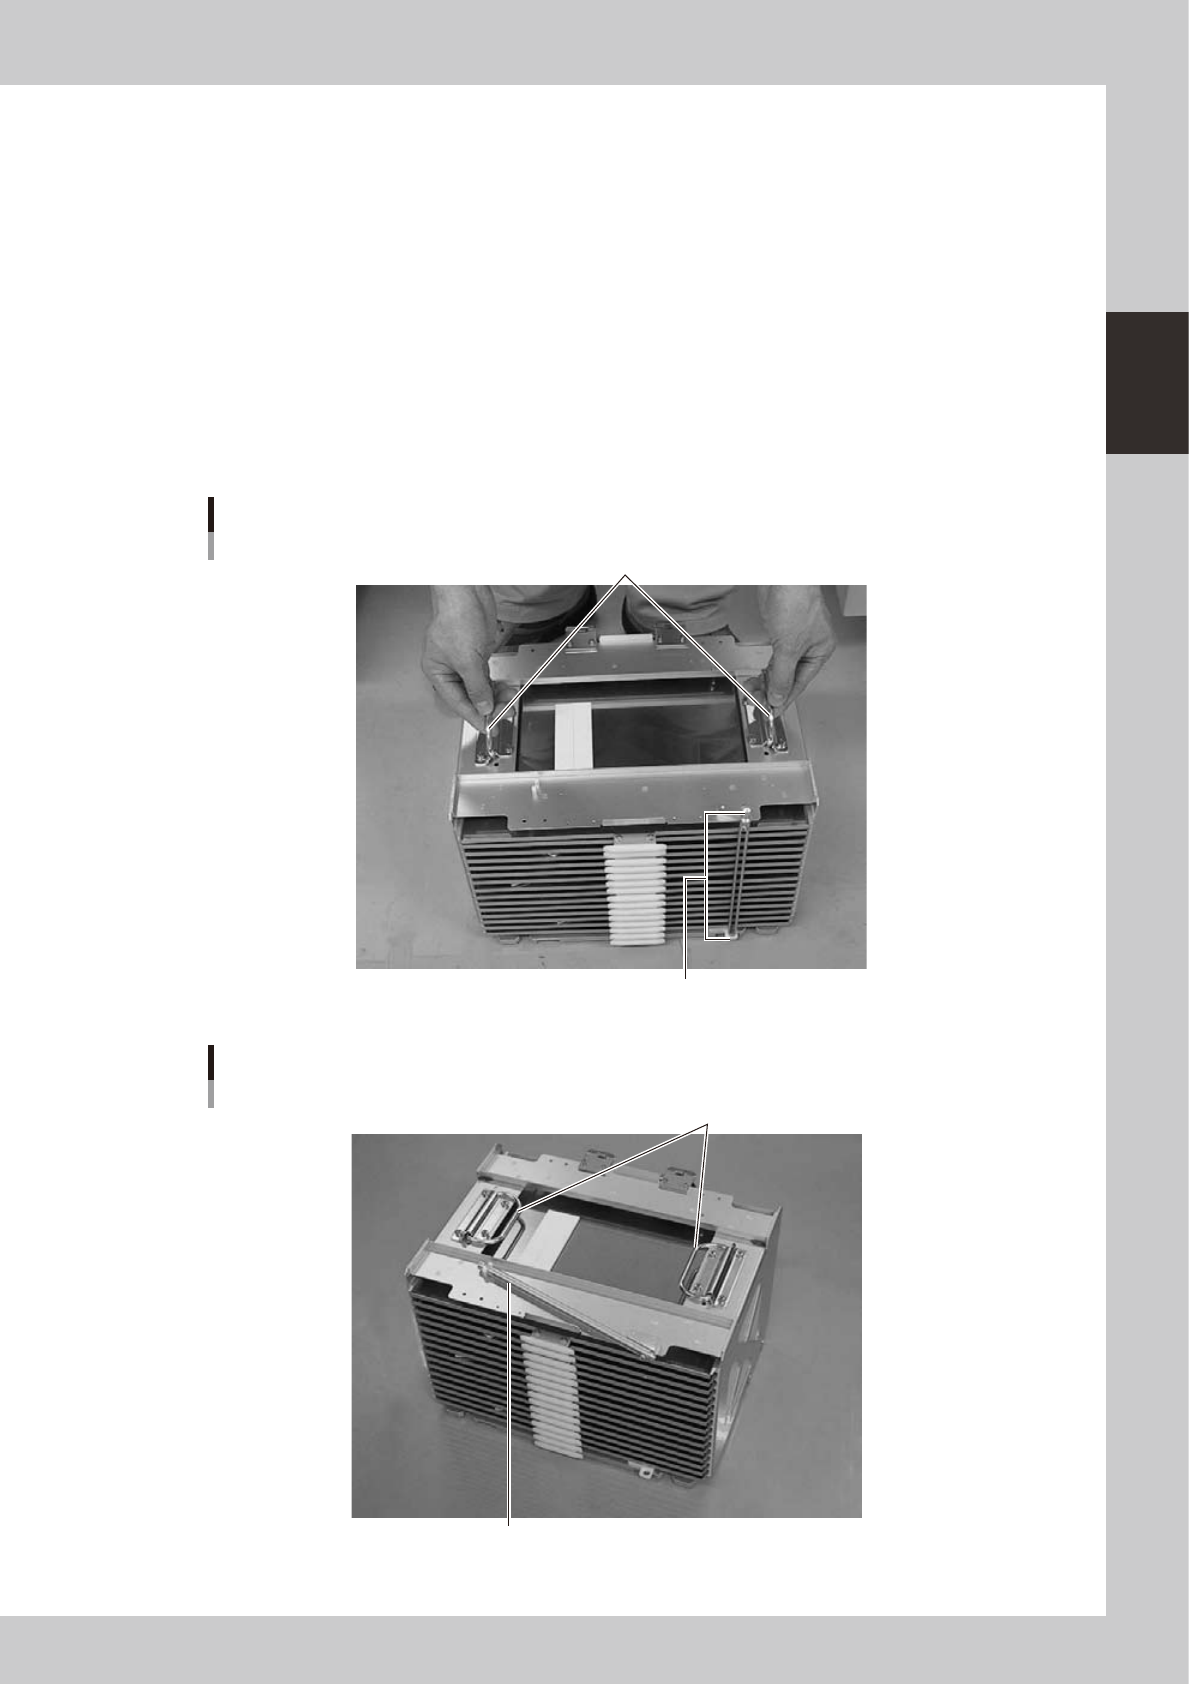
• When carrying a magazine, use the handles on the upper right/left of the magazine and do not let the magazine tilt.
• Carry the magazine with the pallet retainer rod affixed at top and bottom as shown in photo A. This will prevent the
pallets stored in the magazine from slipping out while being carried.
• When setting the magazine in the sATS, wATS or dYTF magazine rack, pull the pallet retainer rod upwards and then
fold it on the upper surface as shown in photo B. Also be sure to always fold the left and right handles down on the
top section.
Photo A
Grip as shown when carrying a magazine
Handles
Fit the pallet retainer rod on at top and bottom.
23223-M0-00
Photo B
When setting a magazine in the rack
Fold down the handles.
Pull the pallet retainer rod upwards and then fold it down on the top surface.
23224-M0-00